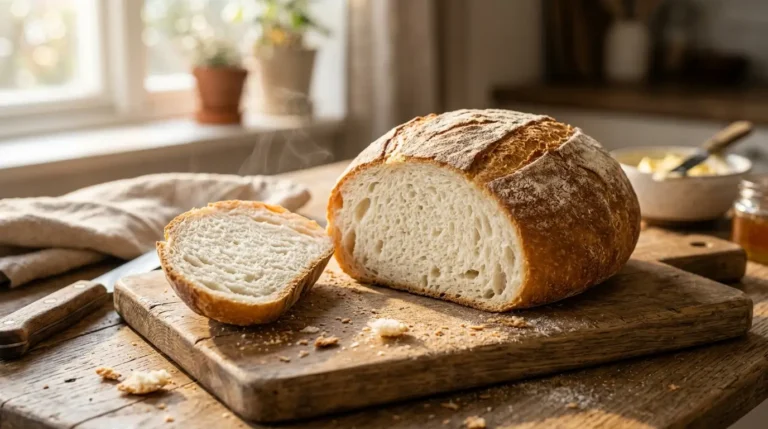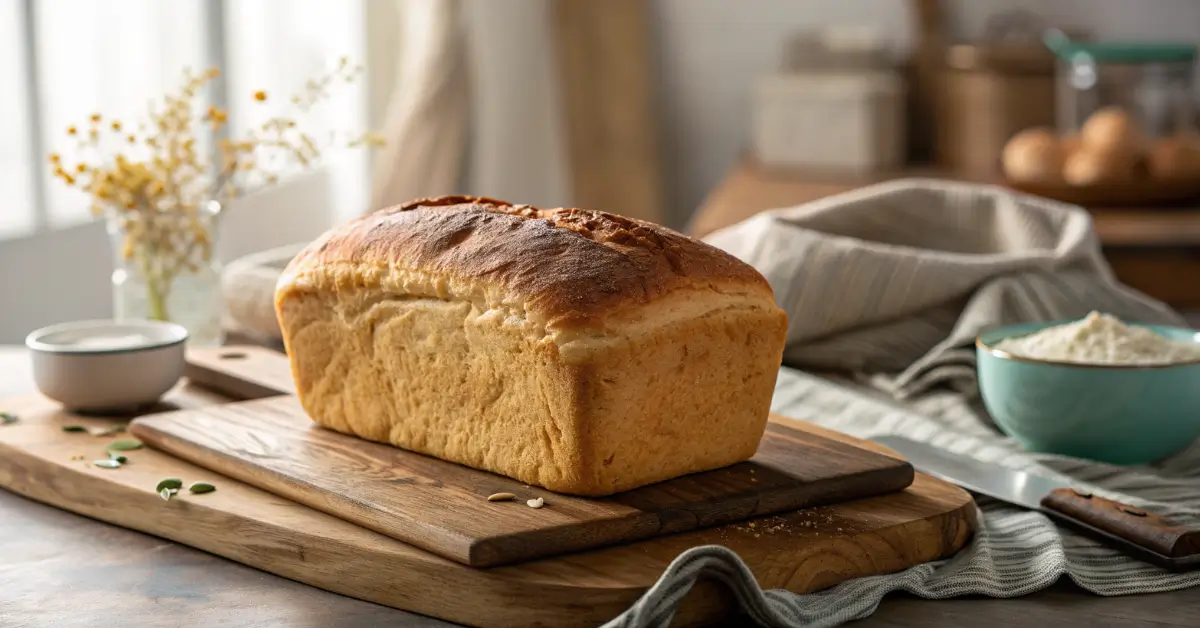
Great Gluten Free Bread: Easy Recipe That Actually Works
Finding great gluten free bread that actually tastes good can feel impossible. Most store-bought loaves are dense, crumbly, or fall apart the moment you try to make a sandwich. But this homemade recipe changes everything.
This is how you make truly great gluten free bread that’s soft, fluffy, and tastes amazing. It bends without breaking, slices clean, and has the texture of regular wheat bread. Even better, you can bake it in your regular oven with simple ingredients.
Why This Makes the Best Great Gluten Free Bread
After testing dozens of recipes, this one consistently delivers great gluten free bread that works for everyday sandwiches, toast, and more. Here’s what makes it special:
Perfect texture – This great gluten free bread is soft and pillowy, not dense or gummy. It has just enough structure to hold together for sandwiches but stays tender inside.
Actually stays together – You can spread peanut butter on it without the slice crumbling in your hands. It bends and squishes like regular bread should.
Simple ingredients – No weird flours or hard-to-find starches. You’ll use basic gluten-free flour blend, eggs, honey, and olive oil.
Naturally dairy-free – Instead of milk or butter, this great gluten free bread uses olive oil and water, making it perfect if you’re avoiding dairy too.
No bread machine needed – While you can use a bread machine, this recipe works perfectly in your regular oven.
What You’ll Need for Great Gluten Free Bread

Equipment
- 9×5 inch bread pan (or better yet, a 9×4 inch Pullman loaf pan for a taller loaf)
- Stand mixer or hand mixer
- Mixing bowls
- Measuring cups and spoons
- Kitchen thermometer (helpful but not required)
Ingredients
Dry ingredients:
- 2½ cups gluten-free all-purpose flour (Pillsbury or similar blend works best)
- 1 teaspoon xanthan gum (skip if your flour blend already contains it)
- 1 teaspoon gluten-free baking powder
- 1 packet rapid-rise yeast (2¼ teaspoons)
- 1 teaspoon salt
Wet ingredients:
- 1½ cups warm water (100-110°F)
- ¼ cup olive oil
- ¼ cup honey (or maple syrup or agave)
- 1 teaspoon apple cider vinegar
- 3 egg whites from large eggs, room temperature
How to Make Great Gluten Free Bread (Step by Step)
Making great gluten free bread at home is easier than you think. Follow these steps for perfect results every time
Step 1: Prep Your Pan and Oven
Spray your bread pan generously with cooking spray. Position your oven rack in the middle. Preheat to 350°F.
Pan size matters: A 9×4 inch Pullman pan gives you the best rise and the most sandwich-friendly shape for your great gluten free bread. A standard 9×5 inch pan works too, but your loaf won’t be quite as tall.
Step 2: Mix the Dry Ingredients
In a large bowl, combine the gluten-free flour, baking powder, and yeast. Stir well to distribute everything evenly.
Flour measuring tip: Use the spoon-and-level method for great gluten free bread. Spoon flour into your measuring cup, then level it off with a knife. Don’t scoop directly from the bag or you’ll pack in too much flour and end up with dense bread.
Step 3: Add Wet Ingredients (Except Eggs)
Pour in the olive oil, honey, apple cider vinegar, and warm water. Mix on low speed for one minute until combined.
Temperature check: Your water should feel warm but not hot to the touch. Too hot kills the yeast. Too cold and it won’t activate. Aim for 100-110°F for great gluten free bread that rises properly.
If you’re using a stand mixer, use the paddle attachment, not the dough hook. The dough for great gluten free bread is more like thick cake batter than traditional bread dough.
Step 4: Add Eggs and Salt
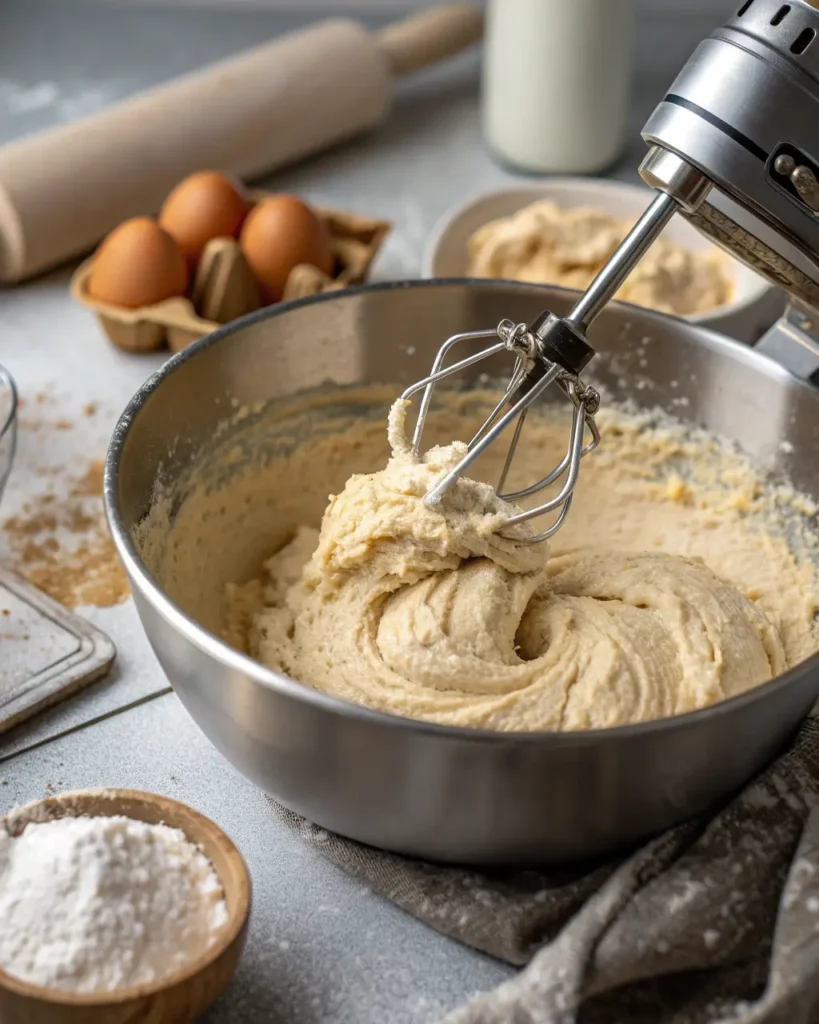
Add the egg whites and salt to your mixture. Beat on medium speed for one minute. The dough should look like thick pancake batter or cake batter.
Why room temperature eggs? Cold eggs can slow down yeast activity. Let your eggs sit on the counter for 5-10 minutes before using them.
Step 5: Let It Rise

Pour the dough into your greased pan. Spray a piece of plastic wrap with cooking spray and lay it loosely over the top. Cover with a kitchen towel.
Let the dough rise in a warm spot for 30 minutes. The dough should roughly double in size.
Finding a warm spot: An oven with a proofing setting at 100°F is perfect for making great gluten free bread. Or try putting the pan near (not on) a warm stovetop, or in a sunny window. Some people heat their oven to 200°F for one minute, turn it off, then let the bread rise inside.
Don’t over-proof: With gluten-free dough, once it doubles in size, it’s ready to bake. Going too long can cause it to collapse.
Step 6: Bake Your Great Gluten Free Bread
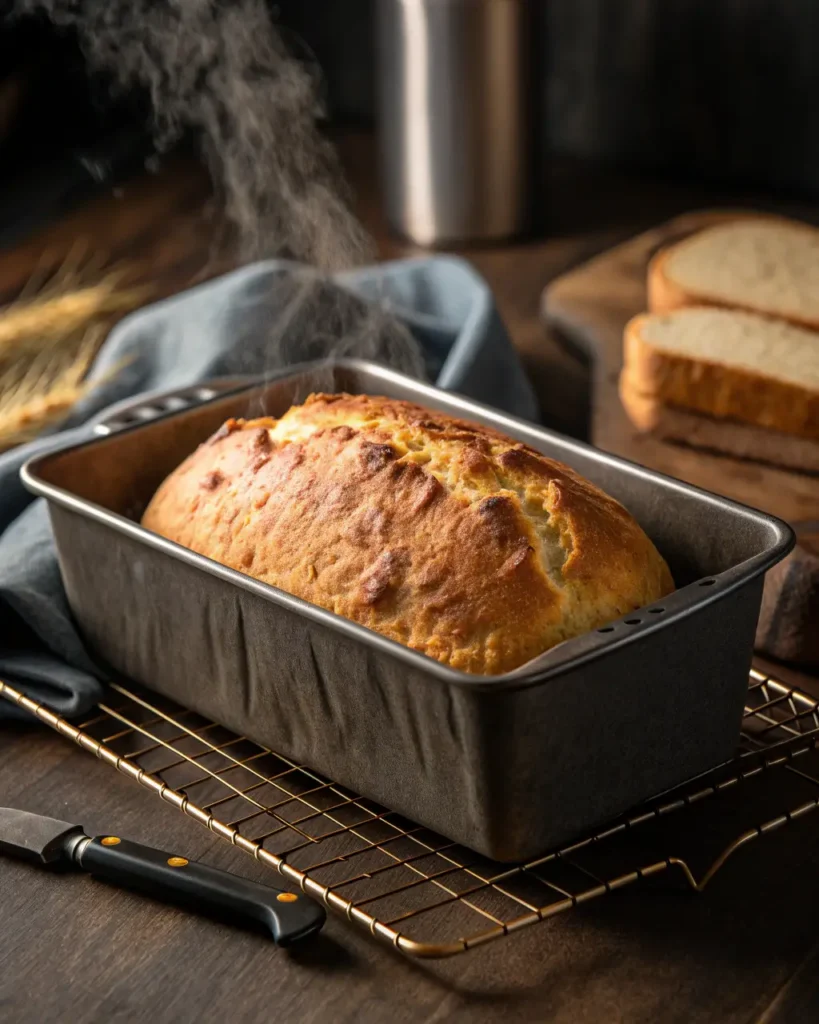
Remove the plastic wrap and towel. Bake on the middle rack for 30 minutes at 350°F.
The finished bread should be golden brown on top. If you have a thermometer, check that the internal temperature is between 205-210°F.
Step 7: Cool Properly
Let the loaf cool in the pan for 10 minutes. This lets it set up just enough to handle.
After 10 minutes, turn it out onto a cooling rack. This step is important – if you leave the bread in the pan until it’s completely cool, steam gets trapped and makes the bottom soggy.
Let the bread cool completely before slicing. It needs time to set up or it will be gummy inside.
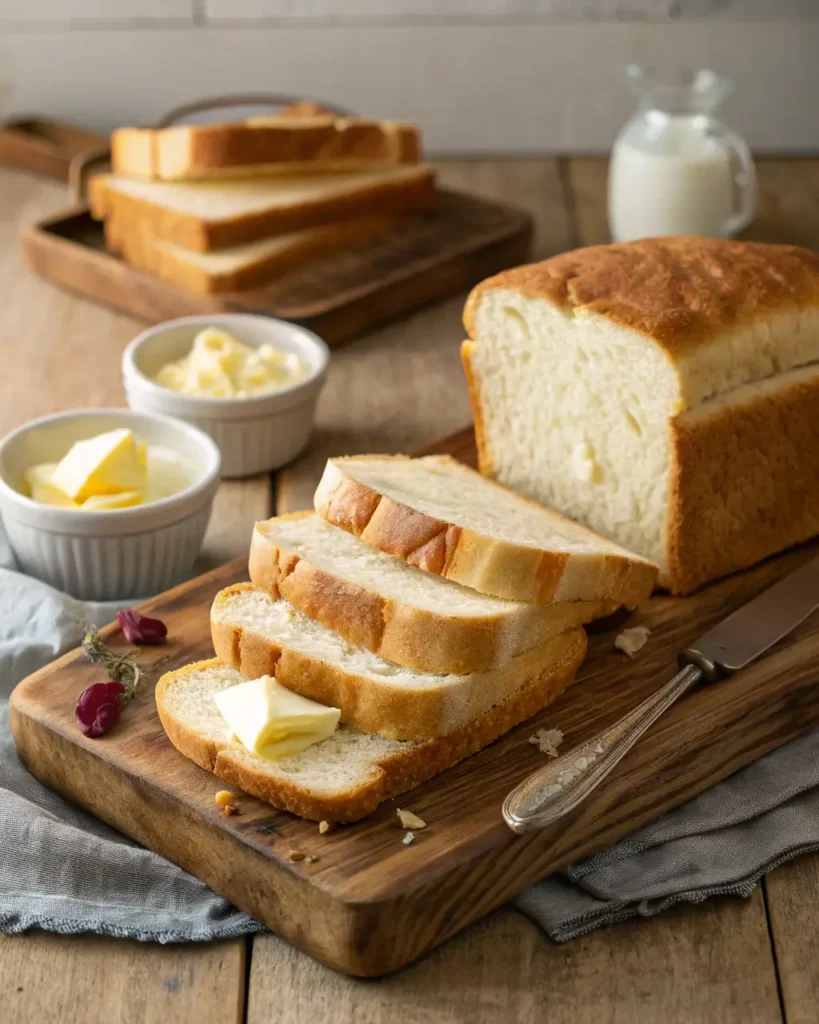
Step 8: Slice and Store
Use a serrated knife to slice your great gluten free bread. A regular knife will squish it.
Store leftover bread in an airtight container at room temperature. Don’t pre-slice the whole loaf, just cut what you need. The bread stays fresher that way.
To freeze: Wrap the cooled loaf tightly in plastic wrap, then in foil. Place in a freezer bag and freeze for up to 3 months. Thaw overnight in the fridge.
Tips for Making Great Gluten Free Bread Every Time
Choose the Right Flour
Not all gluten-free flours work the same way. Pillsbury gluten-free flour works great for making great gluten free bread. King Arthur Measure for Measure and Bob’s Red Mill 1-to-1 specifically say on their packaging that they’re not ideal for yeast breads.
If your flour blend already contains xanthan gum, don’t add extra. Check the ingredient list on your bag.
Get the Yeast Right
This great gluten free bread recipe uses rapid-rise (also called instant) yeast. You mix it right in with the dry ingredients – no proofing needed.
Make sure your yeast isn’t expired. Old yeast won’t rise properly. Store yeast in the fridge or freezer to keep it fresh longer.
Optional yeast test: If you’re not sure your yeast is still good, dissolve the honey in warm water, add the yeast, and wait 5 minutes. If it gets foamy and bubbly, it’s active and ready to use.
Watch Your Water Temperature
This is critical for great gluten free bread. Water that’s too hot (over 120°F) kills yeast. Water that’s too cold (under 100°F) won’t activate it.
If you don’t have a thermometer, test the water on your wrist. It should feel warm but comfortable, like bath water.
Create a Warm Environment
Yeast loves warmth. If your kitchen is cold, your great gluten free bread will take forever to rise (or might not rise at all).
Try these tricks for a warm proofing spot:
- Turn your oven on for 60 seconds, turn it off, then put the bread inside
- Place the pan on top of your fridge
- Set it near a radiator or heating vent (not too close)
- Use your oven’s bread proofing setting if it has one
Don’t Skip the Vinegar
The apple cider vinegar might seem random, but it serves a purpose. The acid helps activate the baking powder and gives your great gluten free bread better structure and rise.
Common Problems When Making Great Gluten Free Bread (And How to Fix Them)
Bread didn’t rise: Your yeast might be dead, your water might have been too hot or too cold, or your kitchen might be too cold. Make sure ingredients are at room temperature and find a warmer spot for proofing.
Dense or heavy texture: You might have packed too much flour into your measuring cups. Always use the spoon-and-level method for great gluten free bread. Also check that your yeast is fresh.
Gummy inside: The bread might not be fully baked. Use a thermometer to check for 205-210°F internal temperature. Also make sure you’re letting it cool completely before slicing.
Soggy bottom: You left the bread in the pan too long while cooling. Remove it after 10 minutes and let it finish cooling on a rack.
Bread collapsed: You might have over-proofed the dough. Once it doubles, get it in the oven. Gluten-free dough doesn’t have gluten structure to hold it up if you wait too long.
What to Do With Your Great Gluten Free Bread
This is perfect everyday sandwich bread. Use your great gluten free bread for:
- Classic PB&J sandwiches
- Grilled cheese
- Toast with butter and jam
- Turkey and cheese sandwiches
- French toast (it soaks up the egg mixture beautifully)
- Bread crumbs (just pulse stale slices in a food processor)
The bread stays soft for several days at room temperature, making it perfect for school lunches and meal prep.
Why Homemade Great Gluten Free Bread Beats Store-Bought
Store-bought gluten-free bread is expensive – often $6-8 for a small loaf. Making great gluten free bread at home costs about $3 and gives you a bigger, better-tasting loaf.
More importantly, homemade great gluten free bread tastes fresher and has better texture. No weird aftertaste, no preservatives, and no mystery ingredients you can’t pronounce.
Once you get the hang of it, this recipe takes about 10 minutes of active work. The rest is just rising and baking time. Making great gluten free bread at home is easier than you think.
Nutrition Information (Per Slice)
Based on 16 slices per loaf:
- Calories: 114
- Carbohydrates: 18g
- Protein: 3g
- Fat: 4g
- Fiber: 2g
- Sugar: 5g
- Sodium: 189mg
Final Thoughts on Making Great Gluten Free Bread
Great gluten free bread doesn’t have to be complicated or require special equipment. This recipe proves you can make bakery-quality great gluten free bread right in your own kitchen with simple ingredients and a regular oven.
The key to making great gluten free bread is using the right flour blend, getting your temperatures right, and not over-proofing the dough. Follow these steps and you’ll have soft, fluffy, sliceable bread that actually tastes good.
Make this great gluten free bread recipe once and you’ll never want to go back to store-bought bread again. It’s that good.
| Pin to Pinterest | Share on Facebook
Follow us On : Facebook and Pinterest