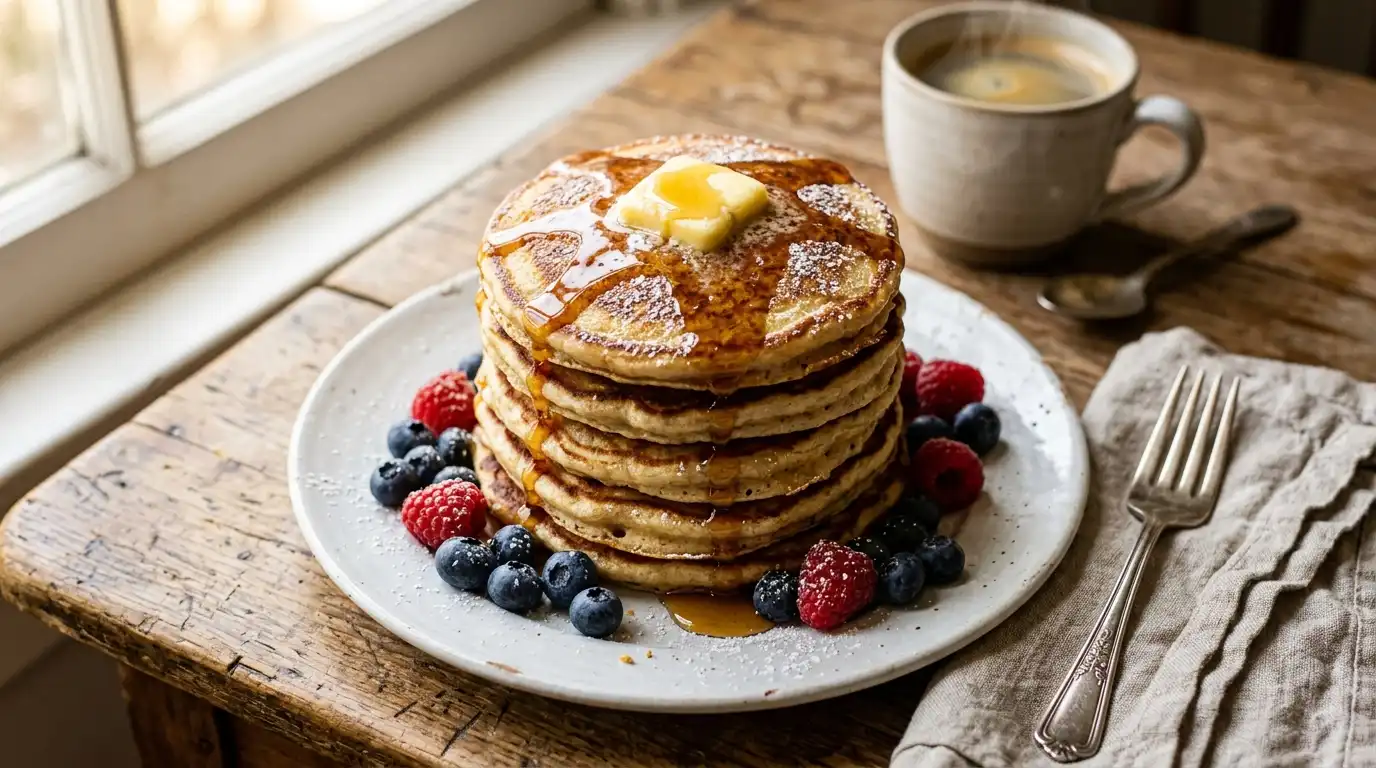
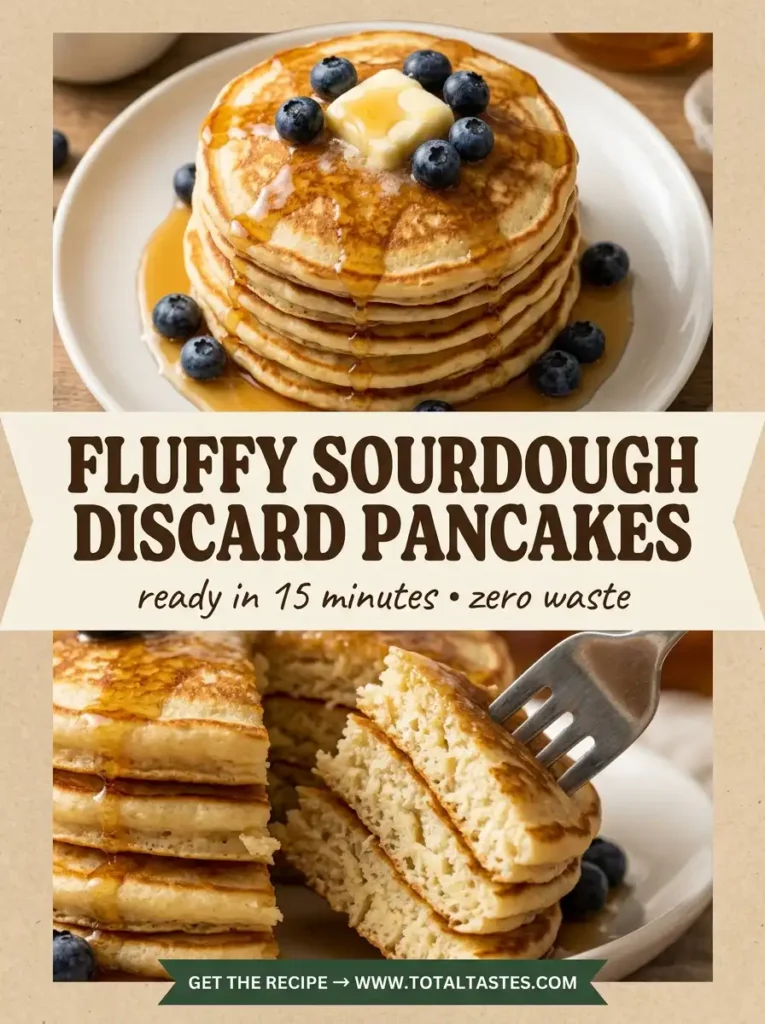
Sourdough Discard Pancakes (Fluffy, Easy & Tangy!)
Got sourdough discard sitting in your fridge? Don’t throw it away — turn it into the fluffiest, most flavorful pancakes you’ve ever tasted. These sourdough discard pancakes have crispy caramelized edges, pillowy cloud-like middles, and a subtle tangy depth that boxed pancake mix could never replicate.
The best part? You’re just 15 minutes away from a stack of sourdough discard pancakes that’ll make your whole family ask for seconds.
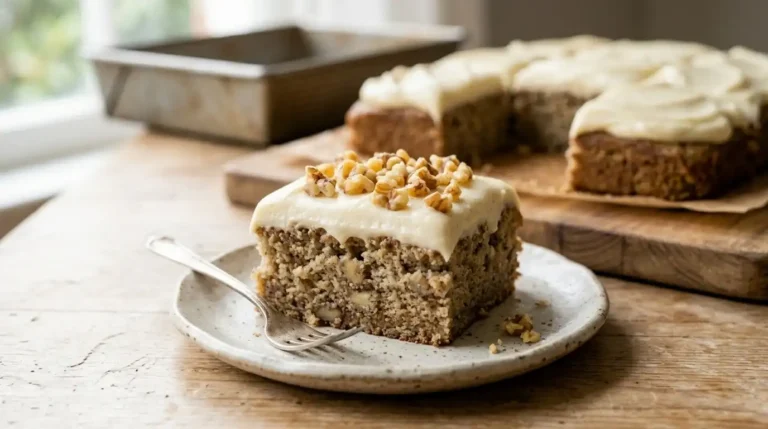
If you love using up sourdough discard, you’ll also adore our Sourdough Banana Bread — another reader favorite that turns wasted starter into pure gold!
Why These Sourdough Discard Pancakes Are Different
Most pancake recipes are… fine. These sourdough discard pancakes aren’t fine — they’re exceptional. Here’s why home bakers keep coming back to this recipe every single weekend:
- Zero Waste: Uses up discard that would otherwise get thrown away
- Incredibly Fluffy: The discard’s acidity reacts with baking soda to create serious lift
- Rich, Complex Flavor: That subtle sourdough tang makes every bite interesting
- 15-Minute Recipe: Faster than driving to a diner
- One Bowl: Less mess, more pancakes
- Completely Customizable: Blueberries, chocolate chips, bananas — go wild
Ingredients for Sourdough Discard Pancakes (4 Servings)
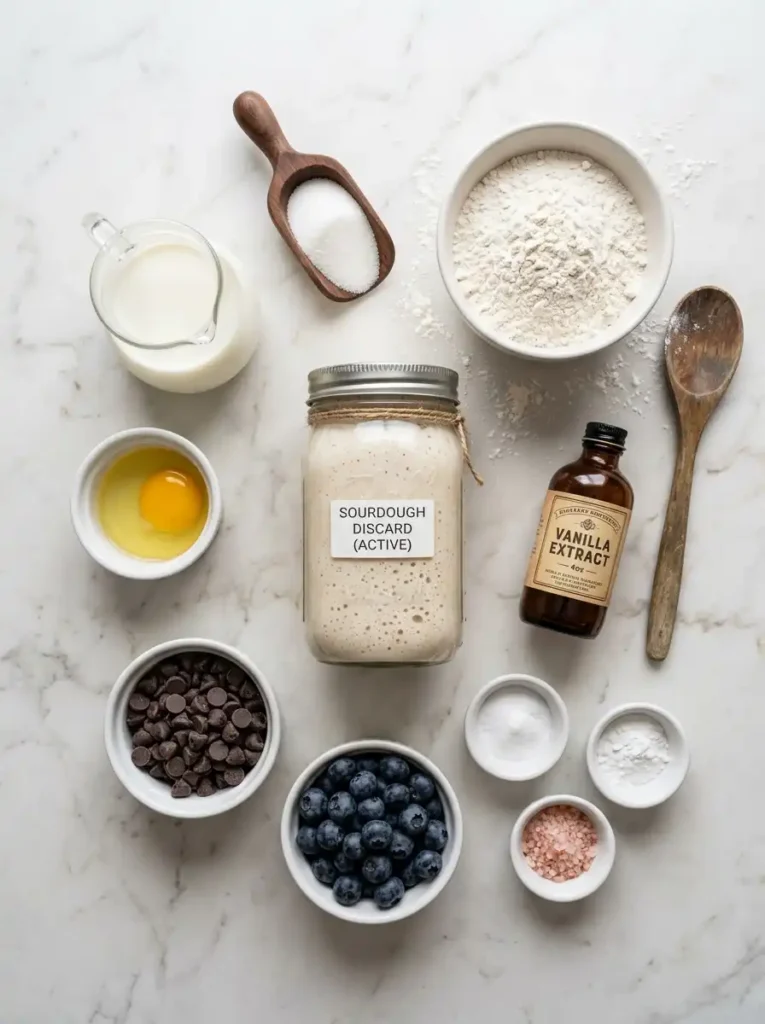
Wet Ingredients:
- 1 cup (240g) sourdough discard — Straight from the fridge, unfed. The star of the show.
- 1 cup (240ml) whole milk — Any milk works, including plant-based
- 1 large egg — Room temperature preferred
- 2 tablespoons melted butter — For richness and crispy edges
- 2 tablespoons sugar — Just enough sweetness
- 1 teaspoon vanilla extract — Adds warmth and depth
Dry Ingredients:
- 1 cup (120g) all-purpose flour
- 1 teaspoon baking powder
- ½ teaspoon baking soda — Essential for reacting with the discard
- ¼ teaspoon salt
Optional Add-ins:
- ½ cup blueberries, chocolate chips, or banana slices
- ½ teaspoon cinnamon
Pro Tip: Discard that’s 3-7 days old gives you the deepest flavor and the most lift for your sourdough discard pancakes. Fresh discard works too — just expect a milder taste.
How to Make Sourdough Discard Pancakes
Step 1: Combine the Wet Ingredients
Whisk together the sourdough discard, milk, egg, melted butter, sugar, and vanilla in a large bowl until smooth. The mixture may look slightly bubbly — that’s a good sign.
Step 2: Add the Dry Ingredients
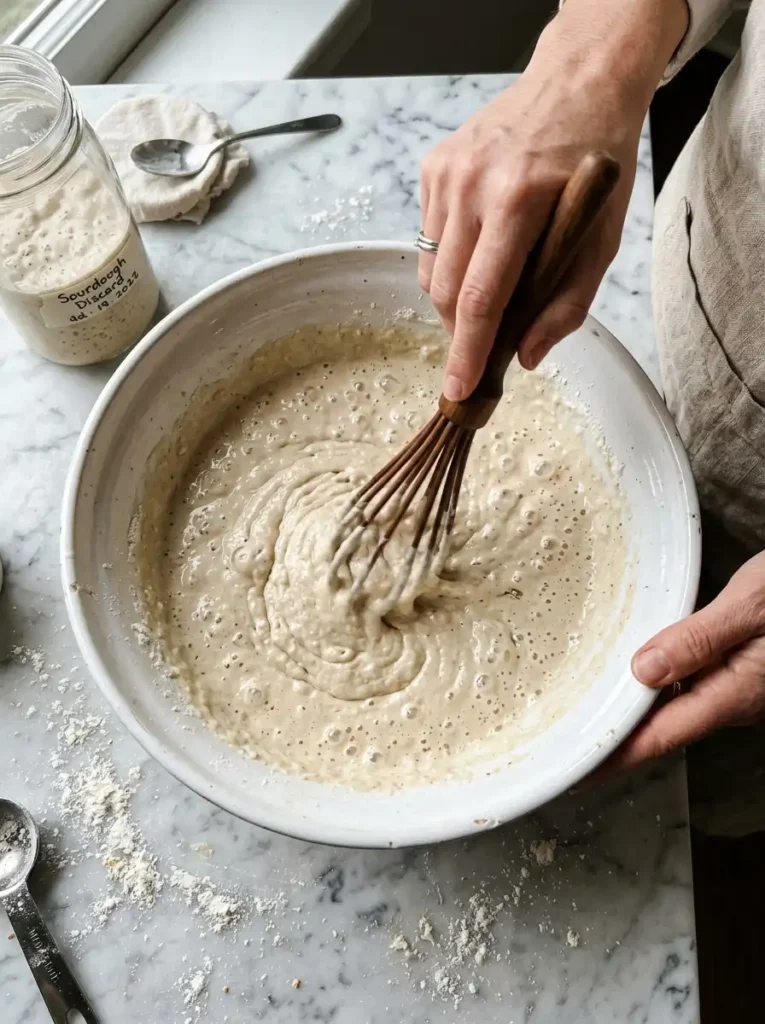
Sprinkle the flour, baking powder, baking soda, and salt over the wet mixture. Whisk gently until just combined. Stop when the flour disappears — lumps are perfectly fine and actually desirable.
Do not overmix. This is the #1 mistake that leads to flat, rubbery pancakes.
Step 3: Watch the Batter Come Alive
You’ll notice the batter start to bubble and puff the moment the baking soda hits the acidic discard. That reaction is exactly what creates fluffy sourdough discard pancakes — don’t stir it out!
Step 4: Rest the Batter (5 Minutes)
Let the batter sit while your pan heats up. This short rest allows the flour to hydrate and the leaveners to fully activate.
Step 5: Heat Your Pan
Set a non-stick skillet or griddle over medium-low heat. Grease lightly with butter. Test the heat by flicking a few water drops — they should sizzle and evaporate immediately.
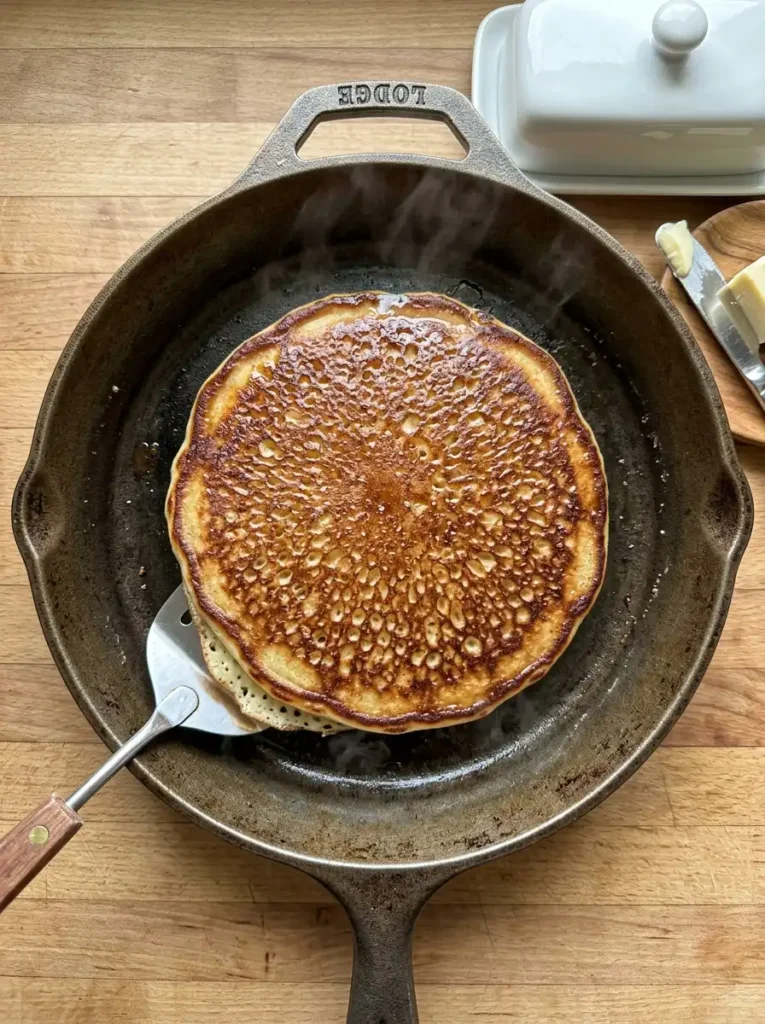
Step 6: Cook the Pancakes
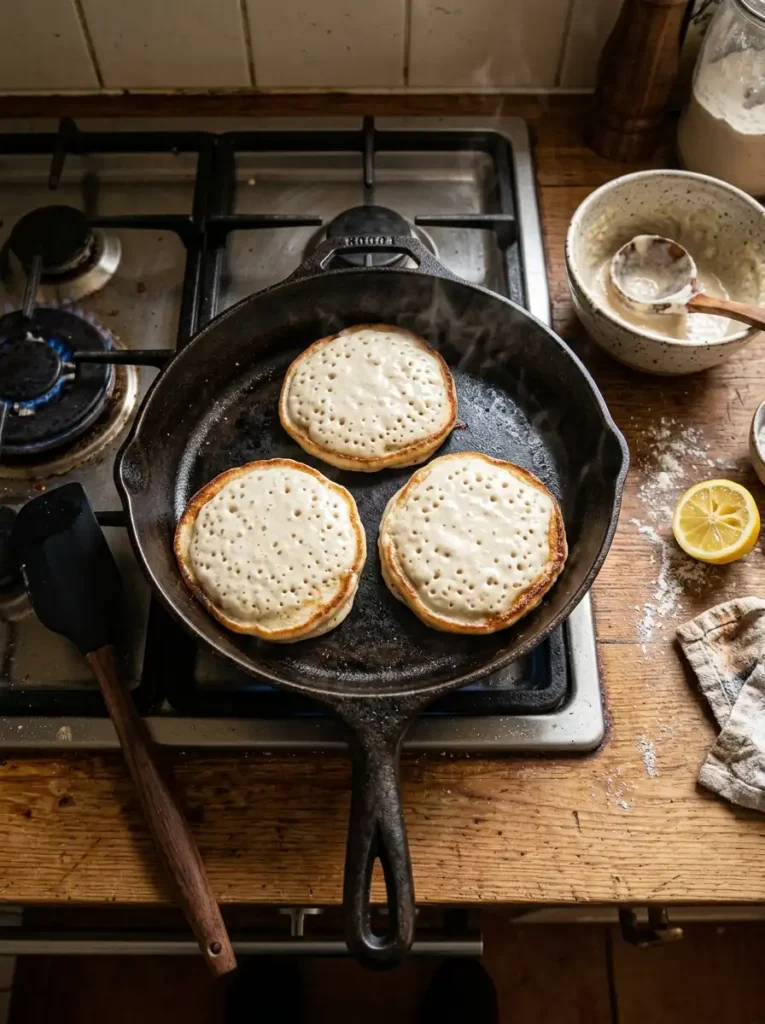
Pour ¼ cup of batter per pancake onto the hot griddle. Cook 2-3 minutes until:
- Bubbles form across the surface
- Edges look dry and set
- Bottom is deep golden brown
Flip once and cook another 1-2 minutes. Resist the urge to press down with your spatula.
PRO TIP: Listen for the sizzle when you pour batter — if it’s silent, your pan isn’t hot enough. If it’s loud and aggressive, lower the heat immediately.
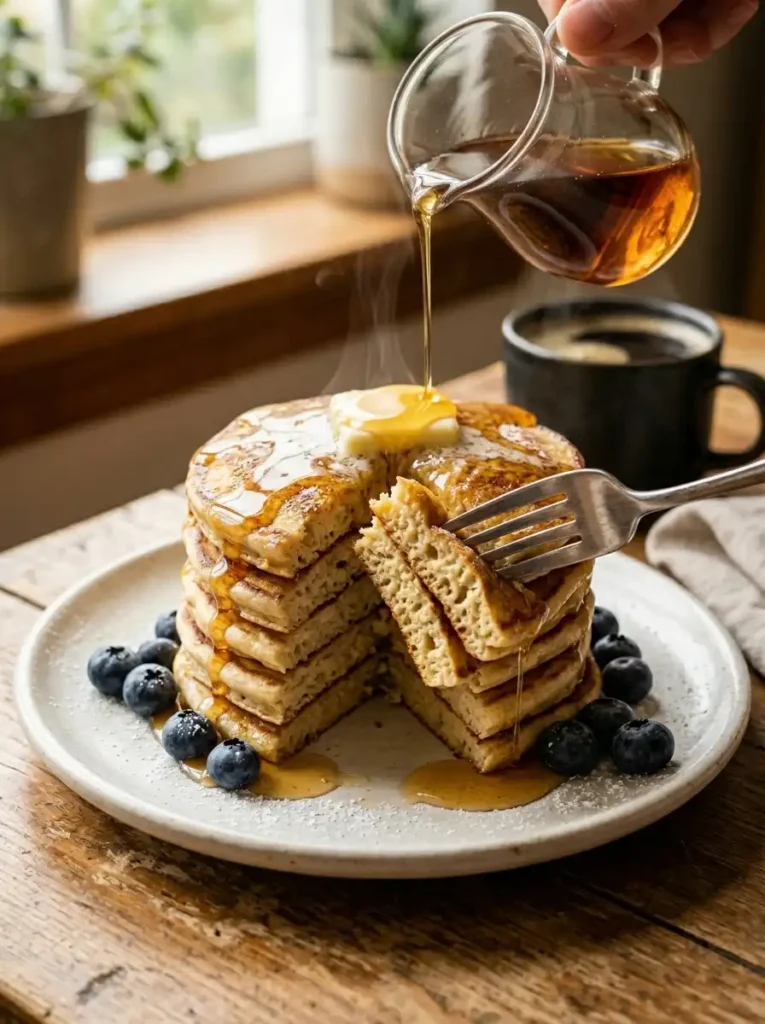
Step 7: Serve Immediately
Stack your sourdough discard pancakes high. Add your toppings. Eat immediately.
7 Tips for Perfect Sourdough Discard Pancakes Every Time
1. Don’t overmix — ever
Mix until the flour just disappears. Lumps = tender pancakes. Smooth batter = tough pancakes.
2. Use medium-low heat
High heat burns the outside before the inside cooks through. Low and slow wins every time.
3. Cook a test pancake first
Your first pancake is always a trial run. Adjust heat and seasoning before cooking the rest.
4. Never press down
Pressing with a spatula crushes the air bubbles that make these pancakes fluffy. Keep your hands off!
5. Let discard come to room temperature
Cold discard can cause the batter to seize. Give it 15-20 minutes on the counter before mixing.
6. Keep finished pancakes warm
Place cooked sourdough discard pancakes on a baking sheet in a 200°F (95°C) oven while you finish the batch.
7. Older discard = better pancakes
3-7 day old discard has more acidity and more flavor. Don’t toss it early!

Common Mistakes to Avoid with Sourdough Discard Pancakes
Even experienced bakers make these mistakes — here’s how to dodge them:
Using cold discard straight from the fridge
Cold discard = lumpy, uneven batter. Always bring to room temp first.
Skipping the rest period
That 5-minute rest isn’t optional — it’s the secret to MAXIMUM fluff.
Cooking on high heat to “save time”
You’ll end up with burnt outsides and raw centers. Patience pays.
Flipping too early
Wait for visible bubbles AND set edges. Early flips = sad pancakes.
Using expired baking soda
Baking soda loses power after 6 months. Test with vinegar — if it fizzes hard, it’s good.
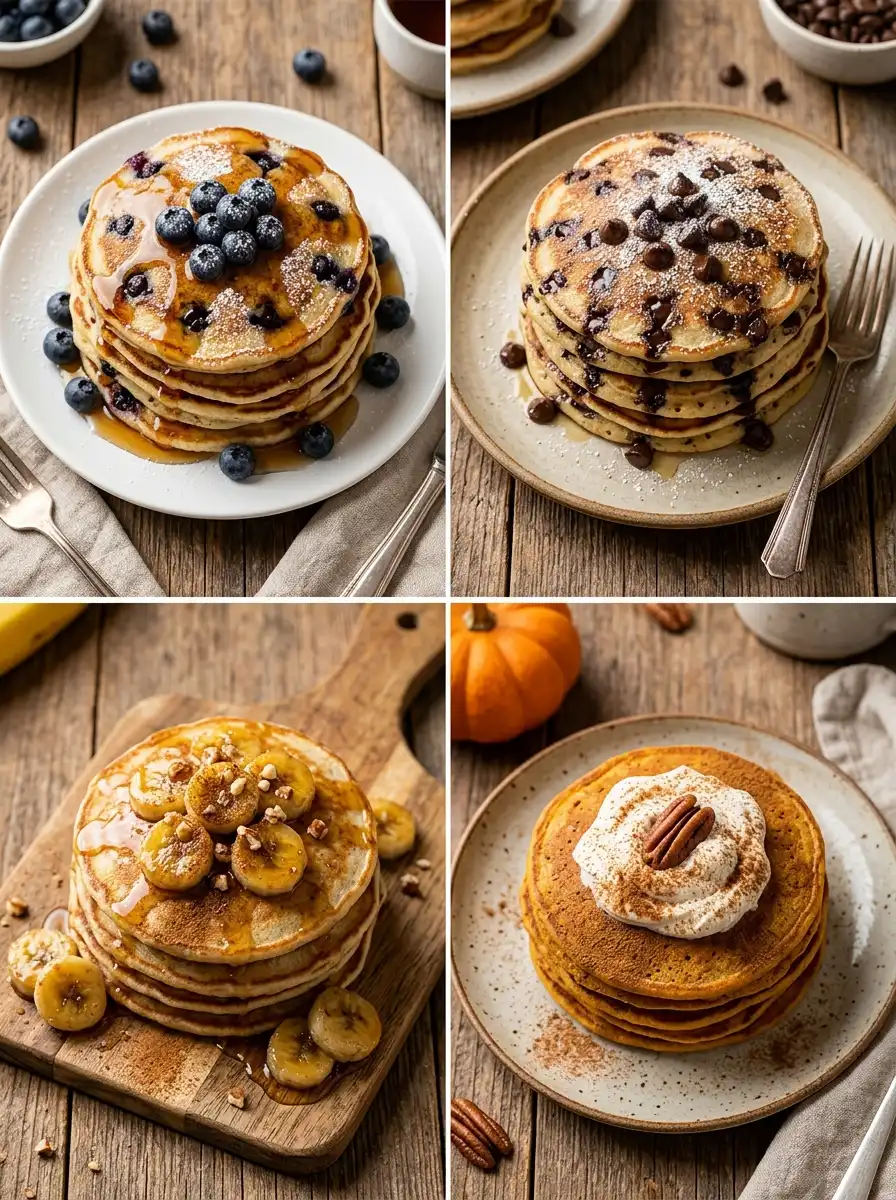
Variations of Sourdough Discard Pancakes Worth Trying
Once you’ve nailed the base sourdough discard pancakes recipe, these twists are absolutely worth exploring:
| Variation | What to Add |
|---|---|
| 🫐 Blueberry | ½ cup fresh or frozen blueberries |
| Chocolate Chip | ½ cup semi-sweet chocolate chips |
| Banana | 1 mashed ripe banana, reduce sugar by half |
| Pumpkin Spice | ¼ cup pumpkin puree + 1 tsp pumpkin pie spice |
| Apple Cinnamon | ½ cup grated apple + 1 tsp cinnamon |
| Whole Wheat | Replace half the flour with whole wheat flour |
| Double Chocolate | 2 tbsp cocoa powder + chocolate chips |
Love banana-flavored breakfast treats? Try our Best Banana Cake with Cream Cheese Frosting for a decadent dessert version!
Topping Ideas for Sourdough Discard Pancakes
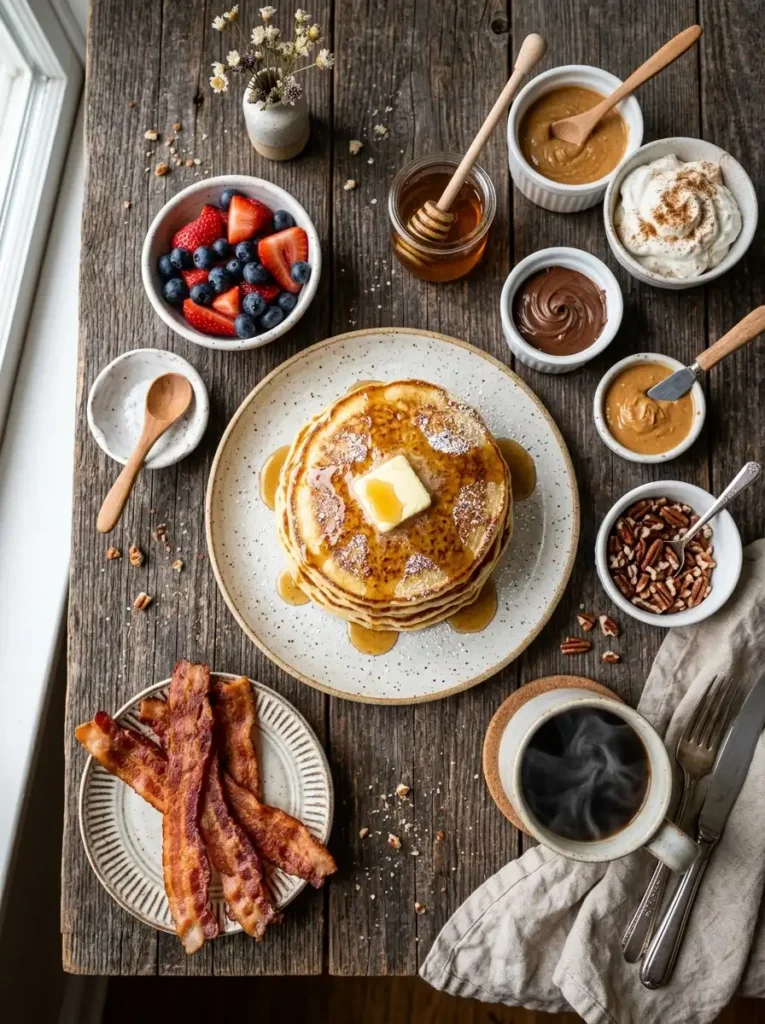
Sweet:
- Pure maple syrup
- Fresh berries
- Whipped cream + cinnamon
- Peanut butter + honey
- Brown butter + powdered sugar
- Nutella
- Crunchy Homemade Streusel Topping — for an unforgettable texture!
Savory Sides:
- Crispy bacon or breakfast sausage
- Scrambled eggs
- Fresh avocado
- Strong black coffee ☕
Storage & Reheating
Refrigerator: Store your sourdough discard pancakes in an airtight container with parchment between layers. Keeps for up to 3 days.
Freezer: Cool completely, freeze in a single layer for 1 hour, then transfer to a freezer bag. Keeps for up to 3 months.
Reheating options:
- Toaster — Best for crispy edges (highly recommended)
- Microwave — 30 seconds for soft pancakes
- Oven — 350°F for 5 minutes, best for large batches
PRO TIP: Freeze pancakes flat in single layers using parchment paper between each. They’ll separate easily when frozen — no more pancake bricks!
Can You Make Sourdough Discard Pancakes Batter Ahead?
Yes — with one important rule.
You can prep your sourdough discard pancakes batter ahead by mixing the wet ingredients the night before and refrigerating. In the morning, whisk in the dry ingredients fresh and cook immediately.
Do not pre-mix the baking soda. Once it hits the acidic discard, the leavening reaction starts — and it won’t wait for morning. Mix dry ingredients only when you’re ready to cook.
Frequently Asked Questions
Can I use active starter instead of discard?
Yes. Active starter works great and may give slightly fluffier results. The flavor will be a little milder.
Why are my sourdough discard pancakes coming out flat?
The most likely causes: overmixed batter, expired baking soda, heat too high, or pressing down while cooking. Check all four.
Can I make these sourdough discard pancakes dairy-free?
Absolutely. Use any plant-based milk and swap butter for coconut oil. The texture stays fluffy.
Can I make these gluten-free?
Use a 1:1 gluten-free flour blend. Note that traditional sourdough discard contains gluten — for fully gluten-free pancakes, use a gluten-free starter.
Why does my batter look curdled?
Completely normal. The discard’s acidity reacts with the milk. Give it a quick whisk — your pancakes will turn out fine.
How do I know when to flip?
Look for bubbles across the surface, dry edges, and a golden bottom. Usually 2-3 minutes on medium-low heat.
Can I add protein powder?
Yes. Add 1-2 scoops and an extra splash of milk to keep the consistency right.
Can I make waffles with this batter?
Reduce milk to ¾ cup and add an extra tablespoon of butter. Cook in a preheated waffle iron until golden and crisp.
Are sourdough discard pancakes healthier than regular pancakes?
They contain live probiotics, are easier to digest due to fermentation, and have a lower glycemic index than standard pancakes. Not a health food — but a smarter choice.
The Science Behind the Fluff
Here’s what’s actually happening in your bowl:
Sourdough discard has a pH between 3.5 and 4.5 — highly acidic. When it meets baking soda (alkaline), the two react instantly, releasing CO2 bubbles that get trapped in the batter and expand during cooking.
This same acidity also:
- Breaks down gluten strands → softer texture
- Triggers the Maillard reaction → better browning
- Adds flavor complexity → tastier pancakes
- Acts as a mild preservative → longer shelf life
That’s the reason these sourdough discard pancakes beat any recipe relying on baking powder alone — and now you know exactly why!
More Sourdough & Banana Recipes You’ll Love
If you enjoyed these sourdough discard pancakes, you have to try these reader favorites:
- Sourdough Banana Bread Recipe — Moist, tangy, and the perfect discard recipe!
- Magnolia Bakery Banana Pudding — Creamy, dreamy, NYC-famous!
- Best Banana Cake with Cream Cheese Frosting — Soft, buttery, and absolutely decadent!
- Homemade Streusel Topping — Add crunch to ANY breakfast!
Final Thoughts
These sourdough discard pancakes have earned a permanent spot in my weekend rotation — and I think they’ll earn one in yours too.
They’re fast, they’re foolproof, and they genuinely taste better than anything you’d make from a box. More importantly, they turn something you’d otherwise throw away into a breakfast worth waking up early for.
Make a double batch of sourdough discard pancakes this weekend. Freeze the leftovers. Thank yourself on Tuesday morning when breakfast is already done.
💬 Tried this recipe? What’s YOUR favorite way to top sourdough discard pancakes? I’m dying to know — leave a comment below and let’s swap ideas! 👇
If you enjoyed this discard recipe, see what else is trending in our roundup of the viral baking trends 2026 — matcha tiramisu, nostalgic crunch cakes, and more easy home bakes. LINK ANCHOR: viral baking trends 2026 LINK : https://www.totaltastes.com/viral-baking-trends-2026/
Sourdough Discard Pancakes
Ingredients
Equipment
Method
- In a large mixing bowl, whisk together the sourdough discard, milk, egg, melted butter, sugar, and vanilla extract until smooth and well combined. The mixture may look slightly bubbly — that's a good sign!
- Sprinkle the flour, baking powder, baking soda, and salt over the wet ingredients. Whisk gently until just combined. Stop when the flour disappears — a few small lumps are perfectly fine and actually desirable. Do not overmix or your pancakes will be flat and rubbery.
- Watch the batter come alive! You’ll notice it start to bubble and puff the moment the baking soda hits the acidic discard. That reaction is exactly what creates fluffy pancakes.
- Let the batter rest for 5 minutes while your pan heats up. This allows the flour to fully hydrate and the leaveners to activate completely.
- Heat a non-stick skillet or griddle over medium-low heat. Lightly grease with butter or oil. The pan is ready when a drop of water sizzles and evaporates immediately.
- Pour 1/4 cup of batter per pancake onto the hot griddle. Cook for 2-3 minutes until bubbles form across the surface, the edges look dry and set, and the bottom is deep golden brown.
- Flip carefully with a thin spatula and cook for another 1-2 minutes on the other side until golden. Resist the urge to press down with your spatula — pressing crushes the air bubbles that make these pancakes fluffy!
- If adding optional ingredients like blueberries or chocolate chips, sprinkle them on each pancake right after pouring the batter onto the griddle (before the bubbles form).
- Repeat with the remaining batter, keeping cooked pancakes warm in a 200°F (95°C) oven on a baking sheet while you finish the batch.
- Stack the pancakes high on a plate and serve immediately with butter, maple syrup, fresh berries, whipped cream, or your favorite toppings. Enjoy that fluffy, tangy magic!