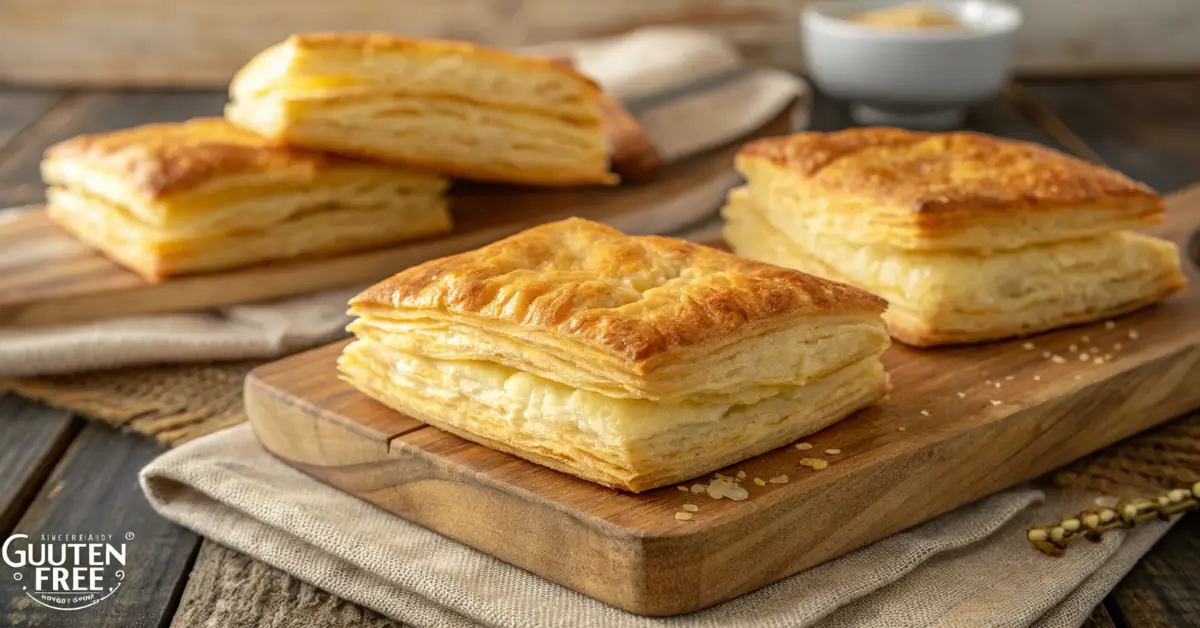
Best Gluten Free Puff Pastry Recipe (Easy 30-Min Method)
Are you tired of missing out on flaky, buttery pastries just because you’re following a gluten-free diet? Look no further! This gluten free puff pastry recipe using the rough puff method will revolutionize your baking game. In just 30 minutes of active prep time, you’ll have homemade gluten free puff pastry that rivals any traditional version.
Whether you’re making savory tarts, sweet turnovers, or elegant vol-au-vents, this gluten free puff pastry delivers the same crispy, layered texture you’ve been craving. The best part? It’s surprisingly simple to make at home.
Table of Contents
Why This Gluten Free Puff Pastry Recipe Works
Traditional puff pastry relies on gluten to create structure and elasticity. Our gluten free puff pastry overcomes this challenge by:
- Using a blend of gluten-free flours that mimic wheat flour’s properties
- Incorporating xanthan gum for binding and structure
- Employing the rough puff method which is more forgiving than classic lamination
- Keeping ingredients cold to ensure proper layering
The rough puff method is perfect for gluten-free baking because it’s less intensive than traditional puff pastry techniques, yet still creates those coveted flaky layers.
Essential Ingredients for Gluten Free Puff Pastry
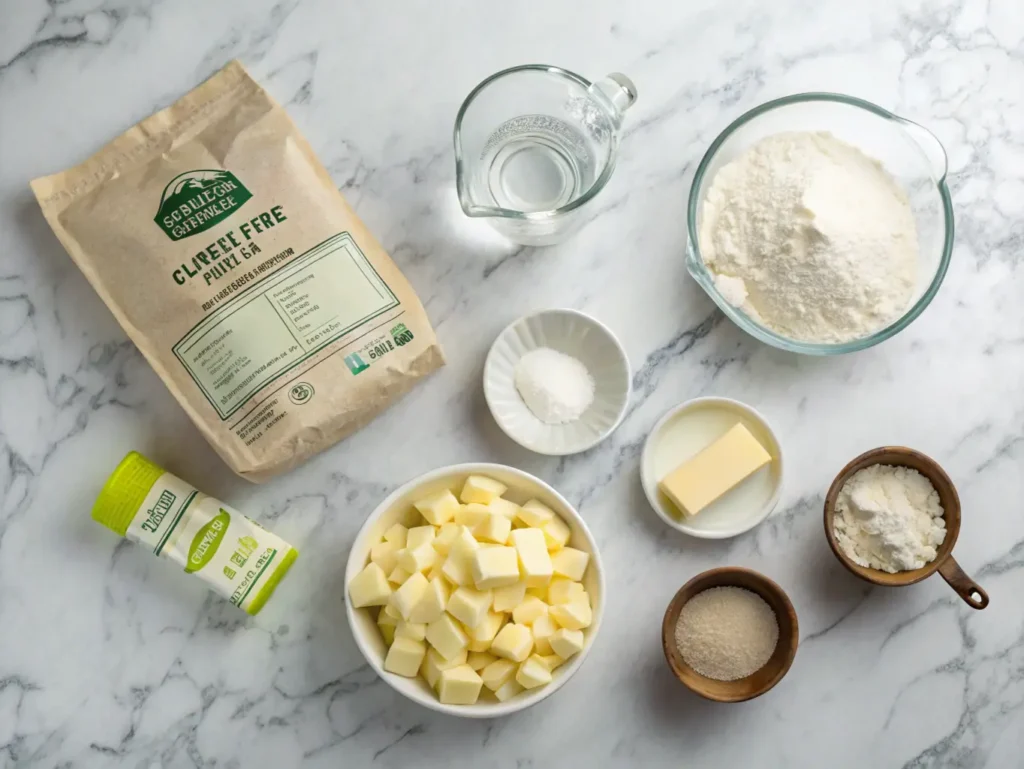
Dry Ingredients:
- 2 cups (280g) gluten-free flour blend (containing xanthan gum)
- 1 teaspoon xanthan gum (if your flour blend doesn’t include it)
- 1 teaspoon salt
- 1 tablespoon sugar (optional, for sweet applications)
Wet Ingredients:
- 1 cup (226g) cold unsalted butter, cubed
- 6-8 tablespoons ice water
- 1 tablespoon lemon juice (helps with texture)
Pro Tip: The key to perfect gluten free puff pastry is keeping everything cold. Chill your bowl and utensils beforehand!
Step-by-Step Instructions
Step 1: Prepare Your Workspace
Start by chilling all your equipment. Place your mixing bowl, measuring cups, and even your flour in the refrigerator for 15 minutes. This gluten free puff pastry relies on cold temperatures for success.
Step 2: Mix the Dry Ingredients
In your chilled bowl, whisk together the gluten-free flour blend, xanthan gum (if needed), salt, and sugar. This ensures even distribution before adding wet ingredients.
Step 3: Add Cold Butter
Cut your cold butter into small cubes and add them to the flour mixture. Using a pastry cutter or your fingertips, work the butter into the flour until you have pieces ranging from pea-sized to walnut-sized. Don’t overmix – visible butter pieces are essential for flaky layers.
Step 4: Add Liquid Gradually
Combine ice water and lemon juice in a small bowl. Gradually add this mixture to your flour and butter, one tablespoon at a time, mixing gently with a fork. Stop as soon as the dough holds together when pressed. Your gluten free puff pastry dough should look shaggy, not smooth.
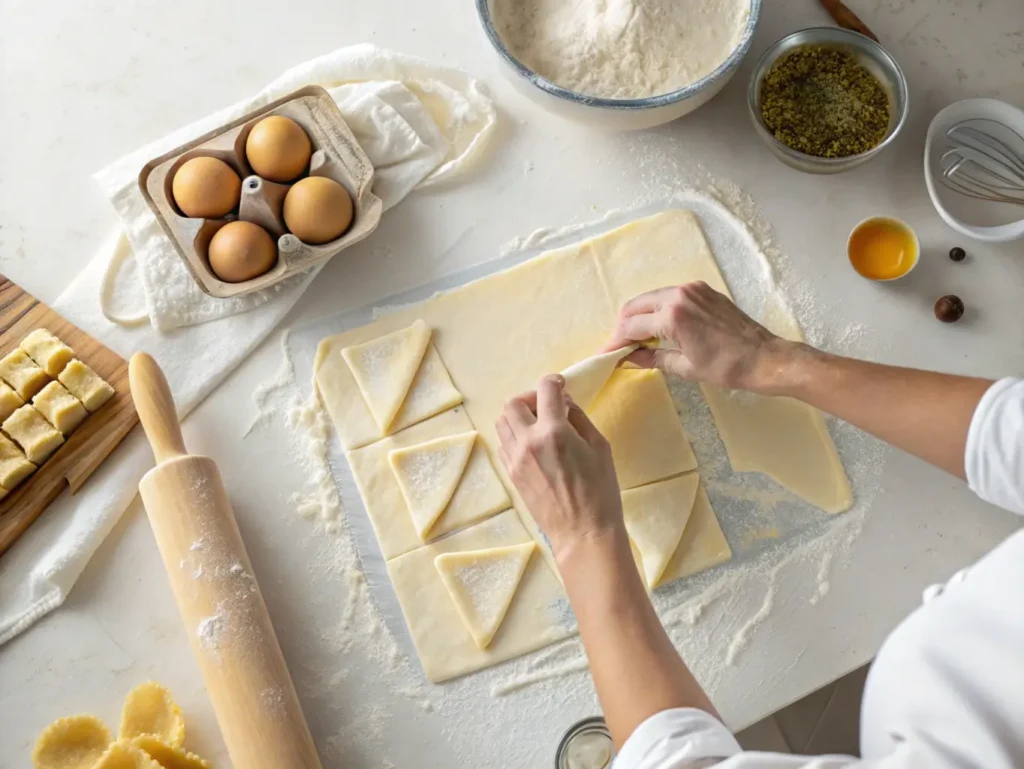
Step 5: First Fold
Turn the dough onto a lightly floured surface and gently press it into a rough rectangle. Fold the dough in thirds like a business letter, then wrap in plastic wrap and refrigerate for 30 minutes.
Step 6: Subsequent Folds
Remove the chilled dough and roll it into a rectangle again. Fold in thirds once more, wrap, and chill for another 30 minutes. Repeat this process 2-3 times total for optimal layering in your gluten free puff pastry.
Step 7: Final Rest
After your final fold, wrap the dough tightly and refrigerate for at least 2 hours, or overnight for best results.
Expert Tips for Perfect Gluten Free Puff Pastry
Temperature Control is Crucial
- Keep butter cold but pliable
- If butter becomes too soft, return dough to refrigerator
- Work in a cool kitchen when possible
Flour Choice Matters
The best gluten free puff pastry uses a high-quality flour blend. Look for blends containing:
- Rice flour (for structure)
- Potato starch (for moisture)
- Tapioca starch (for chewiness)
- Sorghum flour (for flavor)
Rolling Technique
- Roll gently and evenly
- Don’t press too hard – let the rolling pin do the work
- Always roll from center outward
- Lift and turn dough frequently to prevent sticking
Common Mistakes to Avoid
Overworking the Dough: Unlike traditional bread dough, gluten free puff pastry should be handled minimally. Overworking leads to tough, dense pastry.
Warm Ingredients: Room temperature butter will create greasy, flat pastry instead of flaky layers.
Insufficient Chilling: Each rest period is crucial for proper texture development.
Wrong Flour Ratio: Using single flours instead of a blend compromises structure and flavor.
Storing Your Gluten Free Puff Pastry
Refrigerator Storage
Wrapped gluten free puff pastry keeps in the refrigerator for up to 3 days. Always wrap tightly in plastic wrap to prevent drying out.
Freezer Storage
This pastry freezes beautifully! Wrap in plastic wrap, then aluminum foil, and freeze for up to 3 months. Thaw overnight in the refrigerator before using.
Pre-Shaped Storage
You can roll and cut your gluten free puff pastry into desired shapes before freezing. Layer between parchment paper in an airtight container.
Delicious Ways to Use Your Gluten Free Puff Pastry
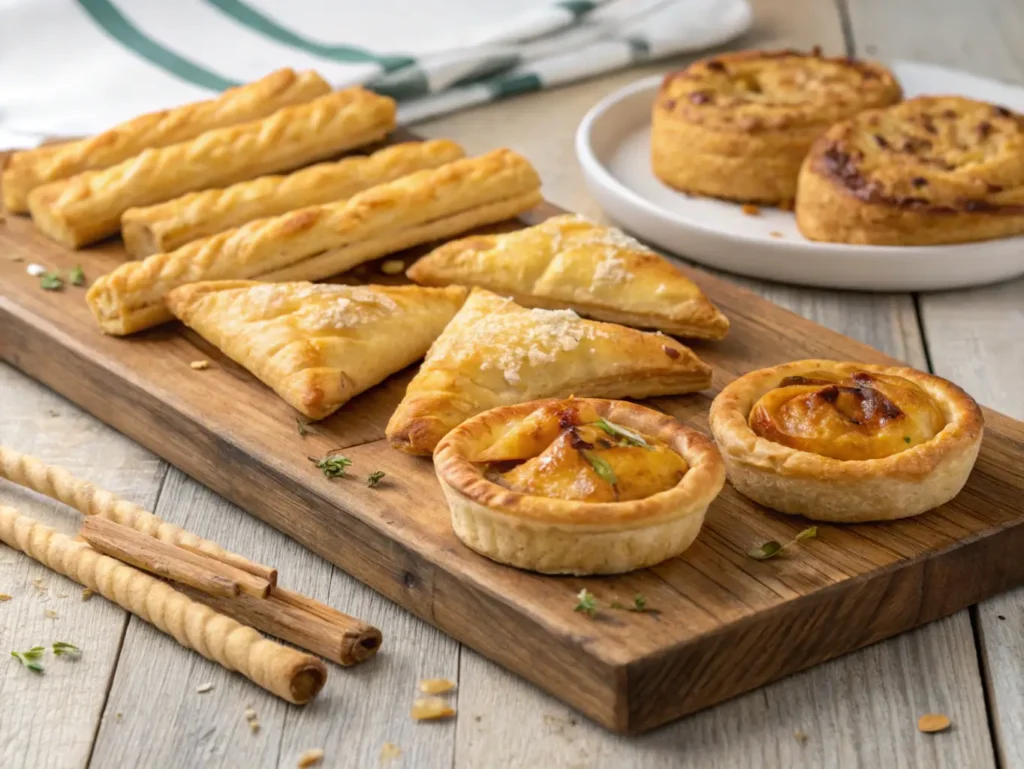
Savory Applications
- Cheese Straws: Twist strips with parmesan and herbs
- Beef Wellington: Wrap seasoned beef for an elegant dinner
- Vegetable Tarts: Top with roasted vegetables and goat cheese
- Sausage Rolls: A British classic made gluten-free
Sweet Treats
- Apple Turnovers: Fill with spiced apples and cinnamon
- Chocolate Croissants: Roll with chocolate for pain au chocolat
- Fruit Galettes: Free-form tarts with seasonal fruit
- Palmiers: Sweet, crispy butterfly cookies
Troubleshooting Your Gluten Free Puff Pastry
Problem: Pastry tears easily Solution: Add an extra tablespoon of ice water to the dough
Problem: Not enough rise or layers Solution: Ensure butter pieces are visible before folding, keep everything cold
Problem: Greasy texture Solution: Butter was too warm; chill longer between folds
Problem: Dense, heavy pastry Solution: Don’t overwork the dough; handle gently
Nutritional Benefits
This gluten free puff pastry offers several advantages over store-bought versions:
- No preservatives or artificial additives
- Control over ingredients and quality
- Often higher in protein from alternative flour blends
- Suitable for celiac disease and gluten sensitivity
Frequently Asked Questions
Can I make this dairy-free too? Yes! Substitute cold vegan butter or coconut oil for regular butter. The technique remains the same.
How do I know if my gluten-free flour blend will work? Look for blends specifically designed for baking that contain xanthan gum. Avoid single-grain flours for this recipe.
Can I use this pastry immediately? While it’s best after proper chilling, you can use it after the first 30-minute rest if you’re in a hurry.
Why is my pastry shrinking during baking? This usually indicates the dough was overworked or not chilled long enough. Always rest shaped pastry before baking.
Conclusion
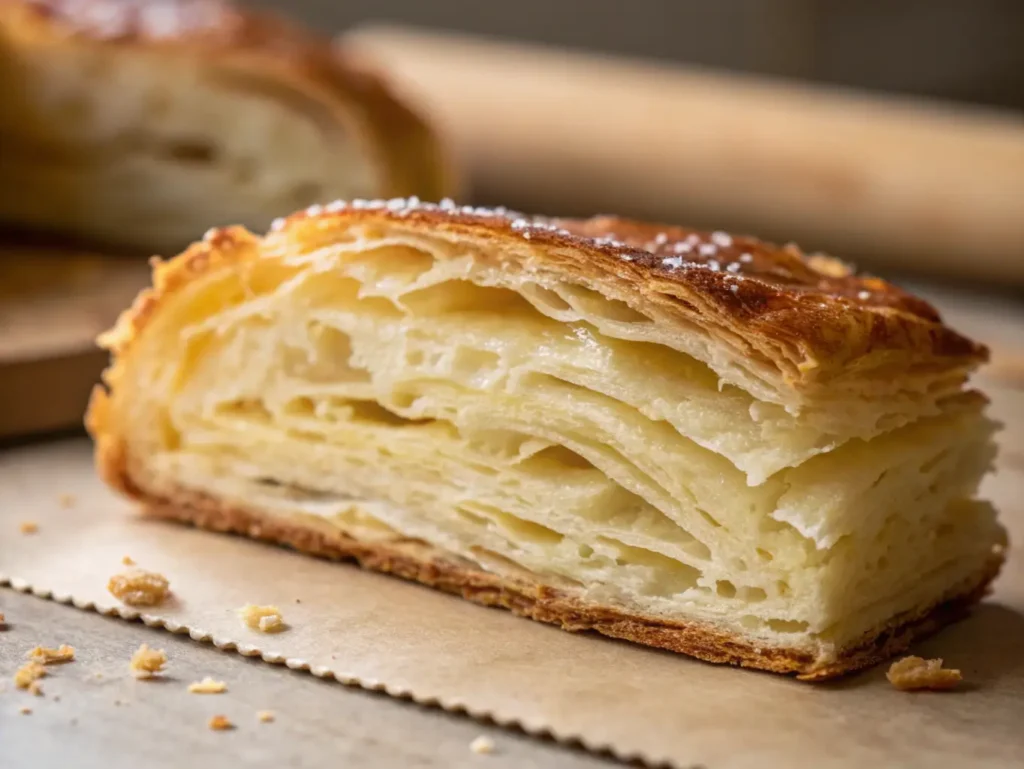
Making gluten free puff pastry at home is not only possible but incredibly rewarding. This rough puff method gives you all the flaky, buttery goodness of traditional puff pastry without the gluten. With practice, you’ll master this technique and open up a world of pastry possibilities.
The key to success lies in keeping ingredients cold, working gently, and being patient with the chilling process. Once you’ve mastered this gluten free puff pastry, you’ll never want to buy store-bought again.
Remember, baking is both art and science. Don’t be discouraged if your first attempt isn’t perfect – each batch teaches you something new. Soon you’ll be creating restaurant-quality pastries right in your own kitchen.
Ready to start your gluten free puff pastry adventure? Gather your ingredients, chill your equipment, and let’s create some magic in the kitchen!
CTA:
👉Follow us on Facebook and Pinterest for more inspiration, trends, and tips — every season!