How to Make Ice Cream Without Ice Cream Maker – 5 Easy Ways
Wondering how to make ice cream without ice cream maker? You’re not alone. With these five proven methods for how to make ice cream without ice cream maker, you’ll be making restaurant-quality ice cream at home using tools you already have in your kitchen.
Why Learn How to Make Ice Cream Without Ice Cream Maker?
Ice cream makers can cost anywhere from $50 to $500, take up precious counter space, and often require pre-freezing bowls for 24 hours. But here’s the secret: learning how to make ice cream without ice cream maker is easier than you think, and you can create equally delicious frozen desserts using simple kitchen tools and a bit of science.
After testing dozens of methods for how to make ice cream without ice cream maker over the past five years (and gaining a few pounds in the process), I’ve discovered the techniques that consistently produce smooth, creamy results. Whether you’re planning a last-minute dessert or want to experiment with unique flavors, these methods for how to make ice cream without ice cream maker will revolutionize your frozen treat game.
The Science Behind How to Make Ice Cream Without Ice Cream Maker
Before diving into the methods for how to make ice cream without ice cream maker, understanding the basic science helps ensure success every time. Ice cream gets its creamy texture from three key factors:
Fat content: Heavy cream’s high fat content creates richness and prevents ice crystals Air incorporation: Whipping introduces air bubbles that create lightness Temperature control: Rapid freezing creates smaller ice crystals for smoother texture
Traditional ice cream makers combine churning with freezing to achieve all three simultaneously. Our methods for how to make ice cream without ice cream maker replicate this process using different techniques.
Method 1: The Ultimate Two-Ingredient Base (Easiest)
Time: 10 minutes prep + 6 hours freezing
Difficulty: Beginner
Equipment: Electric mixer or whisk
This foolproof method produces consistently creamy results and serves as the foundation for countless flavor variations.
Ingredients:
- 2 cups heavy whipping cream (35% fat minimum)
- 1 (14 oz) can sweetened condensed milk, chilled
- 1 teaspoon pure vanilla extract
- Pinch of sea salt
Instructions:
- Chill everything: Place your mixing bowl and beaters in the freezer for 15 minutes before starting
- Whip the cream: Beat heavy cream until stiff peaks form (about 3-4 minutes with electric mixer)
- Combine gently: On lowest speed, slowly drizzle in condensed milk, vanilla, and salt
- Fold carefully: Use a spatula to fold mixture until just combined—don’t overmix
- Freeze properly: Transfer to airtight container, press plastic wrap directly onto surface, freeze 6+ hours
Pro Tip: The condensed milk’s sugar content prevents the mixture from freezing solid, while the pre-whipped cream maintains airiness.
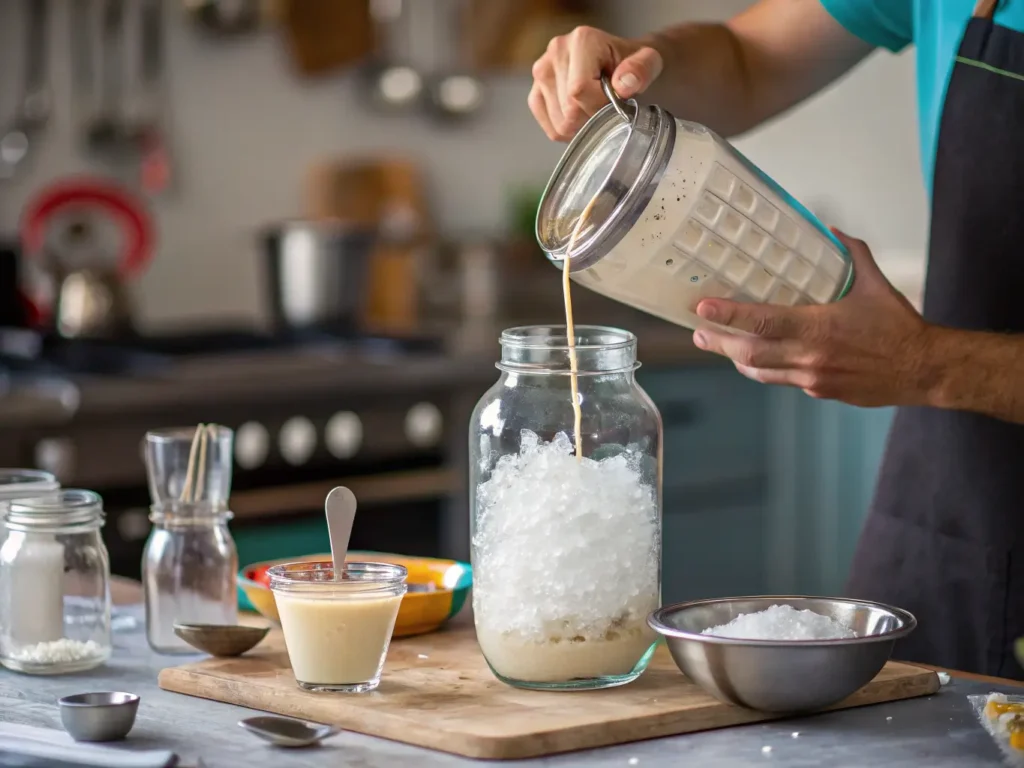
Method 2: The Mason Jar Shake Method (Most Fun)
Time: 20 minutes active + 4 hours freezing
Difficulty: Easy
Equipment: Large mason jar, smaller jar, ice, salt
This method is perfect for single servings and makes a great activity with kids.
What You’ll Need:
- 1 cup heavy cream
- 1/2 cup whole milk
- 1/3 cup sugar
- 1/2 teaspoon vanilla
- 4 cups ice cubes
- 1/2 cup coarse salt (kosher or rock salt)
- 1 quart mason jar
- 1 pint mason jar
Instructions:
- Make the base: Combine cream, milk, sugar, and vanilla in the pint jar. Seal tightly
- Create ice bath: Place small jar inside large jar, surround with ice and salt
- Shake vigorously: Shake continuously for 15-20 minutes (take turns—it’s a workout!)
- Check consistency: Ice cream is ready when mixture no longer sloshes
- Final freeze: Transfer to freezer for 2-4 hours for firmer texture
Why it works: Salt lowers ice’s freezing point to about 15°F, creating an environment cold enough to freeze the cream mixture while shaking incorporates air.
Method 3: The Freeze-and-Whip Technique (Most Control)
Time: 4-5 hours total (hands-on every 45 minutes)
Difficulty: Intermediate
Equipment: Shallow metal pan, electric mixer
This method gives you the most control over texture and closely mimics traditional churning.
Base Recipe:
- 1 cup whole milk
- 3/4 cup granulated sugar
- 2 cups heavy cream
- 1 tablespoon vanilla extract
- 1/4 teaspoon salt
- 2 egg yolks (optional, for custard base)
Step-by-Step Process:
- Dissolve sugar completely: Whisk milk and sugar until no grittiness remains
- Add remaining ingredients: Stir in cream, vanilla, and salt until well combined
- Pour into metal pan: Use 9×13 inch pan for maximum surface area
- First freeze: Place in freezer for 45 minutes
- First whip: Remove when edges start freezing, beat with electric mixer for 2 minutes
- Repeat process: Return to freezer, repeat every 45 minutes for 3-4 cycles
- Final freeze: Once smooth and thick, freeze until serving consistency
Expert insight: Metal conducts cold more efficiently than glass, speeding the freezing process while the regular whipping breaks up ice crystals.
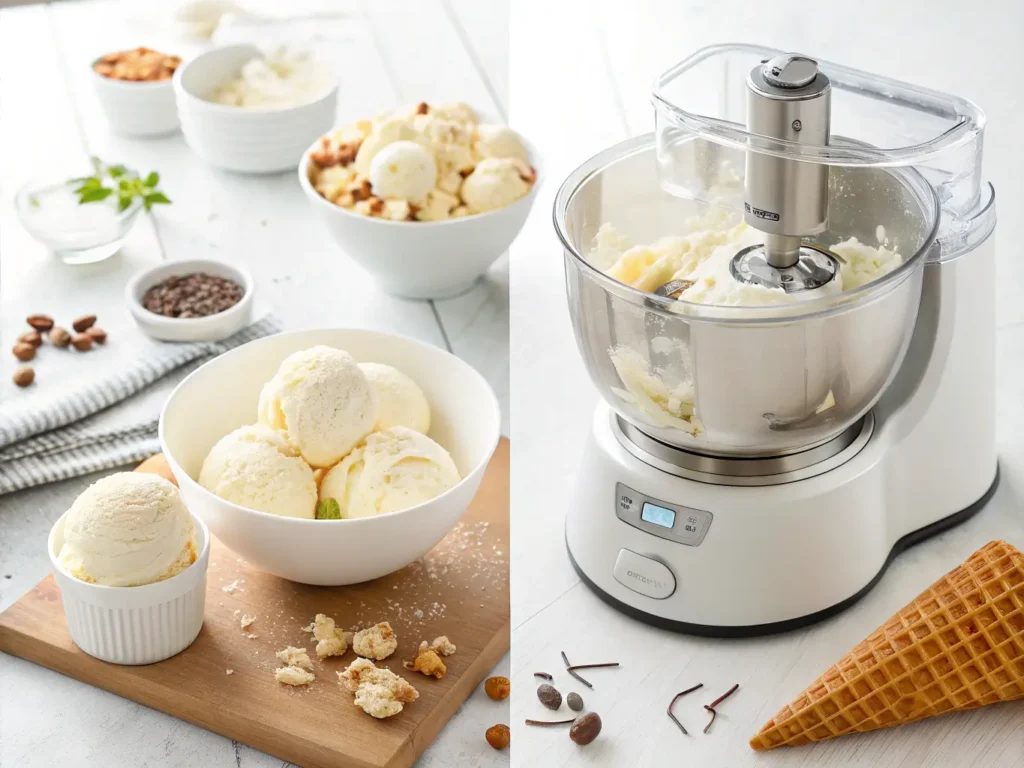
Method 4: The Food Processor Power Method (Best Texture)
Time: 30 minutes prep + overnight freezing + 10 minutes processing
Difficulty: Intermediate
Equipment: Food processor or high-powered blender
This newer technique produces the smoothest, most professional results.
The Process:
- Make any ice cream base: Use the freeze-and-whip base recipe above
- Freeze completely: Pour into zip-top bag, freeze flat overnight until solid
- Break into chunks: Remove from freezer, break frozen mixture into processor-sized pieces
- Process until smooth: Pulse in food processor until completely smooth and creamy
- Add mix-ins: Fold in any desired add-ins during final pulses
- Serve or store: Eat immediately for soft-serve texture, or freeze 2+ hours for firmer scoops
Why this works best: The food processor creates the finest texture by breaking down ice crystals more effectively than manual methods.
Method 5: The Liquid Nitrogen Alternative (Advanced)
Time: 15 minutes
Difficulty: Advanced
Equipment: Dry ice (food grade), heavy-duty mixer, safety equipment
Warning: Only attempt if experienced with dry ice safety protocols
This method produces instant, ultra-smooth ice cream but requires careful handling of dry ice.
Safety Requirements:
- Insulated gloves
- Well-ventilated area
- Food-grade dry ice only
- Never handle dry ice with bare hands
Quick Overview:
- Prepare any liquid ice cream base
- Using stand mixer on low speed, gradually add small pieces of dry ice
- Mix until desired consistency (usually 5-10 minutes)
- Let excess CO2 evaporate before serving
Note: This method is included for completeness but requires proper safety training. Consider it only if you’re experienced with dry ice handling.
Flavor Variations That Always Work
Classic Favorites:
Vanilla Bean: Add 1 scraped vanilla bean pod to base while heating Chocolate: Blend in 3/4 cup cocoa powder + 4 oz melted dark chocolate Strawberry: Puree 2 cups fresh strawberries with 1/4 cup sugar, swirl into base
Gourmet Creations:
Salted Caramel: Swirl in 1/2 cup homemade caramel + 1 tsp sea salt Coffee: Add 2 tbsp instant espresso powder dissolved in 1 tbsp hot water Mint Chip: 1 tsp peppermint extract + 1 cup mini chocolate chips + green coloring
Unique Combinations:
Brown Butter Pecan: Brown 4 tbsp butter, cool, add with 1 cup toasted pecans Lavender Honey: Steep 1 tbsp dried lavender in warm cream, strain, add 1/3 cup honey Bourbon Vanilla: Add 2 tbsp bourbon + extra vanilla for depth
Troubleshooting Common Problems
Ice Cream Too Hard?
- Cause: Insufficient fat content or sugar
- Fix: Add 2-3 tbsp corn syrup to base recipe
- Prevention: Always use heavy cream with 35%+ fat content
Icy Texture?
- Cause: Ice crystals formed during freezing
- Fix: Let soften slightly, re-whip, refreeze
- Prevention: Work quickly when folding, freeze in shallow containers
Won’t Freeze Properly?
- Cause: Too much alcohol or not enough cold
- Fix: Reduce alcohol content, ensure freezer is 0°F or below
- Prevention: Chill all ingredients and equipment beforehand
Separated or Grainy?
- Cause: Overwhipped cream or temperature shock
- Fix: Fold in 2-3 tbsp fresh cream gently
- Prevention: Stop whipping at stiff peaks, add warm ingredients slowly
Pro Tips for Perfect Results Every Time
Temperature Control:
- Keep freezer at 0°F (-18°C) for optimal texture
- Chill all utensils and containers before use
- Work in a cool kitchen when possible
Ingredient Quality:
- Use heavy cream with highest fat content available
- Fresh vanilla extract dramatically improves flavor
- High-quality chocolate and real fruit make noticeable differences
Storage Secrets:
- Press plastic wrap directly onto ice cream surface to prevent freezer burn
- Store in shallow, wide containers for easier scooping
- Let hard ice cream sit at room temperature 5-10 minutes before serving
Mix-In Timing:
- Add liquid flavorings during base preparation
- Fold in chunky mix-ins during final 2 minutes of processing
- Swirl in sauces just before final freeze for ribbon effect
Equipment-Free Alternatives: How to Make Ice Cream Without Ice Cream Maker in Any Situation
No Electric Mixer?
Use the mason jar method or whisk by hand for how to make ice cream without ice cream maker (expect a workout, but it works!)
No Freezer Space?
Try the dry ice method for instant results, or use a large cooler with ice and salt
No Food Processor?
The freeze-and-whip method shows you exactly how to make ice cream without ice cream maker and produces excellent results with just a whisk
Limited Time?
The two-ingredient method requires minimal active time and works with any schedule
Nutritional Benefits of Homemade Ice Cream
Making ice cream at home gives you complete control over ingredients, allowing you to:
- Reduce sugar content by 30-50% compared to commercial brands
- Eliminate artificial stabilizers and preservatives
- Increase protein by adding Greek yogurt or protein powder
- Boost nutrients with real fruit and quality dairy
- Control portion sizes more effectively
Healthier Substitutions:
- Replace half the heavy cream with Greek yogurt for protein
- Use coconut cream for dairy-free versions
- Sweeten with dates, maple syrup, or stevia instead of refined sugar
- Add pureed fruits instead of artificial flavors
Cost Comparison: Homemade vs. Store-Bought
Homemade Ice Cream (per quart):
- Heavy cream: $3.50
- Condensed milk: $2.00
- Vanilla: $0.50
- Total: $6.00
Premium Store-Bought (per quart):
- Average price: $8-12
- Savings: $2-6 per quart
Making ice cream at home saves money while delivering superior taste and quality. Plus, you’ll know exactly what’s in every spoonful.
Seasonal Flavor Calendar
Spring:
- Strawberry basil
- Lemon lavender
- Rhubarb ginger
Summer:
- Peach cobbler
- Watermelon mint
- Key lime pie
Fall:
- Pumpkin spice
- Apple cinnamon
- Maple walnut
Winter:
- Peppermint bark
- Eggnog
- Hot chocolate
Advanced Techniques for Ice Cream Enthusiasts
Creating Perfect Swirls:
- Make sauce slightly thicker than desired final consistency
- Drop spoonfuls over nearly-frozen ice cream
- Use knife tip to create figure-8 patterns
- Freeze immediately to set swirl pattern
Layering Flavors:
- Freeze first layer until semi-solid
- Add contrasting flavor layer
- Repeat for striped effect
- Cut through with knife for marbled appearance
Alcohol Integration:
- Limit to 2-3 tablespoons per quart (more prevents freezing)
- Add during final mixing stage
- Consider alcohol-based extracts for flavor without texture issues
Frequently Asked Questions
Q: How long does homemade ice cream last? A: Properly stored homemade ice cream stays fresh for 2-3 weeks in the freezer, though texture is best within the first week.
Q: Can I make dairy-free versions? A: Absolutely! Substitute coconut cream for heavy cream and use dairy-free condensed milk alternatives or blend cashews with maple syrup.
Q: Is learning how to make ice cream without ice cream maker difficult? A: Not at all! The two-ingredient method is perfect for beginners learning how to make ice cream without ice cream maker, while advanced methods offer more control.
Q: Can I halve these recipes? A: Yes, all recipes scale well. Halving works perfectly for smaller batches, just adjust freezing times slightly.
Q: What’s the best way to serve homemade ice cream? A: Let hard ice cream sit at room temperature for 5-10 minutes, use a warm ice cream scoop, and serve in chilled bowls for best presentation.
Conclusion: Master How to Make Ice Cream Without Ice Cream Maker
Learning how to make ice cream without ice cream maker isn’t just possible—it’s surprisingly simple once you understand the techniques. Whether you choose the foolproof two-ingredient method for busy weeknights or the food processor technique for special occasions, you now know exactly how to make ice cream without ice cream maker using tools you already own.
Start with the basic vanilla using your preferred method, then experiment with the flavor combinations that excite you most. Remember, the best ice cream is the one made with love in your own kitchen, customized exactly to your taste preferences.
Ready to impress your family and friends with homemade ice cream that costs less and tastes better than anything from the store? Now that you know how to make ice cream without ice cream maker using these proven methods, pick your favorite technique above and start creating delicious frozen treats today!
Have you tried any of these methods for how to make ice cream without ice cream maker? Share your results and favorite flavor combinations in the comments below—I love hearing about your ice cream adventures!
Recipe Card: Quick Reference Two-Ingredient Ice Cream
Prep Time: 10 minutes
Freeze Time: 6 hours
Total Time: 6 hours 10 minutes
Servings: 8
Ingredients:
- 2 cups heavy whipping cream, chilled
- 1 (14 oz) can sweetened condensed milk, chilled
- 1 tsp vanilla extract
- Pinch of salt
Instructions:
- Whip cream to stiff peaks
- Slowly fold in condensed milk, vanilla, and salt
- Transfer to container, cover surface with plastic wrap
- Freeze 6+ hours until firm
Notes: For chocolate version, add 3/4 cup cocoa powder. For fruit flavors, fold in 1 cup pureed fruit during step 2.
| Pin to Pinterest | Share on Facebook
Follow us On : Facebook and Pinterest