Ultimate Preppy Kitchen Brownies Recipe – Fudgy & Easy
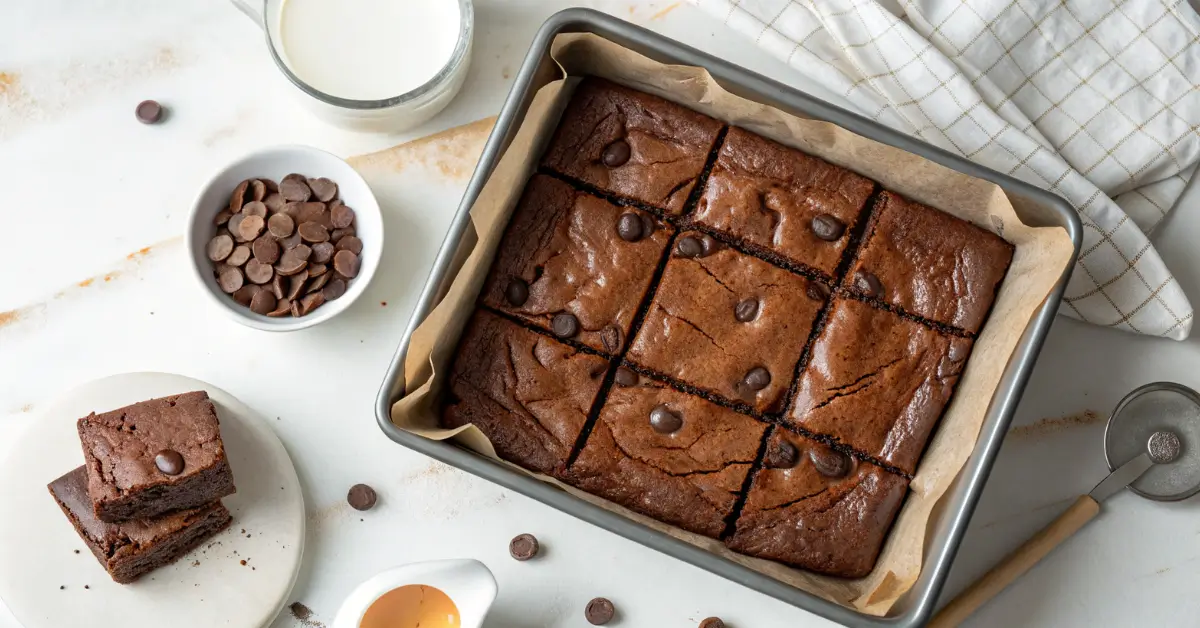
When you’re craving the most indulgent chocolate experience, these preppy kitchen brownies deliver everything you want: a shiny, crackled top that gives way to an impossibly fudgy center, studded with pockets of melted chocolate that create the perfect textural contrast. These aren’t just any brownies—they’re the kind that make people stop mid-conversation to ask for the recipe.
What sets these preppy kitchen brownies apart is their foolproof one-bowl method that produces bakery-quality results every single time. No tempering chocolate, no complicated techniques, just pure chocolate bliss that comes together in under 10 minutes of prep time. The secret lies in the precise balance of cocoa powder and melted chocolate chips, creating layers of chocolate flavor that build with every bite.
Whether you’re a beginner baker looking for guaranteed success or an experienced cook wanting reliable perfection, this recipe has become the gold standard for home bakers who refuse to settle for mediocre brownies. The crispy edges alone will have your family hovering around the kitchen, and the fudgy interior ensures these brownies stay moist for days.
Why These Are the Best Preppy Kitchen Brownies You’ll Ever Make
After testing dozens of brownie recipes, this version consistently produces the perfect balance that makes preppy kitchen brownies so beloved. The texture hits that sweet spot between fudgy and chewy—never cakey, never underbaked. The chocolate flavor is rich and complex without being overwhelming, thanks to the strategic combination of unsweetened cocoa powder and semisweet chocolate chips.
The genius of this recipe lies in its simplicity. Everything happens in one bowl, eliminating the mess and complexity that intimidates many home bakers. The melted butter method creates the perfect fat distribution, while the cocoa powder provides deep chocolate flavor without the fuss of melting chocolate bars. Most importantly, these brownies are nearly impossible to mess up—the recipe is engineered for success.
Essential Ingredients for Perfect Preppy Kitchen Brownies

Unsalted Butter (1 cup) — The foundation of rich flavor and perfect texture. Melting the butter rather than creaming it creates that signature dense, fudgy crumb. If you only have salted butter, reduce the added salt to ½ teaspoon. For a slightly different flavor profile, you can substitute with ¾ cup of neutral oil, though you’ll lose some of the buttery richness.
Granulated Sugar (2 cups) — Creates the essential crackled top and contributes to the fudgy texture. For deeper flavor complexity, substitute ½ cup of the granulated sugar with packed brown sugar, which adds subtle caramel notes that complement the chocolate beautifully.
Unsweetened Cocoa Powder (¾ cup) — The star ingredient that provides intense chocolate flavor without added sweetness. Natural cocoa powder works perfectly, but for ultra-rich preppy kitchen brownies, Dutch-processed cocoa creates an even deeper, more sophisticated chocolate taste. Always sift cocoa powder to prevent lumps.
Large Eggs (3, room temperature) — Essential for structure and that perfect chewy texture. Room temperature eggs incorporate more easily and create a smoother batter. If you forgot to take them out early, place them in warm water for 10 minutes to quickly bring them to temperature.
Pure Vanilla Extract (1 tablespoon) — Enhances and rounds out the chocolate flavor. Skip the imitation vanilla—real extract makes a noticeable difference in these preppy kitchen brownies. For an elevated twist, try using vanilla bean paste for gorgeous specks and intensified vanilla flavor.
Fine Sea Salt (1 teaspoon) — Absolutely crucial for balancing sweetness and intensifying chocolate flavor. Don’t skip this—salt is what transforms good brownies into extraordinary ones.
All-Purpose Flour (1 cup) — Provides just enough structure without making the brownies cakey. Measure carefully using the spoon-and-level method, or better yet, use a kitchen scale (120g) for consistent results every time.
Semisweet Chocolate Chips (1½ cups) — Creates those coveted pockets of melted chocolate throughout. Semisweet provides the perfect balance of sweetness. For more sophisticated preppy kitchen brownies, try chopping a high-quality chocolate bar instead of using chips—the irregular pieces create beautiful chocolate swirls.
Step-by-Step Method for Preppy Kitchen Brownies Perfection
Step 1: Prepare Your Pan and Oven Preheat your oven to 350°F (175°C). Line an 8×8-inch metal baking pan with parchment paper, leaving overhang for easy removal. Lightly spray with cooking spray. This preparation step is crucial—parchment paper is your insurance policy against stuck brownies.
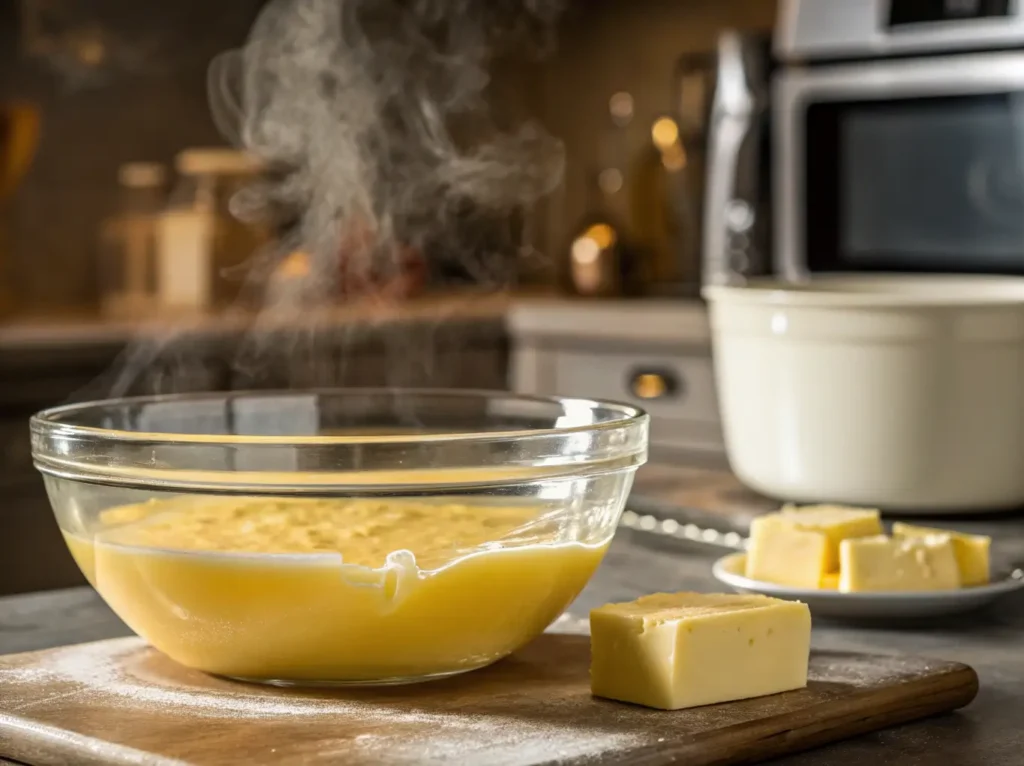
Step 2: Melt the Butter Place butter in a large microwave-safe bowl. Microwave in 20-second intervals, stirring between each interval to prevent splattering and ensure even melting. This should take 90-120 seconds total. The bowl will be hot, so use oven mitts when handling.
Step 3: Create the Chocolate Base Immediately whisk the granulated sugar and cocoa powder into the hot melted butter. Whisk vigorously for 45 seconds—this step is crucial for developing that signature shiny top on your preppy kitchen brownies. The mixture should be smooth and slightly glossy.
Step 4: Add Wet Ingredients Whisk in eggs one at a time, ensuring each is fully incorporated before adding the next. Add vanilla extract and salt, whisking until the mixture is completely smooth and slightly lightened in color.
Step 5: Incorporate Dry Ingredients Add flour all at once and gently fold with a rubber spatula until just combined. Don’t overmix—stop as soon as no dry flour streaks remain. Overmixing develops gluten, resulting in tough brownies.
Step 6: Fold in Chocolate Chips Gently fold in chocolate chips, reserving a handful to sprinkle on top if desired. The batter should be thick and glossy.
Step 7: Bake to Perfection Spread batter evenly in prepared pan. Bake for 35-40 minutes, until the top is set and slightly cracked, and a toothpick inserted in the center comes out with a few moist crumbs. For ultimate fudgy preppy kitchen brownies, err on the side of slightly underbaking.
Step 8: Cool Completely This is the hardest step—let brownies cool completely in the pan before cutting. This allows them to set properly and prevents crumbling. For clean cuts, chill for 30 minutes before slicing.
Professional Secrets for Superior Preppy Kitchen Brownies
Master the Doneness Test The perfect preppy kitchen brownies are done when a toothpick inserted 2 inches from the edge comes out clean, but one inserted in the center has moist crumbs. The center will continue cooking from residual heat as it cools.
Use the Right Pan Metal pans are non-negotiable for the best preppy kitchen brownies. They conduct heat evenly and create those coveted crispy edges. Glass pans require 5-10 minutes longer baking time and often result in uneven cooking.
Temperature Matters Room temperature ingredients incorporate more easily and create better texture. Cold eggs can cause the batter to seize, while melted butter that’s too hot can cook the eggs.
Enhance the Chocolate For next-level preppy kitchen brownies, add 1 tablespoon of instant espresso powder to the melted butter mixture. Coffee doesn’t make brownies taste like coffee—it intensifies the chocolate flavor dramatically.
Storage for Maximum Freshness Store cooled brownies in an airtight container at room temperature for up to 5 days. For longer storage, wrap individual portions in plastic wrap and freeze for up to 3 months. They thaw perfectly at room temperature.
Cutting Clean Squares Use a sharp knife wiped clean between cuts, or for professional-looking squares, use a bench scraper. Slightly warm the knife under hot water and dry it for the cleanest cuts through fudgy brownies.
Irresistible Variations on Classic Preppy Kitchen Brownies

Salted Caramel Brownies Swirl 3 tablespoons of caramel sauce into the batter before baking, then sprinkle the top with flaky sea salt. The sweet-salty combination elevates these preppy kitchen brownies to gourmet status.
Nutty Brownies Fold in ¾ cup of toasted walnuts or pecans with the chocolate chips. Toast nuts in a 350°F oven for 8-10 minutes for maximum flavor impact.
Mint Chocolate Brownies Replace vanilla extract with peppermint extract (use only ½ teaspoon—it’s potent). Add crushed peppermint candies or mint chocolate chips for festive preppy kitchen brownies.
Peanut Butter Swirl Drop spoonfuls of peanut butter over the batter and use a knife to create swirls. The combination of chocolate and peanut butter makes these preppy kitchen brownies absolutely irresistible.
Double Chocolate For chocolate lovers, replace ½ cup of flour with additional cocoa powder and add white chocolate chips along with the semisweet ones for contrast.
Troubleshooting Common Preppy Kitchen Brownies Issues
Problem: Brownies Are Too Cakey This usually means too much flour or overmixing. Measure flour carefully and fold just until combined. Also check your oven temperature—too high heat can cause rapid rising and cakey texture.
Problem: Brownies Fall Apart When Cut This typically happens when brownies are cut too soon. Always cool completely—this can take 2-3 hours. For extra insurance, chill for 30 minutes before cutting.
Problem: Brownies Are Too Sweet Next time, try replacing some granulated sugar with brown sugar, or use bittersweet chocolate chips instead of semisweet. A pinch more salt also helps balance sweetness.
Problem: Uneven Baking Ensure your oven rack is in the center position, and rotate the pan halfway through baking if your oven has hot spots. Also verify your oven temperature with an oven thermometer.
Problem: Brownies Stick to Pan Always line with parchment paper with overhang. If you forgot parchment, run a thin knife around the edges while brownies are still slightly warm to prevent sticking.

Frequently Asked Questions About Preppy Kitchen Brownies
Can I make these brownies gluten-free? Yes! Substitute the all-purpose flour with a 1:1 gluten-free flour blend. The texture may be slightly different, but they’ll still be deliciously fudgy.
How do I know when my preppy kitchen brownies are perfectly done? Look for a set top with slight cracks and a toothpick that comes out with moist crumbs (not wet batter). The edges should just start pulling away from the pan sides.
Can I double this recipe? Absolutely! Use a 9×13-inch pan and increase baking time to 45-50 minutes. The larger pan creates thinner brownies with more of those beloved crispy edges.
What’s the best way to store leftover brownies? Store in an airtight container at room temperature for up to 5 days. For longer storage, wrap individually and freeze for up to 3 months.
Can I add frosting to these brownies? While these preppy kitchen brownies are perfect on their own, they’re divine with cream cheese frosting, chocolate ganache, or even a simple dusting of powdered sugar.
How can I make these brownies even more fudgy? Underbake them slightly—remove when the center still looks slightly underset. They’ll continue cooking as they cool, resulting in ultra-fudgy texture.
The Perfect Preppy Kitchen Brownies Recipe
Equipment Needed:
- 8×8-inch metal baking pan
- Large microwave-safe mixing bowl
- Rubber spatula
- Wire whisk
- Measuring cups and spoons
Ingredients:
- 1 cup (226g) unsalted butter
- 2 cups (400g) granulated sugar
- ¾ cup (75g) unsweetened cocoa powder, sifted
- 3 large eggs, room temperature
- 1 tablespoon pure vanilla extract
- 1 teaspoon fine sea salt
- 1 cup (120g) all-purpose flour
- 1½ cups (270g) semisweet chocolate chips
Instructions:
- Prep: Preheat oven to 350°F. Line 8×8-inch metal pan with parchment paper, leaving overhang. Lightly spray with cooking spray.
- Melt Butter: In large microwave-safe bowl, melt butter in 20-second intervals, stirring between each, until fully melted (about 90-120 seconds total).
- Chocolate Base: Immediately whisk sugar and sifted cocoa powder into hot butter. Whisk vigorously for 45 seconds until smooth and glossy.
- Wet Ingredients: Whisk in eggs one at a time, then vanilla and salt until mixture is smooth and slightly lightened.
- Add Flour: Fold in flour with rubber spatula until just combined—don’t overmix.
- Chocolate Chips: Gently fold in chocolate chips, reserving some for topping if desired.
- Bake: Spread batter evenly in prepared pan. Bake 35-40 minutes until top is set with slight cracks and toothpick has moist crumbs.
- Cool: Cool completely in pan before cutting (2-3 hours). For cleanest cuts, chill 30 minutes before slicing.
Nutrition (per square, makes 16): Calories: 285 | Fat: 12g | Carbs: 45g | Protein: 4g | Sugar: 38g
These preppy kitchen brownies represent everything a perfect brownie should be—intensely chocolatey, perfectly textured, and absolutely foolproof. Once you master this recipe, you’ll never need another brownie recipe again. The combination of simplicity and superior results makes these the ultimate go-to treat for any occasion.
Tag me @yourkitchen and use #preppykitchenbrownies when you make these—I love seeing your delicious creations!
| Pin to Pinterest | Share on Facebook
Follow us On : Facebook and Pinterest