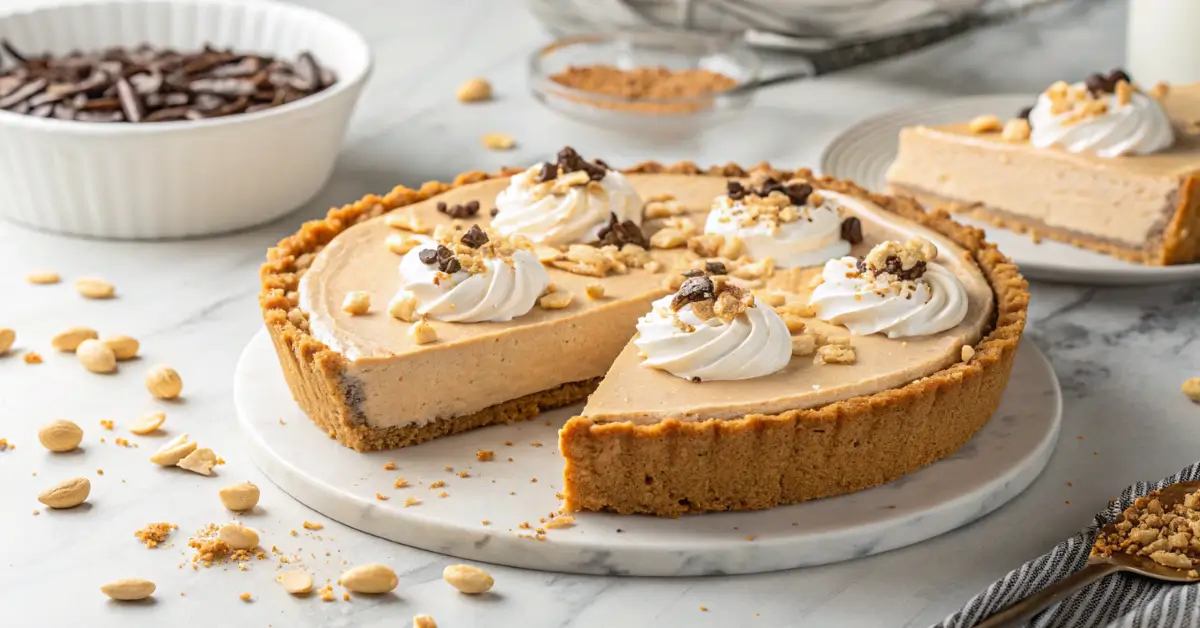
Ultimate Peanut Butter Pie Recipe – Easy & Creamy
Are you craving a dessert that combines the rich, nutty flavor of peanut butter with a silky smooth texture? Look no further than this incredible peanut butter pie recipe that will have your family and friends begging for seconds. This classic American dessert delivers the perfect balance of sweet and salty flavors in every heavenly bite.
What Makes the Perfect Peanut Butter Pie?
A truly exceptional peanut butter pie should have three key characteristics: a crispy, buttery crust, a creamy and rich peanut butter filling, and a light, fluffy topping that complements the intense flavor below. Our recipe achieves all three elements, creating a dessert that rivals the best bakery versions.
The secret to our peanut butter pie lies in the careful balance of ingredients and the proper technique for achieving that signature smooth texture. Unlike many complicated dessert recipes, this peanut butter pie is surprisingly simple to make, requiring no baking for the filling and using ingredients you likely already have in your pantry.
Essential Ingredients for Peanut Butter Pie
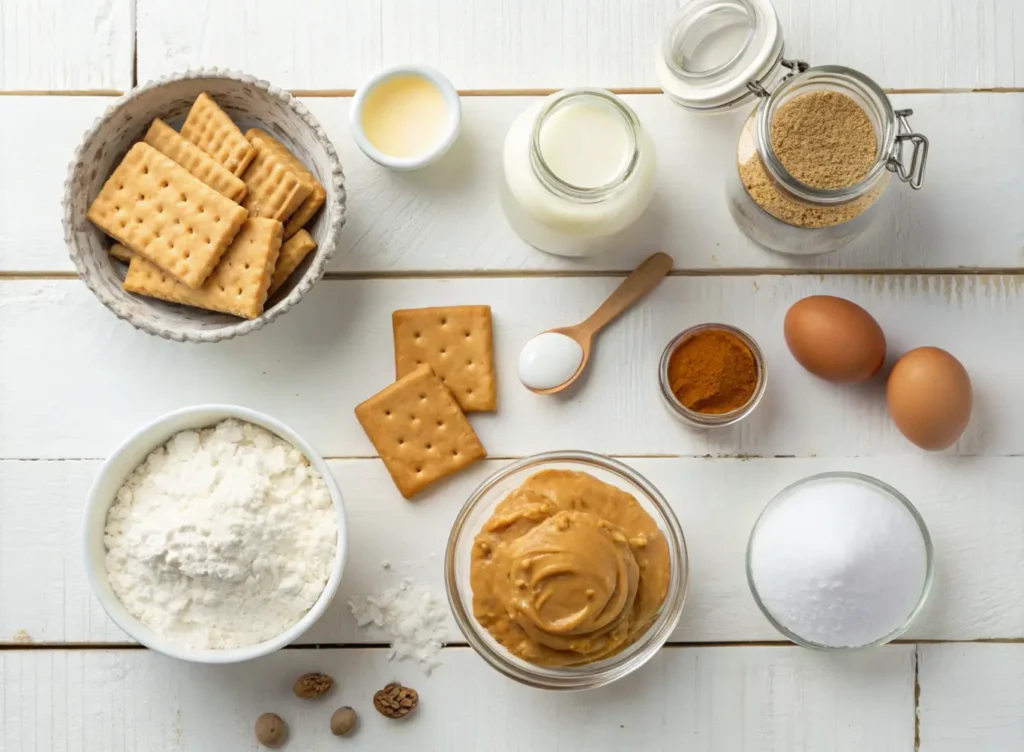
For the Crust:
- 1½ cups graham cracker crumbs
- ⅓ cup melted butter
- ¼ cup granulated sugar
- Pinch of salt
For the Peanut Butter Filling:
- 8 oz cream cheese, softened
- 1 cup creamy peanut butter
- 1 cup powdered sugar
- 1 teaspoon vanilla extract
- 1½ cups heavy whipping cream
- ¼ cup granulated sugar
For the Topping:
- 1 cup heavy whipping cream
- 2 tablespoons powdered sugar
- ½ teaspoon vanilla extract
- Chopped peanuts for garnish
- Chocolate shavings (optional)
Step-by-Step Peanut Butter Pie Recipe
Preparing the Graham Cracker Crust
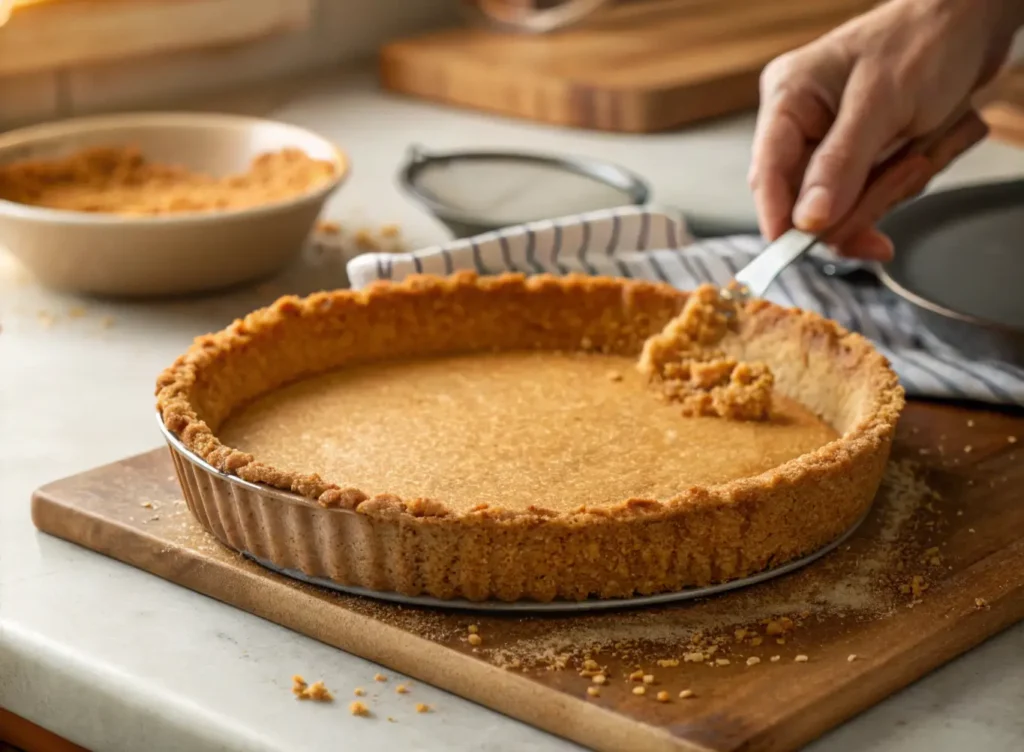
The foundation of any great peanut butter pie starts with a perfectly prepared crust. Begin by combining graham cracker crumbs, melted butter, sugar, and salt in a medium bowl. The mixture should hold together when pressed but not be overly wet.
Press the mixture firmly into a 9-inch pie pan, making sure to create an even layer on the bottom and up the sides. Use the bottom of a measuring cup to achieve a smooth, compact surface. Refrigerate the crust for at least 30 minutes while you prepare the filling.
Creating the Creamy Peanut Butter Filling
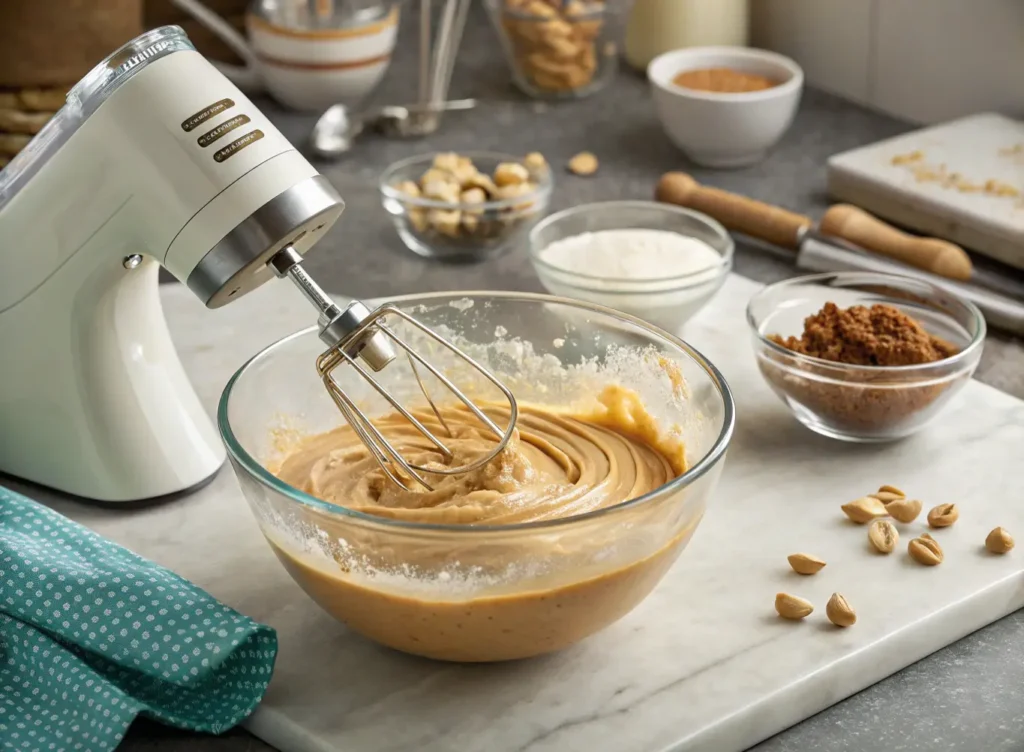
The heart of this peanut butter pie is its luxuriously smooth filling. Start by beating the softened cream cheese until it’s completely smooth and free of lumps. This step is crucial for achieving the silky texture that makes this pie so irresistible.
Add the peanut butter to the cream cheese and beat until well combined. The mixture should be smooth and creamy. Gradually add the powdered sugar and vanilla extract, beating until fully incorporated.
In a separate bowl, whip the heavy cream and granulated sugar until soft peaks form. Be careful not to overbeat, as this can cause the cream to become grainy. Gently fold the whipped cream into the peanut butter mixture in three additions, maintaining the light, airy texture.
Assembling Your Peanut Butter Pie
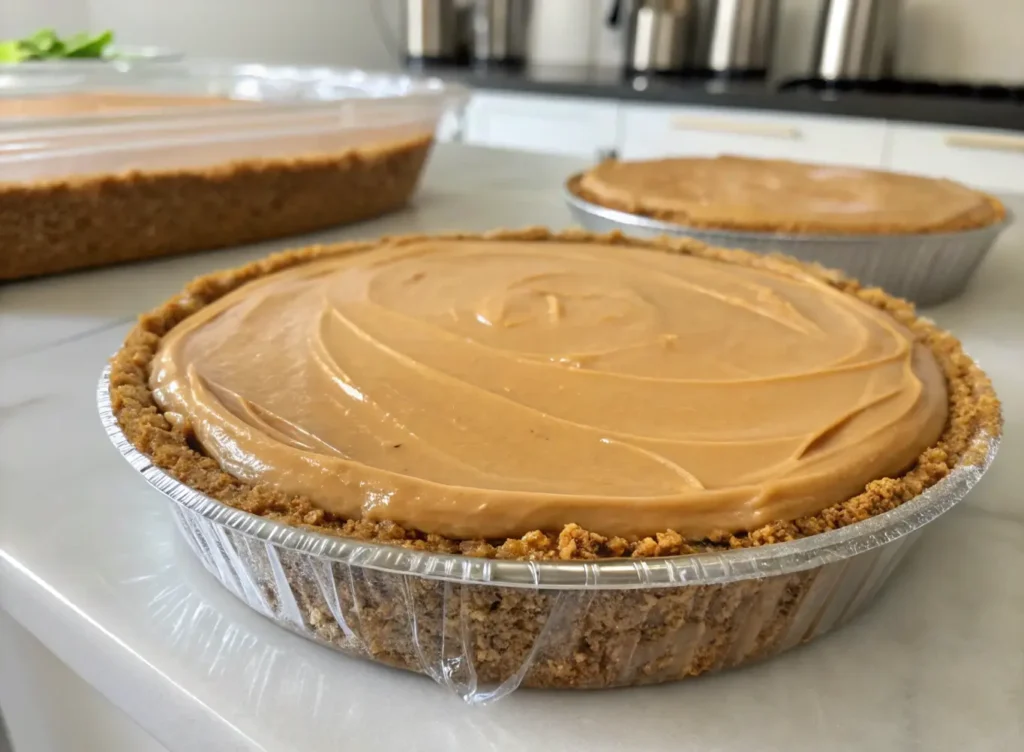
Pour the peanut butter filling into the prepared graham cracker crust, spreading it evenly with a spatula. The filling should be smooth and level, creating an attractive presentation.
Cover the pie with plastic wrap, making sure the plastic doesn’t touch the surface of the filling. Refrigerate for at least 4 hours, though overnight chilling produces the best results for both texture and flavor development.
Professional Tips for Perfect Peanut Butter Pie
Choosing the Right Peanut Butter
For the best peanut butter pie, use a high-quality creamy peanut butter. Avoid natural peanut butters that separate, as they can affect the texture of your filling. Popular brands like Jif or Skippy work excellently for this recipe.
Temperature Matters
All ingredients should be at room temperature when making the filling. Cold cream cheese will create lumps that are difficult to eliminate, while room temperature ingredients blend together seamlessly.
Whipping Cream Technique
When whipping cream for both the filling and topping, start at medium speed and gradually increase. Over-whipped cream will break and become grainy, while under-whipped cream won’t provide the proper structure.
Serving and Storage Suggestions
Serving Your Peanut Butter Pie
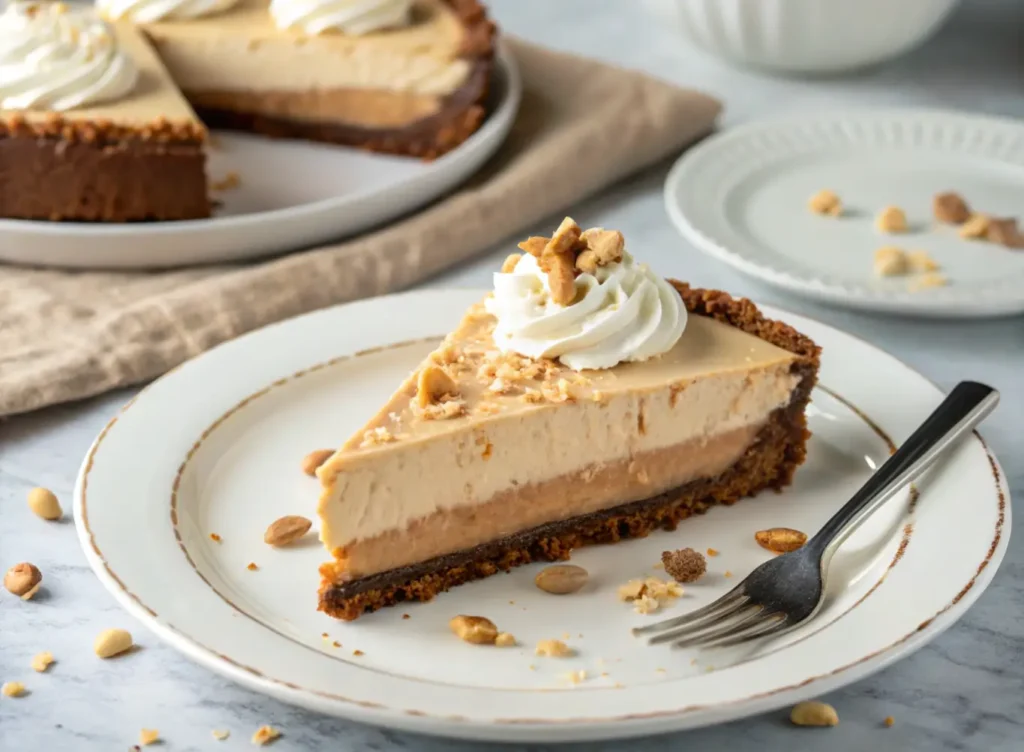
This peanut butter pie serves 8-10 people generously. Use a sharp knife dipped in warm water and wiped clean between cuts to achieve clean, professional-looking slices. The contrast between the golden crust and creamy filling creates an beautiful presentation.
Storage Tips
Store your peanut butter pie covered in the refrigerator for up to 5 days. The flavors actually improve after the first day as they have time to meld together. For longer storage, this pie can be frozen for up to 3 months, though the texture of the whipped cream may change slightly upon thawing.
Variations and Customizations
Chocolate Peanut Butter Pie

Transform your basic peanut butter pie into a chocolate lover’s dream by adding 2 tablespoons of cocoa powder to the filling or drizzling melted chocolate over the top before serving.
Crunchy Peanut Butter Version
For those who prefer texture in their peanut butter pie, substitute crunchy peanut butter for half of the creamy peanut butter called for in the recipe. This adds delightful peanut pieces throughout the filling.
Oreo Crust Alternative
Replace the graham cracker crust with an Oreo cookie crust for a more decadent peanut butter pie. Simply substitute crushed Oreo cookies for the graham crackers and reduce the added sugar accordingly.
Nutritional Information and Dietary Considerations
While peanut butter pie is certainly an indulgent dessert, it does provide some nutritional benefits from the peanut butter, including protein and healthy fats. Each slice contains approximately 450 calories, making it a treat best enjoyed in moderation.
For those with dietary restrictions, this peanut butter pie can be adapted using sugar-free powdered sugar and sugar-free whipped topping. Gluten-free graham crackers can be used for the crust to accommodate gluten sensitivities.
Troubleshooting Common Issues
Runny Filling
If your peanut butter pie filling seems too loose, it likely needs more chilling time. The cream cheese and whipped cream need adequate time to set properly. Additionally, ensure your cream cheese was properly softened before mixing.
Cracked Crust
A cracked graham cracker crust usually indicates the mixture was too dry. Next time, add an extra tablespoon of melted butter to help bind the crumbs together more effectively.
The History of Peanut Butter Pie
Peanut butter pie became popular in American cuisine during the mid-20th century as peanut butter gained widespread acceptance as a household staple. This no-bake dessert represented the convenience cooking trend of the era while delivering restaurant-quality results.
The pie’s popularity has endured because it combines familiar flavors in an elegant presentation. From family gatherings to upscale restaurants, peanut butter pie has found its place as a beloved American dessert.

Conclusion
Creating the perfect peanut butter pie at home is easier than you might think. With the right ingredients, proper technique, and a little patience for chilling, you can produce a dessert that rivals any professional bakery’s version.
This peanut butter pie recipe delivers on all fronts: it’s simple enough for beginner bakers, impressive enough for special occasions, and delicious enough to become a family favorite. The combination of textures and the rich peanut butter flavor creates a memorable dessert experience that will have everyone asking for the recipe.
Whether you’re planning a holiday dinner, birthday celebration, or simply want to treat yourself to something special, this peanut butter pie is guaranteed to satisfy. The make-ahead nature of this dessert also makes it perfect for entertaining, allowing you to focus on other aspects of your meal while your pie chills to perfection.
Try this recipe today and discover why peanut butter pie has become such an enduring favorite in American dessert culture. Your taste buds will thank you for this rich, creamy, and utterly delicious treat.
| Pin to Pinterest | Share on Facebook
Follow us On : Facebook and Pinterest