Dutch Oven Recipes: Ultimate Gluten Free Bread Guide
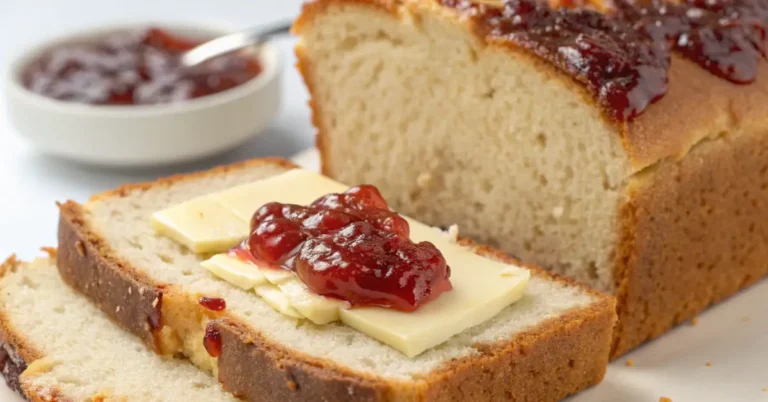
Looking for a gluten-free bread recipe that actually tastes like real bread? This artisan-style loaf combines traditional dutch oven recipes techniques with modern gluten-free baking science to create crusty, flavorful bread that rivals any bakery. Master these dutch oven recipes and transform your home baking forever.
Why This Gluten-Free Bread Recipe Works
Most gluten-free breads are dense, crumbly, and lack the chewy texture we crave. This recipe solves those problems by using professional dutch oven recipes methods:
- Dutch oven baking for professional-quality crust
- Psyllium husk for binding and texture
- Proper hydration for light, airy crumb
- Long fermentation for complex flavor development
These dutch oven recipes principles ensure bakery-quality results every time.
Essential Ingredients for Success
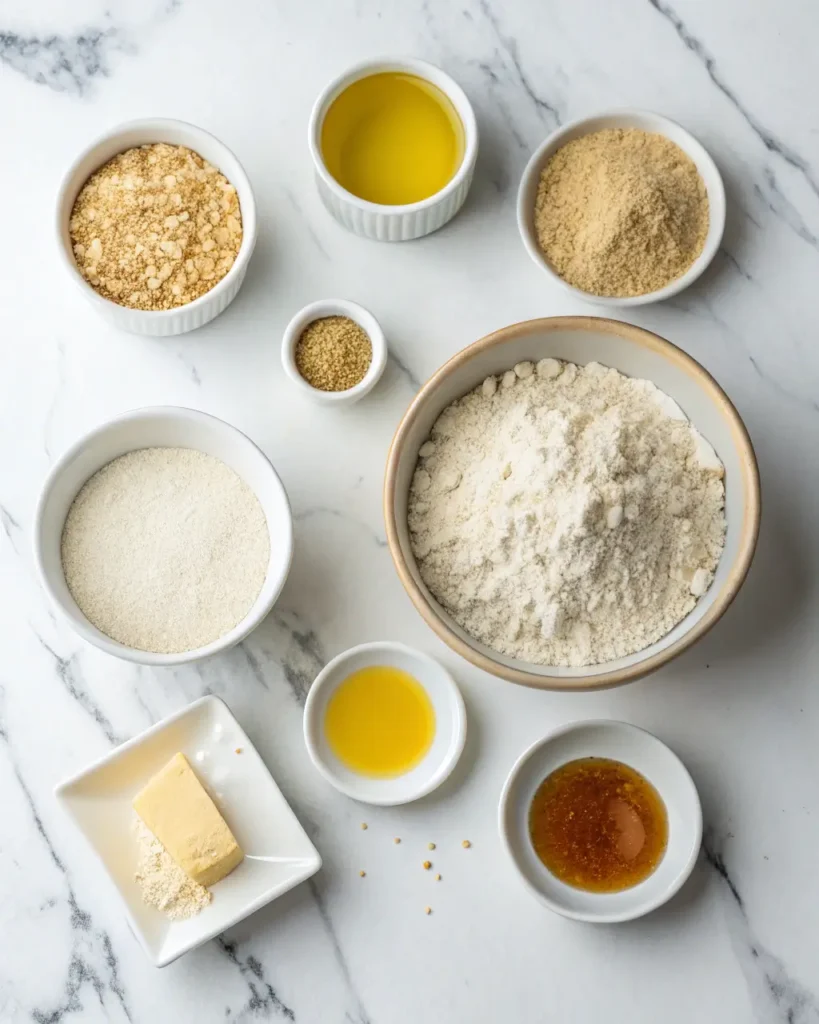
Main Ingredients:
- 3 cups gluten-free flour blend (with xanthan gum)
- 1 tablespoon psyllium husk powder
- 1¼ cups warm water (110°F)
- 2 teaspoons active dry yeast
- 1 tablespoon honey (or sugar)
- 1 teaspoon salt
- 2 tablespoons olive oil
For the Dutch Oven Method:
- Heavy-bottomed dutch oven with lid
- Parchment paper for easy handling
Note: This technique works for many dutch oven recipes beyond bread, making it a versatile skill to master.
Step-by-Step Instructions
1. Prepare the Yeast Mixture
Mix warm water, honey, and yeast in a large bowl. Let sit for 5-10 minutes until foamy. This proves your yeast is active and ready to work.
2. Combine Dry Ingredients
In a separate bowl, whisk together:
- Gluten-free flour blend
- Psyllium husk powder
- Salt
Pro Tip: Sift dry ingredients to prevent lumps and ensure even distribution.
3. Make the Dough
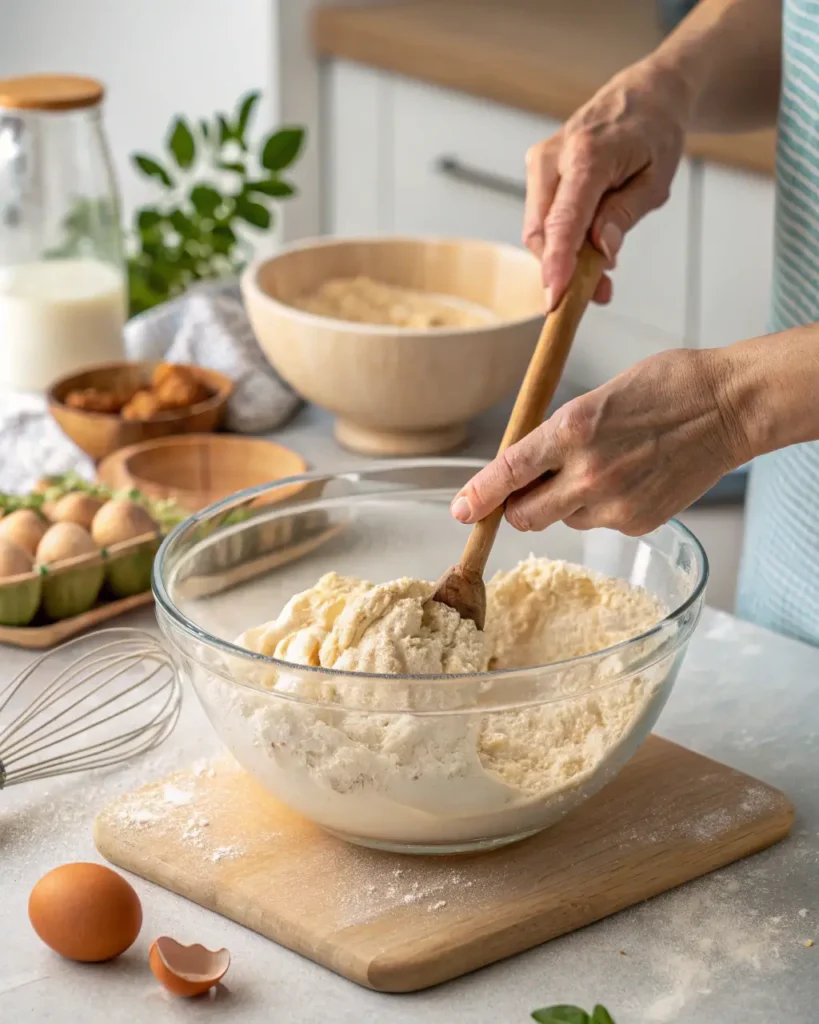
Add the flour mixture to the yeast mixture along with olive oil. Mix until a sticky dough forms. The dough will be wetter than traditional bread dough – this is normal for gluten-free baking.
4. First Rise
Cover the bowl with damp cloth and let rise in a warm place for 1-2 hours until doubled in size. Gluten-free doughs often take longer to rise, so be patient.
5. Shape and Second Rise
Turn dough onto parchment paper and shape into a round loaf. Cover and let rise for another 45-60 minutes.
6. Preheat Dutch Oven
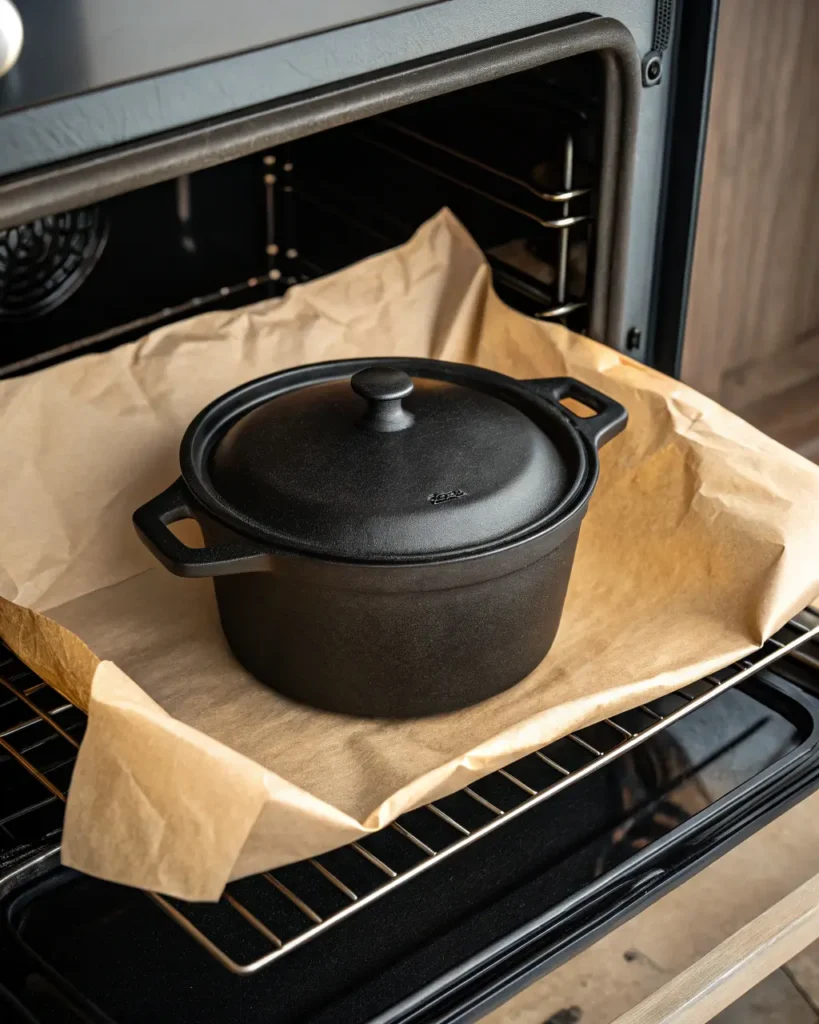
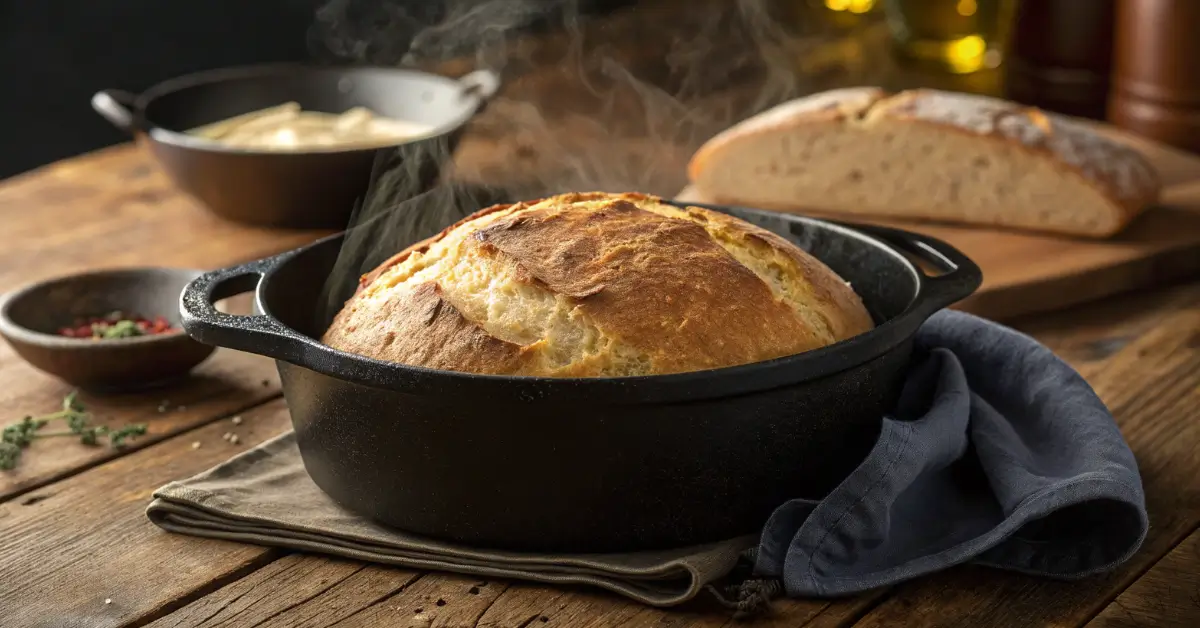
Place your dutch oven (with lid) in the oven and preheat to 450°F (230°C). This step is crucial for creating steam and achieving a crispy crust.
7. Bake in Dutch Oven
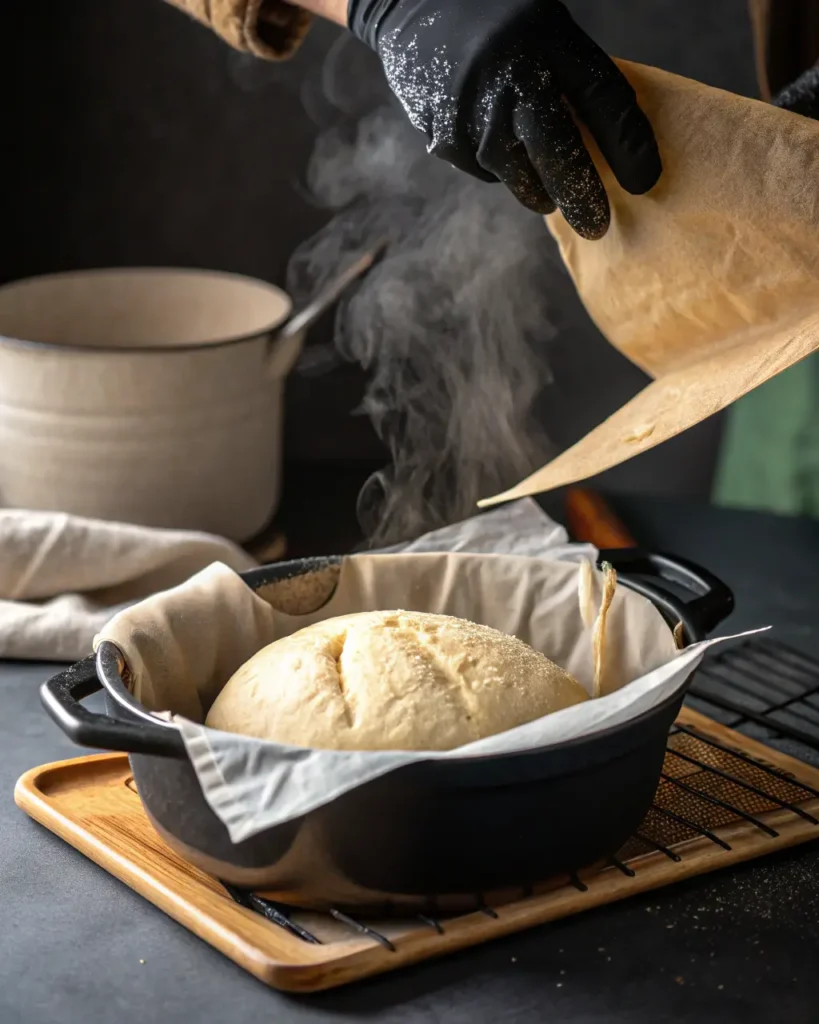
Carefully remove the hot dutch oven. Using the parchment paper, lower the bread into the pot. Cover and bake for 30 minutes.
Remove the lid and bake for another 15-20 minutes until golden brown and hollow-sounding when tapped.
Dutch Oven Recipes: Why This Method Works
Using a dutch oven creates the perfect environment for artisan bread and other dutch oven recipes:
- Steam retention develops a crispy crust
- Even heat distribution ensures uniform baking
- High heat creates proper oven spring
- Contained environment mimics professional steam ovens
This technique works for many other dutch oven recipes beyond gluten-free bread, including sourdough, whole grain loaves, and even pizza dough. Once you master these dutch oven recipes techniques, you’ll revolutionize your home baking.
Troubleshooting Common Issues
Dense, Heavy Bread
- Solution: Check yeast freshness and water temperature
- Tip: Ensure proper rise times – don’t rush the process
Crumbly Texture
- Solution: Add more psyllium husk or increase hydration
- Tip: Let dough rest longer to fully hydrate
Flat Loaf
- Solution: Strengthen gluten-free flour blend with more binding agents
- Tip: Shape more firmly and support sides during final rise
Storage and Serving Tips
Best Storage Methods:
- Room temperature: 2-3 days in airtight container
- Freezer: Up to 3 months, slice before freezing
- Refresh: Toast slices or warm in oven to restore texture
Serving Suggestions:
- Fresh: Perfect for sandwiches and toast
- Day 2: Excellent for French toast or bread pudding
- Stale: Make breadcrumbs or croutons
Variations and Customizations
Herb and Garlic Version:
Add 2 tablespoons dried herbs and 3 minced garlic cloves to the dough.
Seeded Crust:
Brush top with water and sprinkle with sesame seeds, poppy seeds, or everything bagel seasoning.
Sweet Version:
Add 2 tablespoons sugar and 1 teaspoon cinnamon for a slightly sweet breakfast bread.
The Science Behind Gluten-Free Baking
Understanding why this recipe works helps you become a better baker:
Psyllium husk creates the binding network that gluten normally provides. It absorbs water and forms a gel-like structure that gives bread its stretch and chew.
Higher hydration compensates for gluten-free flour’s inability to trap moisture. This creates steam during baking, resulting in a lighter crumb.
Dutch oven baking provides the intense heat and steam necessary for proper crust development and oven spring.
Recipe Success Tips
- Weigh ingredients for consistency
- Don’t over-mix – gluten-free doughs are delicate
- Be patient with rise times
- Use instant-read thermometer – internal temperature should reach 200°F
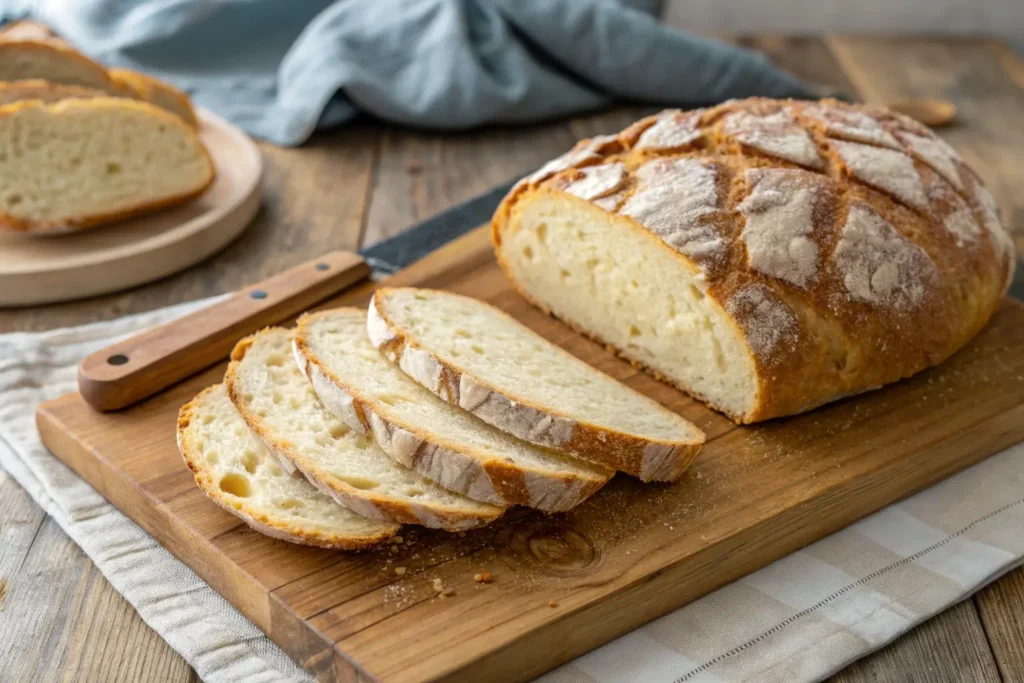
- Cool completely before slicing
Final Thoughts
This gluten-free bread recipe proves that dietary restrictions don’t mean sacrificing flavor or texture. The combination of proper technique, quality ingredients, and dutch oven baking creates bread that everyone will enjoy – whether they need gluten-free options or not.
The dutch oven method is particularly forgiving for beginners and produces consistently professional results. Once you master this technique, you’ll find it works beautifully for many other dutch oven recipes in your baking repertoire.
Ready to bake? Gather your ingredients and give this recipe a try. Your kitchen will smell amazing, and you’ll have fresh, homemade bread that rivals any bakery loaf.
The Ultimate Gluten Free Bread Recipe (Artisan Style Loaf)
Ingredients
Equipment
Method
- Mix warm water, honey, and yeast in large bowl. Let sit 5-10 minutes until foamy.
- In separate bowl, whisk gluten-free flour, psyllium husk, and salt.
- Add flour mixture to yeast mixture with olive oil. Mix until sticky dough forms.
- Cover bowl with damp towel. Rise 1-2 hours until doubled.
- Shape on parchment into round loaf. Cover and rise 45-60 minutes.
- Preheat dutch oven with lid to 450°F.
- Lower bread into hot dutch oven using parchment. Cover, bake 30 minutes.
- Remove lid, bake 15-20 minutes until golden brown.
- Cool completely before slicing.
Notes
Recipe Notes
Yeast Tips:- Test your yeast by ensuring it foams properly in warm water
- If yeast doesn’t foam, start over with fresh yeast for best results
- Psyllium husk powder is essential – don’t substitute or skip it
- Gluten-free flour blend must contain xanthan gum for proper binding
- Water temperature should be 110°F – too hot kills yeast, too cold won’t activate
- The dough will be much stickier than regular bread dough – this is normal
- Don’t add extra flour to make it less sticky – it will affect the final texture
- Gluten-free dough takes longer to rise – be patient for best results
- Place in warm, draft-free area for optimal rising
- Dough should double in size during first rise
- Internal temperature should reach 200°F when fully baked
- Bread will sound hollow when tapped on bottom when done
- Don’t skip the cooling time – hot bread will be gummy when sliced
- Store covered at room temperature up to 3 days
- Freeze sliced bread for up to 3 months
- Toast day-old slices to refresh texture
- Perfect for sandwiches, toast, or served with soup
- Makes excellent French toast or bread pudding when slightly stale
Have you tried this recipe? Share your results and any variations you’ve discovered in the comments below!
| Pin to Pinterest | Share on Facebook
Follow us On : Facebook and Pinterest