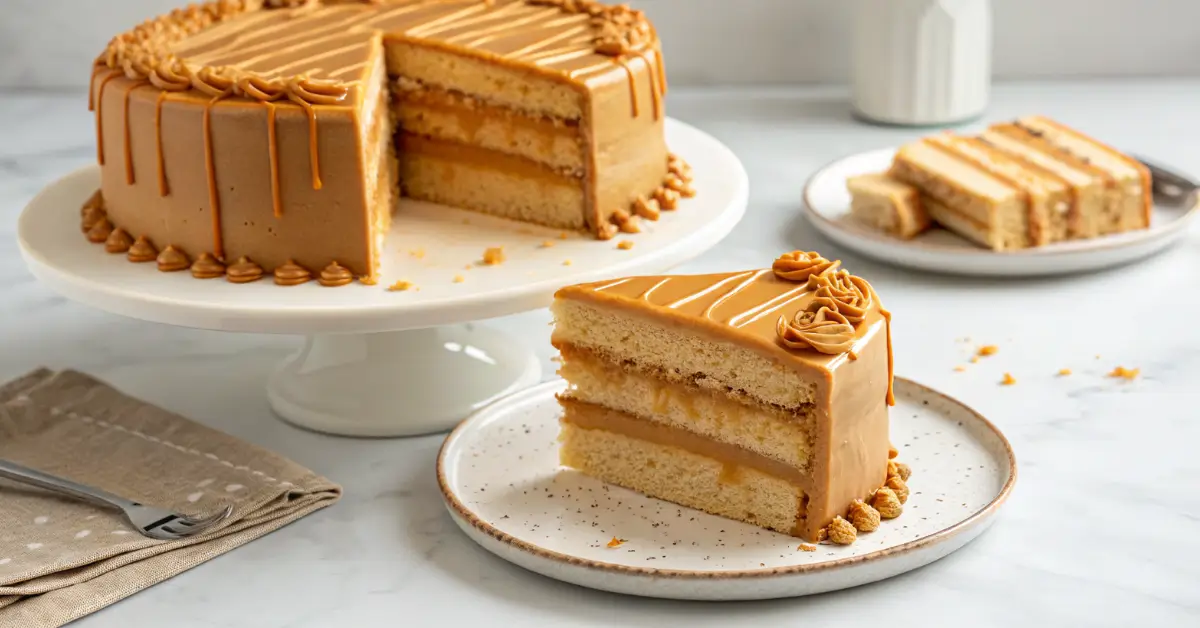
Butterscotch Cake Recipe: Easy Homemade Guide (2025)
Are you craving a dessert that combines rich, buttery sweetness with moist, tender cake layers? This butterscotch cake recipe will become your new favorite go-to dessert for special occasions and weekend treats alike.
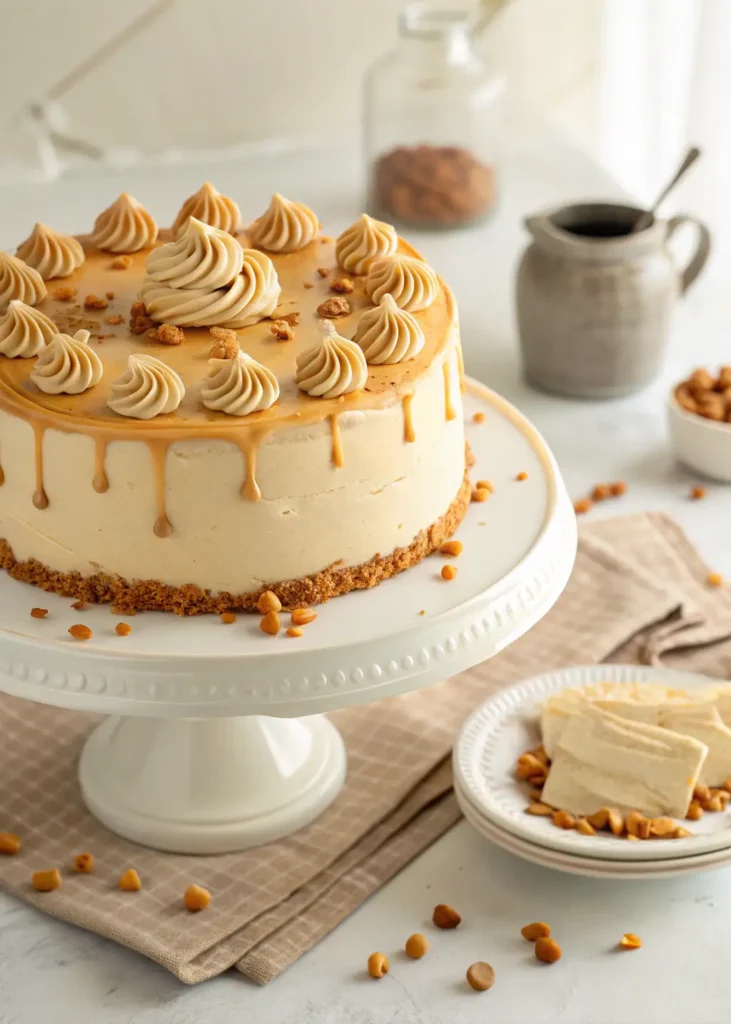
What Makes This Butterscotch Cake Special?
Unlike ordinary vanilla or chocolate cakes, this butterscotch cake delivers layers of complex flavor that dance on your taste buds. The secret lies in using brown sugar in the cake batter, homemade butterscotch sauce between layers, and a luscious butterscotch buttercream frosting.
Key Features:
- Ultra-moist texture from brown sugar and sour cream
- Triple butterscotch flavor in cake, filling, and frosting
- Perfect balance of sweet and salty notes
- Impressive presentation for birthdays and celebrations
Essential Ingredients for Perfect Butterscotch Cake
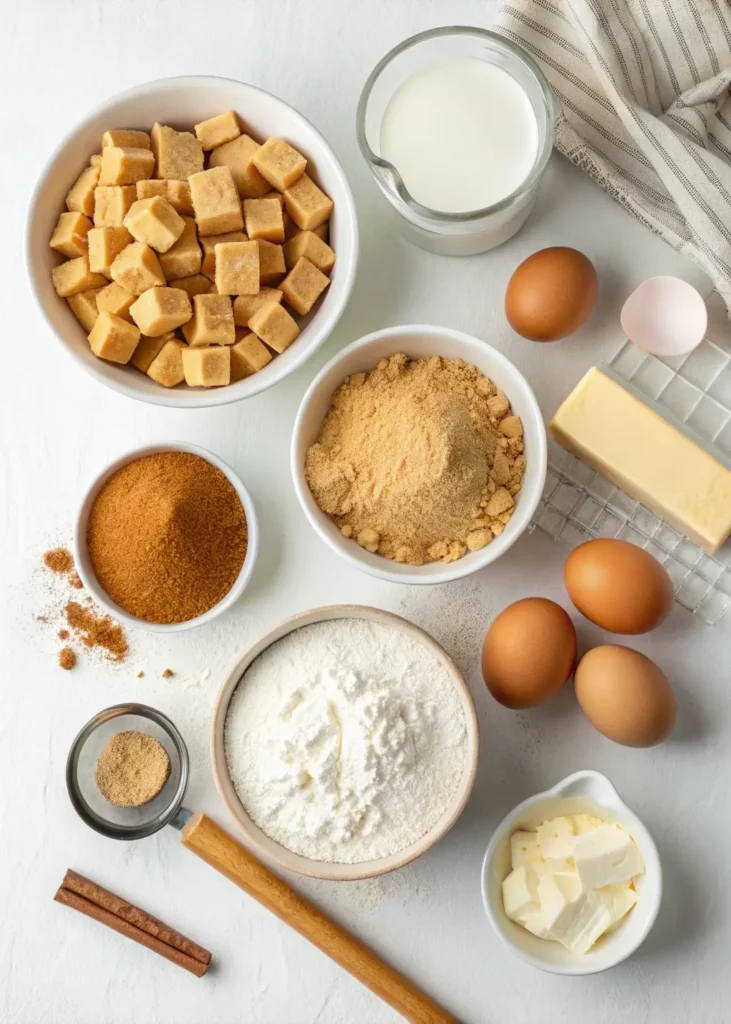
For the Cake Layers:
- 2½ cups all-purpose flour
- 2½ teaspoons baking powder
- ½ teaspoon salt
- ½ teaspoon ground cinnamon
- 2 sticks unsalted butter (room temperature)
- 1½ cups packed light brown sugar
- ½ cup granulated sugar
- 2 teaspoons vanilla extract
- 3 large eggs (room temperature)
- 1 cup sour cream (room temperature)
For the Butterscotch Buttercream:
- 2 cups powdered sugar (sifted)
- 2 sticks unsalted butter (room temperature)
- ¼ teaspoon salt
- 2 teaspoons vanilla extract
- 1⅓ cups butterscotch sauce (divided)
Step-by-Step Butterscotch Cake Instructions
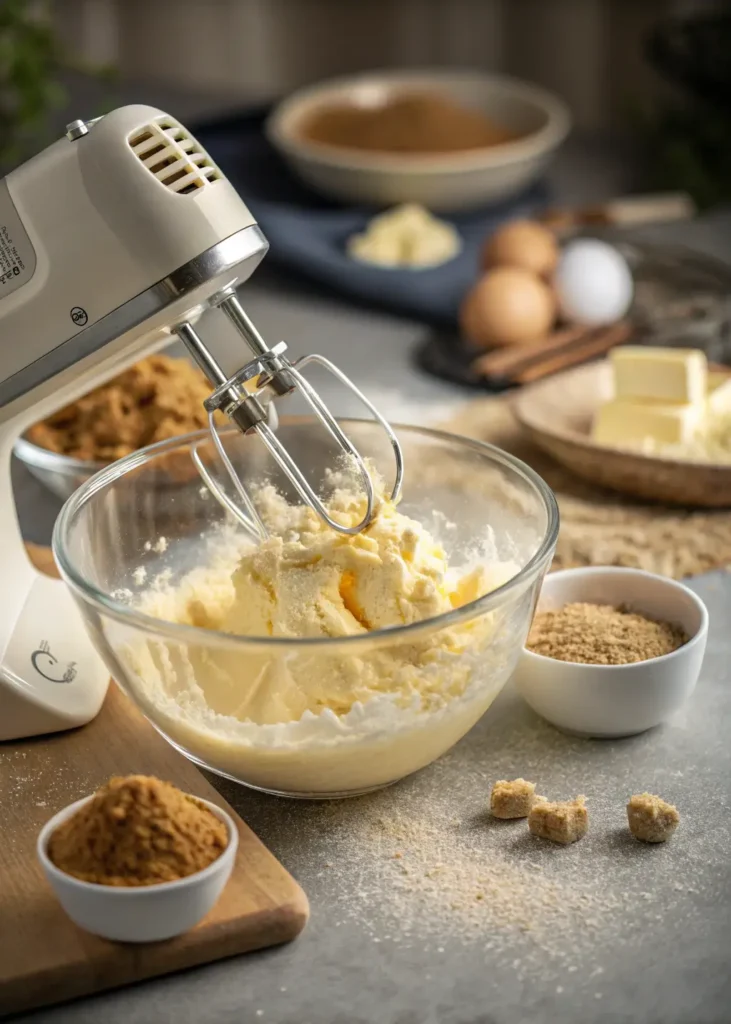
Preparing the Cake Layers
- Preheat and Prep: Heat oven to 350°F. Butter and flour two 8-inch cake pans, then line with parchment paper.
- Mix Dry Ingredients: Whisk together flour, baking powder, salt, and cinnamon in a medium bowl.
- Cream Butter and Sugars: Beat butter until smooth (1 minute). Add both sugars and beat on high for 3-4 minutes until light and fluffy.
- Add Wet Ingredients: Mix in vanilla and eggs until combined.
- Combine Everything: Alternately add flour mixture and sour cream, starting and ending with flour. Mix just until combined.
- Bake: Divide batter between pans. Bake 35 minutes or until toothpick comes out clean.
Making the Butterscotch Buttercream
- Beat powdered sugar and butter on low, then increase to medium for 2 minutes
- Add salt, vanilla, and ⅓ cup butterscotch sauce
- Beat on medium for 2 minutes until smooth and creamy
Assembly Instructions
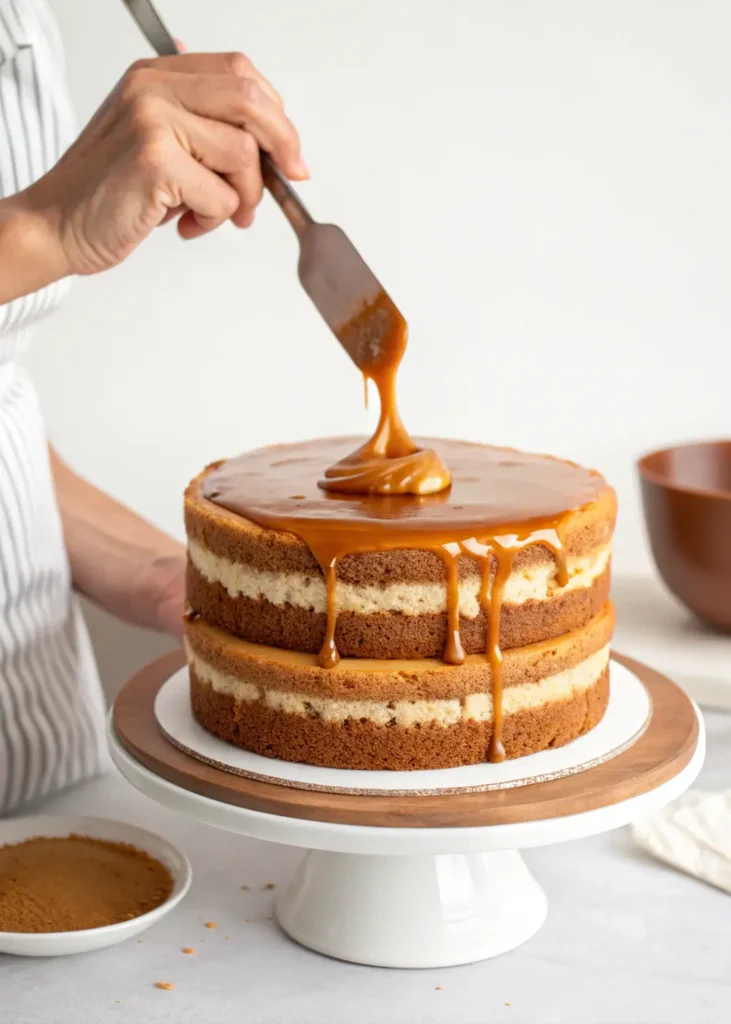
- Level Layers: Cut each cooled cake layer in half horizontally using a serrated knife
- Add Filling: Place first layer on serving plate. Spread ⅓ cup butterscotch sauce, leaving ½-inch border
- Repeat: Continue layering cake and sauce
- Crumb Coat: Apply thin frosting layer all around cake. Refrigerate 30 minutes
- Final Frosting: Apply remaining buttercream and decorate as desired
Pro Tips for the Best Butterscotch Cake
Moisture Secrets
- Don’t overbake – start checking doneness at 30 minutes
- Measure flour correctly – too much creates dry, dense cake
- Use room temperature ingredients for better mixing
- Slightly chill cake layers before frosting for easier handling
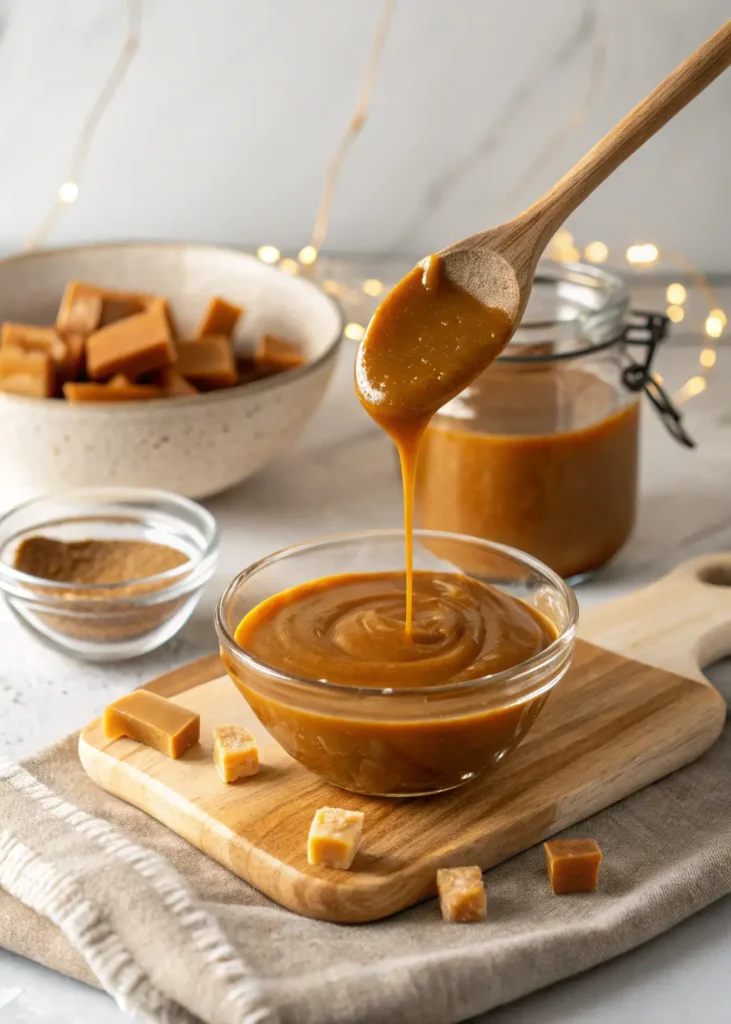
Butterscotch Sauce Tips
- Make homemade sauce for superior flavor
- Let sauce cool slightly before using as filling
- Save some sauce for drizzling on individual slices
Storage and Make-Ahead Options
- Cake layers: Wrap well and freeze up to 2 months
- Buttercream: Refrigerate up to 1 week or freeze 3 months
- Assembled cake: Room temperature 2-3 days covered, or refrigerate
Common Butterscotch Cake Questions
Q: Can I use store-bought butterscotch sauce? A: Yes, but homemade sauce provides richer flavor and better consistency for layering.
Q: Why is my butterscotch cake dry? A: Common causes include overbaking, too much flour, or using cold ingredients. Follow temperature and timing guidelines carefully.
Q: Can I make this butterscotch cake ahead of time? A: Absolutely! Cake layers freeze beautifully, and the assembled cake stays fresh for several days.
Q: What’s the best pan size for butterscotch cake? A: This recipe works perfectly with two 8-inch round pans. Light-colored pans prevent overbaking the edges.
Variations and Serving Suggestions
Flavor Variations:
- Add bourbon to butterscotch sauce for adult version
- Include chopped pecans in cake batter for crunch
- Salted caramel drizzle for extra indulgence
Serving Ideas:
- Serve with vanilla ice cream for temperature contrast
- Dust with cinnamon before serving
- Garnish with butterscotch chips for visual appeal
Why This Butterscotch Cake Recipe Works
This butterscotch cake succeeds because it builds flavor in layers. The brown sugar in the cake provides depth, the butterscotch sauce adds moisture and richness, while the buttercream brings everything together with creamy sweetness.
The combination of textures – tender cake, gooey sauce, and smooth frosting – creates an unforgettable eating experience that explains why butterscotch cake remains a beloved classic.
Final Thoughts
Making the perfect butterscotch cake requires attention to detail, but the results are absolutely worth the effort. This recipe delivers bakery-quality results in your home kitchen, creating a dessert that’s sure to impress family and friends.
Whether you’re celebrating a special occasion or simply treating yourself to something extraordinary, this butterscotch cake will quickly become your signature dessert. The rich, complex flavors and beautiful presentation make it a showstopper that tastes even better than it looks.
Ready to create your own butterscotch cake masterpiece? Gather your ingredients and let’s get baking!

Butterscotch Cake Recipe
Ingredients
Equipment
Method
- Preheat oven to 350°F. Grease and flour two 8-inch cake pans, line with parchment.
- Whisk flour, baking powder, salt, and cinnamon in medium bowl.
- Beat butter until smooth (1 min). Add sugars, beat 3-4 minutes until fluffy.
- Mix in vanilla and eggs until combined.
- Alternately add flour mixture and sour cream, starting/ending with flour.
- Divide batter between pans. Bake 35 minutes until toothpick clean.
- Beat sugar and butter, add salt, vanilla, ⅓ cup butterscotch sauce.
- Cut layers in half. Layer with butterscotch sauce, frost outside.
Notes
| Pin to Pinterest | Share on Facebook
Follow us On : Facebook and Pinterest