
Best Cannoli Cream Recipe – Authentic Italian Filling
Making authentic cannoli cream at home is easier than you think. This traditional Italian cannoli cream recipe uses simple ingredients to create the perfect sweet ricotta filling. Whether you’re filling store-bought shells or homemade ones, this cannoli cream recipe delivers bakery-quality results every time.
What Makes This Cannoli Cream Recipe Special
This isn’t just any ricotta filling. After testing dozens of variations, I’ve perfected a cannoli cream recipe that delivers authentic Italian pastry shop taste. The secret? Properly drained ricotta and the right balance of sweetness.
Unlike other versions that turn out watery or grainy, this cannoli cream recipe creates smooth, creamy filling that holds its shape beautifully and never makes your shells soggy.
Ingredients for Cannoli Cream Recipe
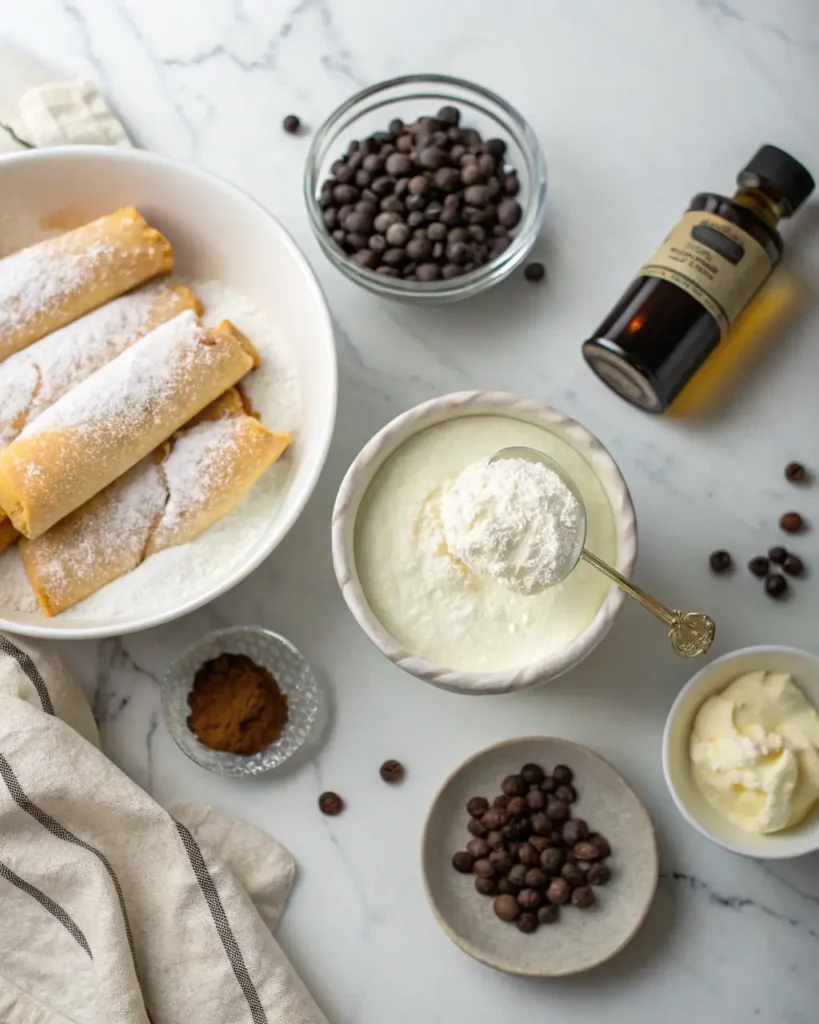
For the Basic Cream:
- 2 cups whole milk ricotta cheese (highest quality you can find)
- 1 cup powdered sugar (sifted)
- 1 teaspoon pure vanilla extract
- 1/4 cup mini chocolate chips
- Pinch of salt
Optional Add-ins:
- 2 tablespoons heavy cream (for extra smoothness)
- 1/4 teaspoon cinnamon
- 2 tablespoons chopped pistachios
- Candied orange peel (finely chopped)
The Critical First Step in This Cannoli Cream Recipe
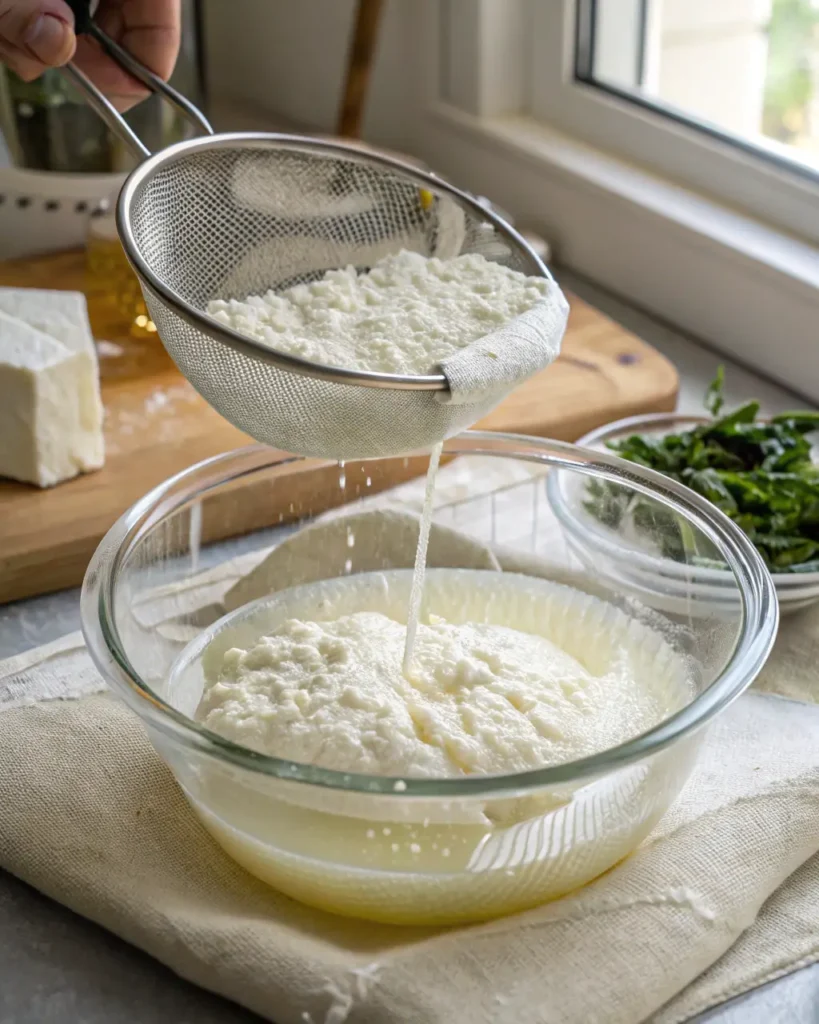
This is the most important step in any cannoli cream recipe. Skip this and your filling will be disappointing.
How to drain ricotta properly:
Place your ricotta in a fine-mesh strainer lined with cheesecloth or paper towels. Set it over a bowl, cover with plastic wrap, and refrigerate for at least 8 hours or overnight. For best results with this cannoli cream recipe, place a small weight on top (a can of beans works perfectly).
You’ll be amazed at how much liquid drains out. This step transforms grainy, wet ricotta into the perfect base for silky cannoli cream.
Pro tip: Don’t rush this step when making this cannoli cream recipe. The longer you drain (up to 24 hours), the better your results.
How to Make Cannoli Cream Recipe (Step by Step)
Once your ricotta is properly drained, this cannoli cream recipe takes just 5 minutes.
Step 1: Transfer the drained ricotta to a large mixing bowl. It should look thick and almost crumbly.
Step 2: Sift your powdered sugar to remove any lumps. This prevents gritty texture in your cannoli cream recipe.
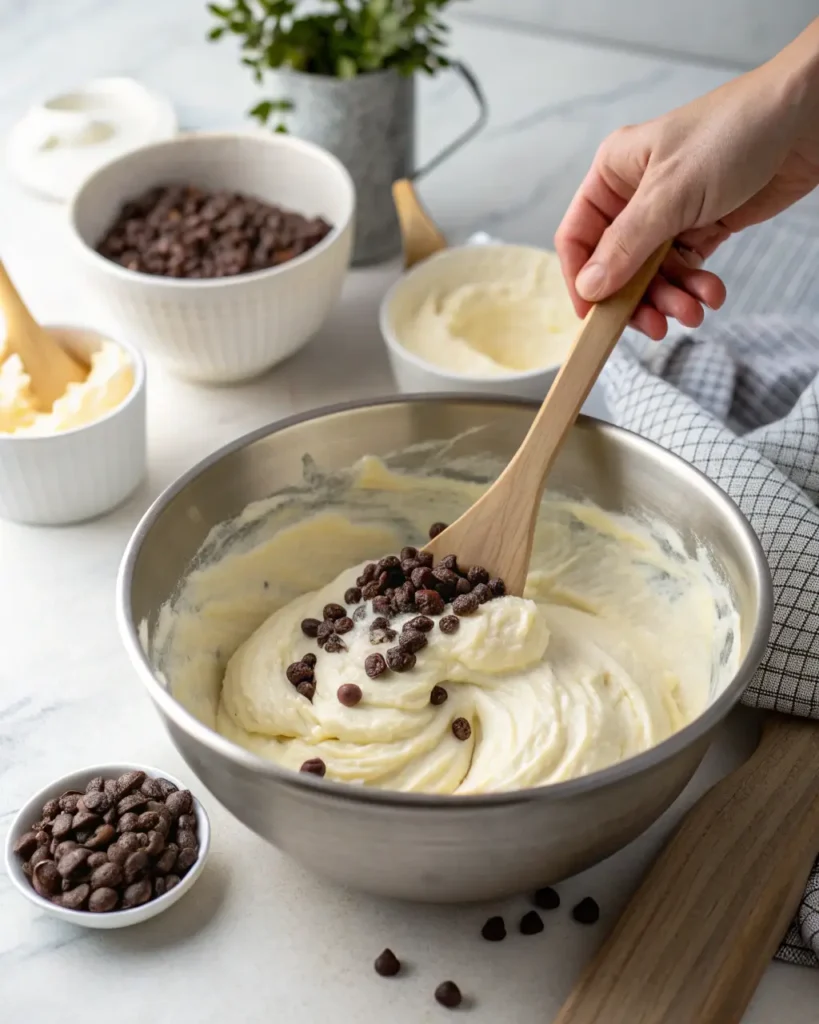
Step 3: Add the sifted powdered sugar to the ricotta. Using a rubber spatula or wooden spoon, fold gently until fully combined. Don’t use an electric mixer for this cannoli cream recipe as it can make the filling too loose.
Step 4: Fold in the vanilla extract and a pinch of salt. The salt enhances the sweetness and brings out the vanilla flavor.
Step 5: If you want creamier texture in your cannoli cream recipe, fold in 2 tablespoons of cold heavy cream at this point.
Step 6: Gently fold in mini chocolate chips just before filling your shells. If you add them too early in this cannoli cream recipe, they’ll bleed color into the white cream.
Making Your Cannoli Cream Recipe Extra Creamy
Traditional filling has a slightly grainy texture from the ricotta. If you prefer ultra-smooth filling, here are three techniques for your cannoli cream recipe:
Method 1 – Heavy Cream: Add 2-4 tablespoons of cold heavy cream to your cannoli cream recipe and fold gently. This creates a mousse-like texture.
Method 2 – Whipped Ricotta: Before draining for your cannoli cream recipe, pulse your ricotta in a food processor for 30 seconds. Then drain as normal.
Method 3 – Mascarpone Blend: Replace 1/2 cup of ricotta with mascarpone cheese in your cannoli cream recipe for incredible richness.
Flavor Variations for Cannoli Cream Recipe
Once you master the basic cannoli cream recipe, try these delicious variations:
Chocolate Cannoli Cream Recipe: Fold in 3 tablespoons of cocoa powder with the sugar. Add extra chocolate chips for intense flavor.
Pistachio Cannoli Cream Recipe: Replace chocolate chips with finely chopped pistachios. Add a few drops of almond extract.
Orange Cannoli Cream Recipe: Add 1 teaspoon of orange zest and 1/4 teaspoon orange extract to your cannoli cream recipe. Fold in candied orange peel instead of chocolate chips.
Espresso Cannoli Cream Recipe: Dissolve 2 teaspoons of instant espresso powder in 1 tablespoon of warm water. Cool completely, then fold into your cannoli cream recipe.
How to Fill Cannoli Shells
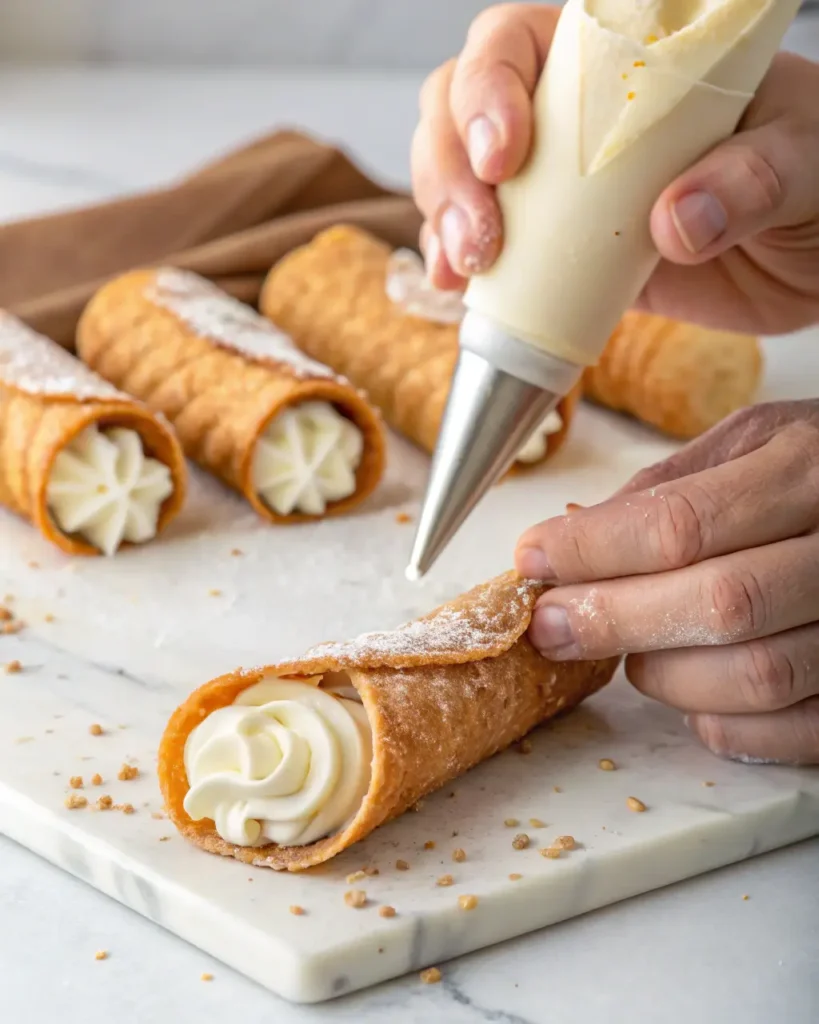
The filling technique matters just as much as the cannoli cream recipe itself.
Using a piping bag (recommended): Transfer your filling to a large piping bag. Cut a 1-inch opening at the tip. Pipe from one end of the shell, filling halfway, then flip and fill from the other end.
Without a piping bag: Use a small spoon or butter knife to fill from both ends. Work slowly to avoid breaking the delicate shells.
Important timing: Only fill cannoli shells 1-2 hours before serving when using this cannoli cream recipe. Fill them too early and they’ll get soggy.
Common Cannoli Cream Recipe Mistakes
Problem: Watery, runny filling that makes shells soggy. Solution: You didn’t drain the ricotta long enough for this cannoli cream recipe. Always drain at least 8 hours.
Problem: Grainy, gritty texture. Solution: Use whole milk ricotta (not part-skim) and sift your powdered sugar.
Problem: Filling is too sweet. Solution: Reduce powdered sugar to 3/4 cup in your cannoli cream recipe and add extra salt.
Problem: Chocolate chips sink to the bottom. Solution: Use mini chips and fold them in gently just before filling.
Problem: Cream tastes bland. Solution: Use pure vanilla extract (not imitation) in your cannoli cream recipe and don’t forget that pinch of salt.
Storing Your Cannoli Cream Recipe
Unfilled cream: Store this cannoli cream-recipe in an airtight container in the refrigerator for up to 3 days. The texture actually improves after a day.
Filled cannoli: These are best eaten within 2 hours. If you must store them, keep in the refrigerator for no more than 4 hours.
Freezing: You can freeze this cannoli cream-recipe for up to 1 month. Thaw overnight in the refrigerator and stir well before using.
What Ricotta Works Best
The quality of your ricotta makes or breaks this cannoli cream-recipe.
Best choice: Fresh ricotta from an Italian market or specialty cheese shop. It has the best flavor and texture.
Good choice: Whole milk ricotta from brands like Belgioioso, Calabro, or Galbani. Look for ricotta with minimal ingredients.
Avoid: Part-skim ricotta or store brands with gums and stabilizers. These create gummy texture.
If you can only find standard supermarket ricotta, the draining step becomes even more critical for your cannoli cream-recipe.
Expert Tips for Perfect Results
Keep everything cold: Work with chilled ricotta and cold heavy cream when making this cannoli cream recipe. Warm ingredients create a loose, runny filling.
Fold, don’t stir: Gentle folding keeps the cream light and fluffy. Aggressive stirring makes it dense.
Taste and adjust: Everyone’s sweetness preference is different. Start with 3/4 cup sugar, taste, and add more if needed.
Use mini chocolate chips: Regular chips are too heavy and will sink. Mini chips distribute evenly.
Fill shells at the last minute: Crispy shells are what make cannoli special.
Serving Suggestions
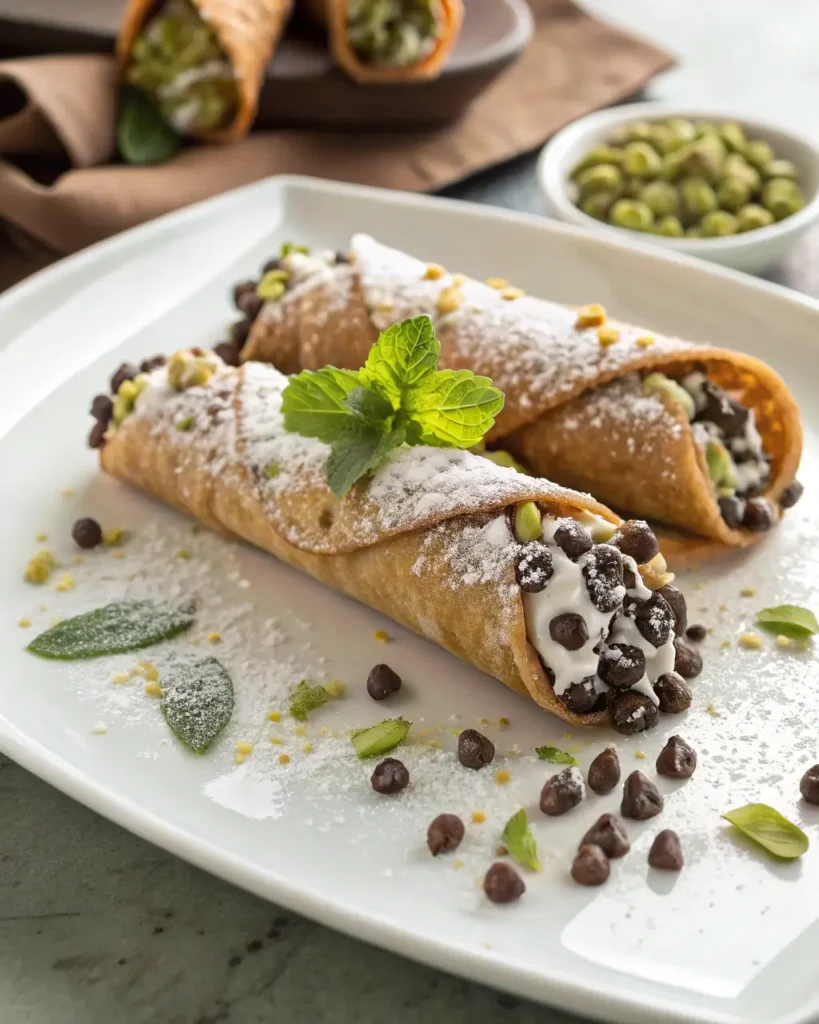
Dust filled cannoli with extra powdered sugar just before serving for that classic bakery look.
Dip the ends in chopped pistachios, mini chocolate chips, or candied orange peel for beautiful presentation.
Serve as a dessert dip with broken pizzelle cookies, biscotti, or fresh fruit.
For parties, set up a cannoli bar where guests fill their own shells. Keep the cream chilled in a bowl.
Make-Ahead Instructions
You can prepare this cannoli cream-recipe 2-3 days in advance, which makes entertaining easier.
Make the filling through Step 5, but don’t add chocolate chips yet. Store covered in the refrigerator. The day of serving, stir gently, fold in chocolate chips, and fill shells.
Why This Cannoli Cream Recipe Works
After making cannoli hundreds of times, I’ve learned exactly what creates perfect bakery-quality filling.
The overnight draining removes excess moisture. Sifting the powdered sugar ensures smoothness. Folding by hand keeps the texture light. Adding chocolate chips at the last minute prevents color bleeding.
These aren’t just suggestions—they’re the difference between mediocre cannoli and extraordinary ones.
Frequently Asked Questions
Can I make this cannoli cream-recipe with low-fat ricotta? I don’t recommend it. Part-skim ricotta creates a watery, less flavorful filling. Whole milk ricotta is essential.
Do I have to drain the ricotta? Yes. This is the single most important step in this cannoli cream-recipe. Without draining, you’ll have watery filling.
Can I use a mixer? No. Electric mixers over-work the ricotta and create loose consistency. Always fold by hand.
How far ahead can I make this cannoli cream-recipe? Up to 3 days ahead, stored covered in the refrigerator. Don’t add chocolate chips until ready to fill.
My filling is too thick. What do I do? Fold in heavy cream, one tablespoon at a time, until you reach desired consistency.
Can I use this cannoli cream-recipe for other desserts? Absolutely! It’s delicious as filling for crepes, layered in parfaits, or served as dip.
Now you have everything you need to make this authentic cannoli cream-recipe at home. Remember: drain the ricotta overnight, work gently, and fill shells at the last minute. This cannoli cream-recipe will create cannoli that taste like they came straight from an Italian pastry shop.
| Pin to Pinterest | Share on Facebook
Follow us On : Facebook and Pinterest