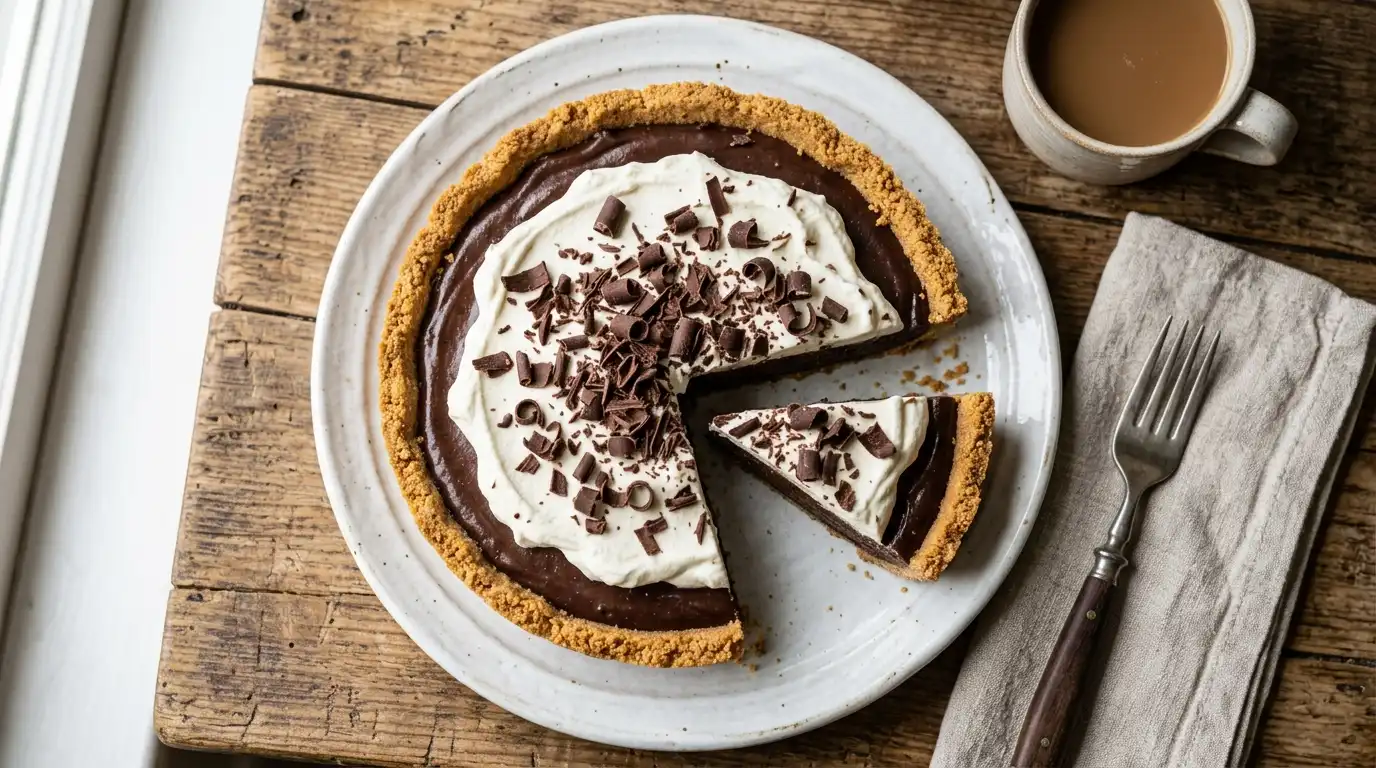
Chocolate Pudding Pie (No-Bake, 20-Minute Recipe)
This classic chocolate pudding pie recipe is the dessert most people search for when they want something rich, chocolatey, and ready without turning on the oven. Below you’ll find the exact ratios, the mistake that keeps most homemade chocolate pudding pie from setting properly, and a full FAQ covering the questions people ask most.
Quick Answer
Chocolate pudding pie is a chilled dessert made from a rich chocolate pudding filling set inside a graham cracker crust and topped with whipped cream. The easiest version uses instant chocolate pudding mix and takes about 20 minutes of hands-on work — no oven, no eggs to temper, and no stovetop cooking. For a richer, bakery-style version, you can make the filling from scratch with a cooked custard base instead of instant mix. Both versions chill for at least 3–4 hours before serving.
This guide covers the no-bake instant pudding method (the fastest and most popular way to make it), plus how it compares to the from-scratch custard version, exact pudding-to-milk ratios, and answers to the most common questions people have before they start.
What Is Chocolate Pudding Pie?
Chocolate pudding pie is exactly what it sounds like: a chocolate pudding filling poured into a pre-made crust and chilled until firm enough to slice. It sits somewhere between a cheesecake and a classic cream pie — dense enough to hold a clean slice, but soft and silky like pudding.
There are two ways people make chocolate pudding pie:
- No-bake with instant pudding mix — the filling sets in the fridge using cornstarch that’s already in the pudding mix. This is the version most home cooks make because it takes minutes and doesn’t require a stovetop.
- From-scratch cooked custard — the filling is cooked on the stove with egg yolks, milk, sugar, and real chocolate, similar to a chocolate pastry cream. It has a deeper, more “real chocolate” flavor but takes longer and requires more technique (tempering eggs, watching for lumps).
Both use the same basic crust: graham cracker (most common), Oreo, or a baked pastry shell. If you haven’t made a crust from scratch before, our graham cracker crust recipe walks through the exact ratio and the trick that keeps it from crumbling when you slice the pie.
No-Bake Chocolate Pudding Pie vs. Baked Custard: Which Should You Make?
| No-Bake (Instant Pudding) | Baked Custard (From Scratch) | |
|---|---|---|
| Time | ~20 min active + 3-4 hrs chilling | ~45 min active + overnight chilling |
| Skill level | Beginner | Intermediate (requires tempering eggs) |
| Texture | Light, mousse-like | Dense, silky, more like a pastry cream |
| Flavor | Good, slightly “boxed” chocolate taste | Richer, tastes like real melted chocolate |
| Best for | Weeknights, potlucks, kids’ desserts | Holidays, dinner parties, from-scratch bakers |
If this is your first time making chocolate pudding pie, start with the no-bake version below. It’s the one most people are searching for, and it’s nearly impossible to mess up.
No-Bake Chocolate Pudding Pie (Full Recipe)
Ingredients
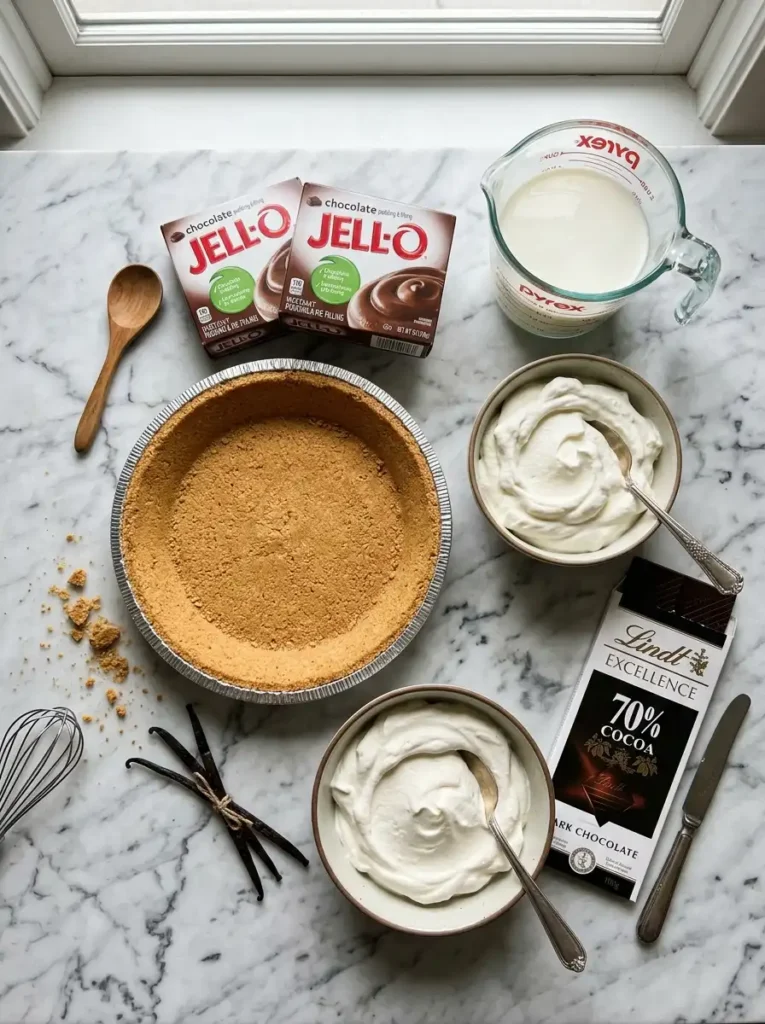
For the crust:
- 1 pre-made 9-inch graham cracker crust (store-bought), or 1 homemade crust using this graham cracker crust recipe
For the filling:
- 2 boxes (3.9 oz / 110g each) instant chocolate pudding mix
- 2 ½ cups cold whole milk (less than the package calls for — this is what makes it firm enough to slice)
- 1 cup heavy cream, whipped to soft peaks (or 8 oz tub of whipped topping, thawed)
For topping:
- Whipped cream or extra whipped topping
- 1–2 oz chocolate bar, shaved or grated, for garnish
Instructions
Step 1: Whisk the pudding.
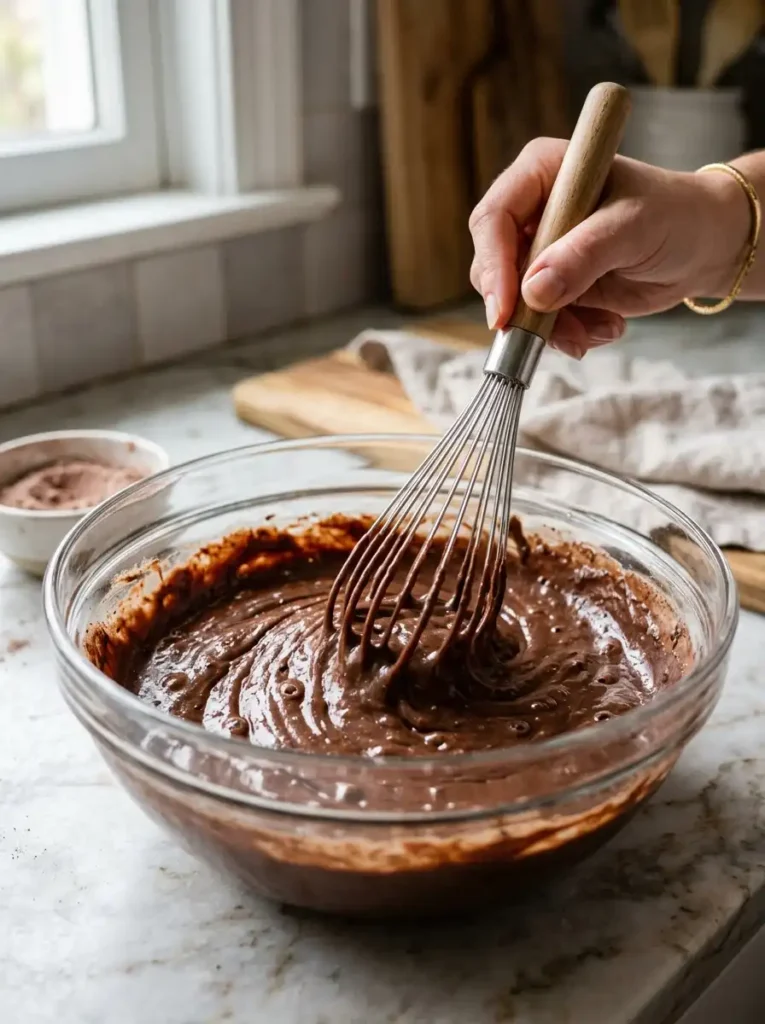
In a large bowl, whisk both boxes of instant pudding mix with the cold milk for about 2 minutes, until it starts to thicken. Using less milk than the box instructions is what gives the pie a firm, sliceable texture instead of a soft, spoonable one.
Step 2: Fold in the whipped cream.
Once the pudding has thickened (it will look like soft-set pudding, not liquid), gently fold in about half of the whipped cream or whipped topping. This lightens the texture and keeps the pie from tasting too dense.
Step 3: Fill the crust.

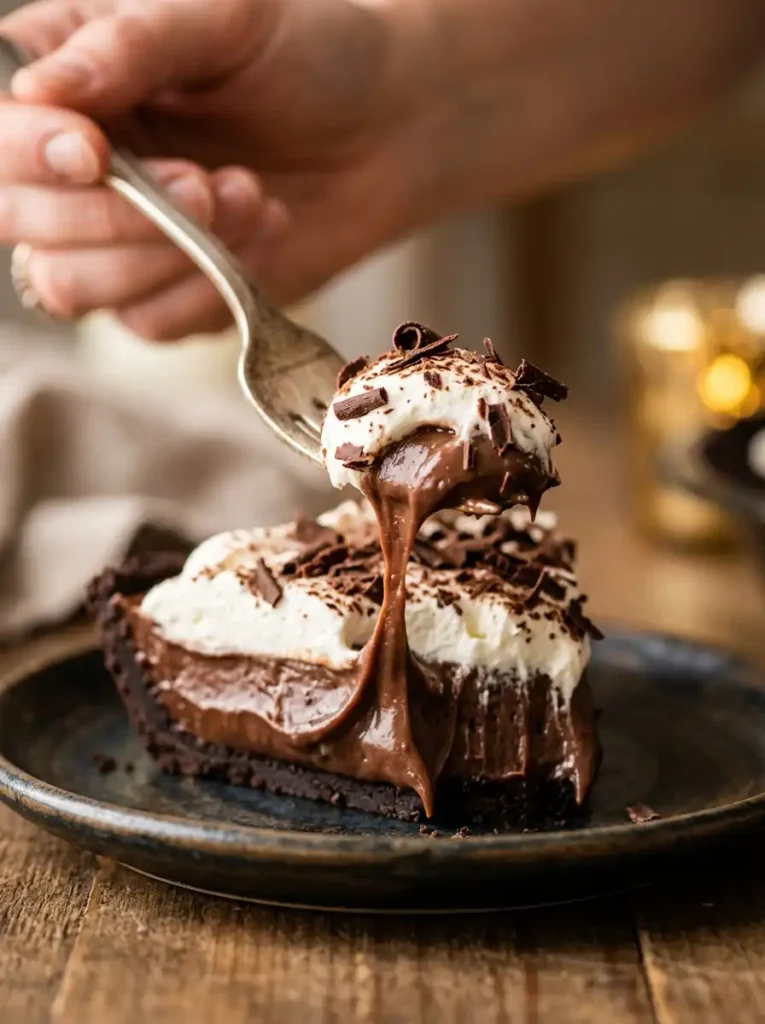
Pour the pudding mixture into your graham cracker crust and smooth the top with a spatula. This is what turns the filling into an actual chocolate pudding pie instead of just a bowl of pudding. Press a piece of plastic wrap directly onto the surface of the filling — this stops a skin from forming while it chills.
Step 4: Chill.
Refrigerate for at least 3–4 hours, or until fully set. Overnight is even better if you have the time.
Step 5: Top and serve.
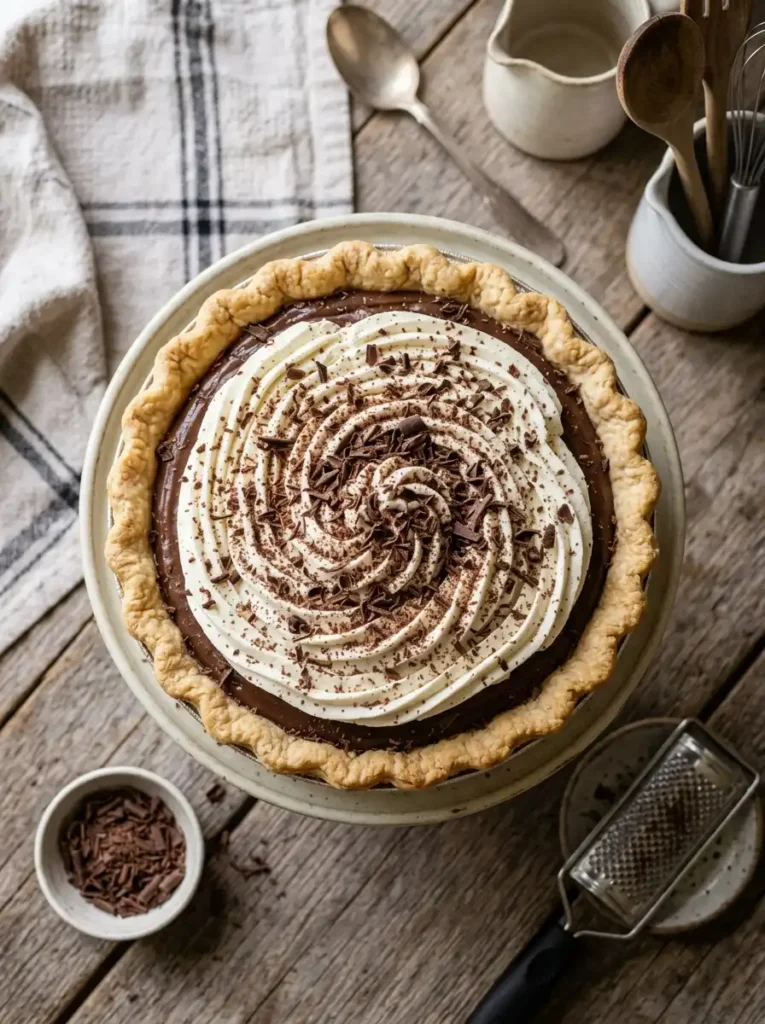
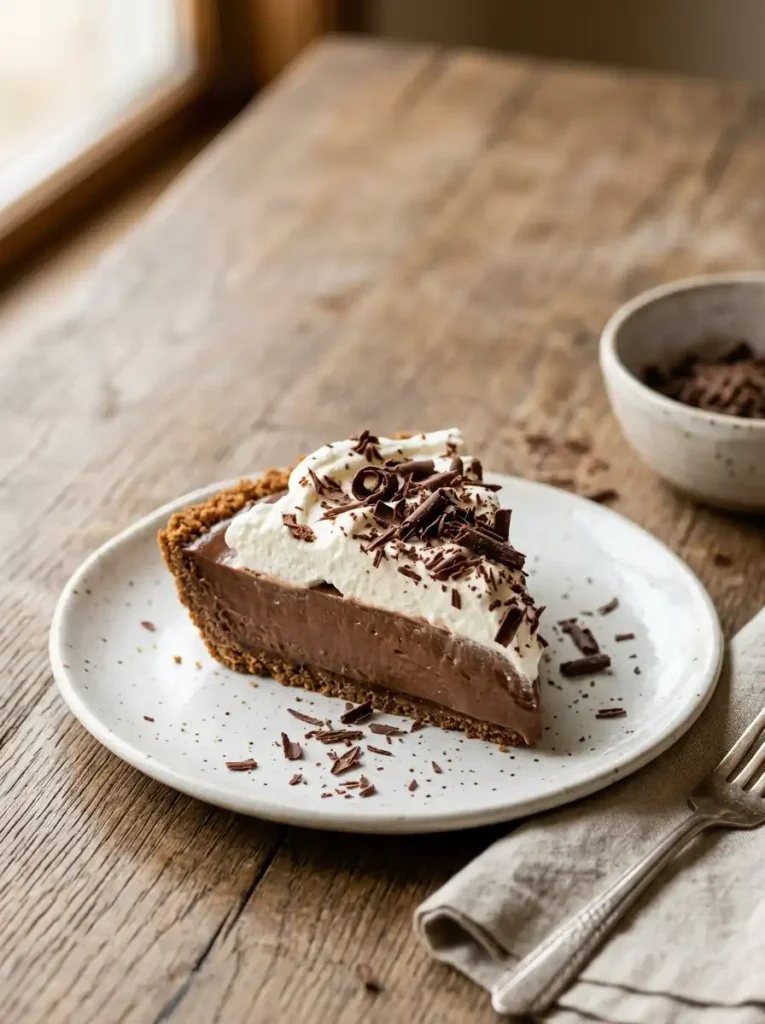
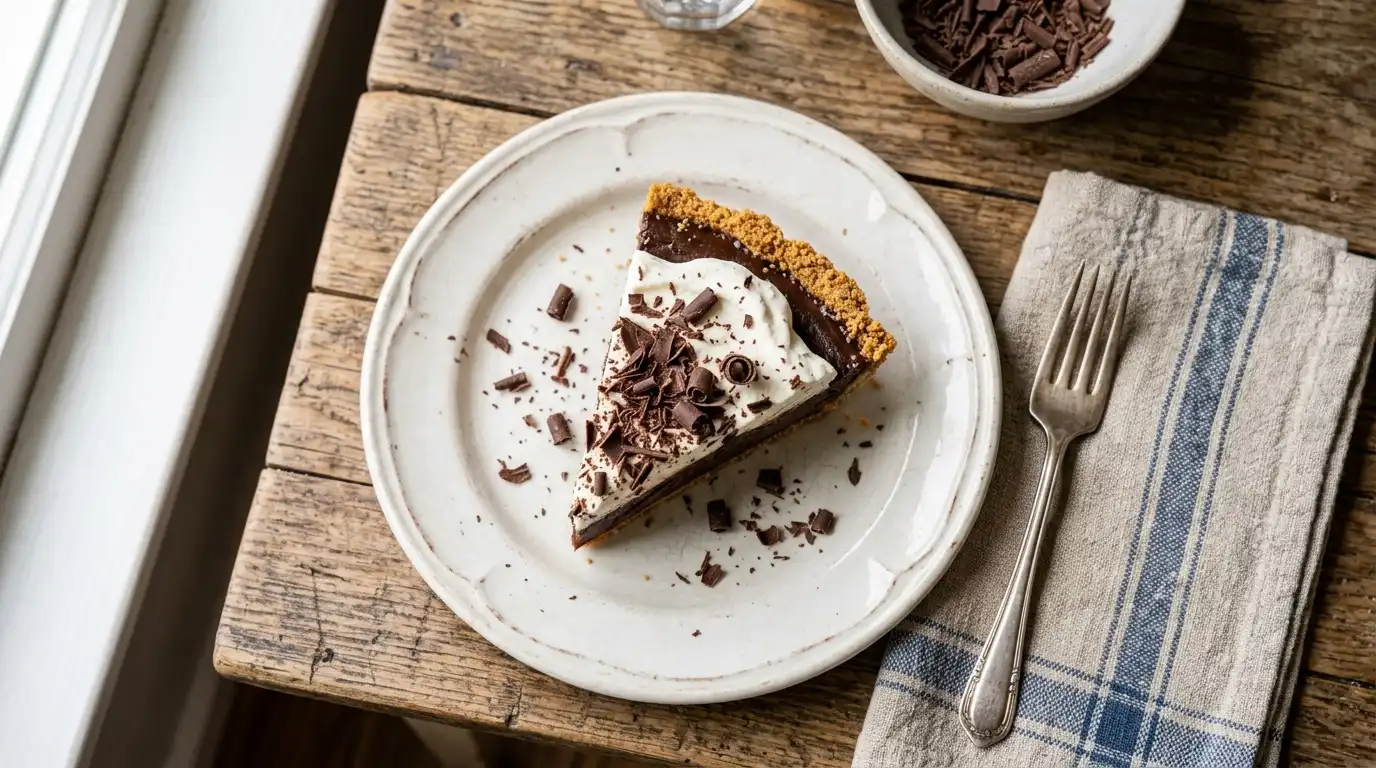
Remove the plastic wrap, spread the remaining whipped cream over the top, and finish with grated chocolate. Slice with a warm, clean knife for neat pieces.
Makes one 9-inch pie — about 8 servings.
How Many Boxes of Pudding Do You Need for a Chocolate Pudding Pie?
For a standard 9-inch chocolate pudding pie, you need 2 boxes (3.9 oz each) of instant pudding mix. One box alone makes a thin filling that won’t fill the crust properly or hold a clean slice. If you’re using the small 3.4 oz boxes instead of 3.9 oz, the ratio is the same — just reduce the milk slightly (start with 2 cups instead of 2 ½).
How Much Milk Do You Add to Pudding for a Pie?
Use less milk than the pudding box recommends for a “cup” of pudding — about 2 to 2 ½ cups for two boxes of instant mix, instead of the usual 3 cups. Less milk means less water content, which means your chocolate pudding pie filling sets up firm enough to slice cleanly instead of oozing when you cut into it.
Baked Custard Chocolate Pudding Pie (From Scratch)
If you want the richer, more “real chocolate” version of chocolate pudding pie, the method is different:
- Temper egg yolks into hot milk (never add cold yolks directly to hot liquid — it will scramble them)
- Cook the custard on the stove over low heat, stirring constantly, until it coats the back of a spoon
- Stir in chopped chocolate and vanilla until melted and smooth
- Pour into a pre-baked pie shell
- Chill overnight before topping with whipped cream
This version takes longer and requires more attention, but it’s worth it for special occasions. We’ll be publishing a full step-by-step version of this method soon — for now, our flourless chocolate torte uses a similar technique with whipped eggs and melted chocolate if you want to practice the method first.
Tips for the Best Texture
- Prevent a soggy crust: Brush a thin layer of melted chocolate over the baked crust before adding the filling. It creates a barrier so the crust stays crisp instead of absorbing moisture from the pudding.
- Prevent a skin from forming: Press plastic wrap directly onto the surface of the filling while it chills — not over the top of the pan, but touching the pudding itself.
- For the cleanest slices: Dip your knife in warm water and wipe it dry between cuts.
- Don’t rush the chill time: A pie that hasn’t fully set will slide apart when you slice it. If you’re not sure, give it another hour.
Chocolate Pudding Pie Variations
- Oreo crust: Swap the graham cracker crust for a crushed Oreo crust for a more chocolate-forward pie.
- Cream cheese layer: Beat 8 oz of softened cream cheese with ¼ cup powdered sugar and spread it over the crust before adding the pudding layer, for a cheesecake-style chocolate pudding pie.
- Mocha version: Add 1 teaspoon of espresso powder to the pudding mix while whisking for a subtle coffee flavor that deepens the chocolate.
- Make it dairy-free: Use full-fat coconut milk in place of whole milk and a dairy-free whipped topping.
Storage and Make-Ahead
Chocolate pudding pie keeps well, which makes it a good make-ahead dessert for gatherings.
- Refrigerator: Covered, chocolate pudding pie keeps for up to 4 days.
- Make-ahead: You can make the full pie up to 2 days in advance. Add the whipped cream topping and chocolate garnish just before serving so it stays fresh-looking.
- Freezing: Not recommended for the finished pie — the pudding filling can separate and turn watery when thawed. If you want to prep ahead, freeze just the baked crust for up to 1 month, then make the filling fresh.
Chocolate Pudding Pie FAQ
Can I use Jell-O instant pudding to make chocolate pudding pie?
Yes — Jell-O instant chocolate pudding is what most people use for this recipe. Follow the reduced-milk method above (2–2 ½ cups instead of the amount listed on the box) so the filling firms up enough to slice.
Can I make chocolate pudding pie with cook-and-serve pudding instead of instant?
Yes, but the method changes. Cook-and-serve pudding needs to be prepared on the stovetop according to the package directions, then cooled slightly before pouring into the crust. It sets up denser than instant pudding.
How far in advance can I make chocolate pudding pie?
Up to 2 days ahead. Keep it covered in the fridge and add the whipped cream topping right before serving.
Why is my chocolate pudding pie not setting?
The most common cause is too much milk. If you followed the standard pudding box instructions instead of the reduced-milk method above, the filling will be too soft to hold a slice. Try using less milk next time, and make sure you chill it for the full 3–4 hours.
Can I use whipped cream instead of Cool Whip in chocolate pudding pie?
Yes. Whip 1 cup of heavy cream with 2 tablespoons of powdered sugar to soft peaks as a substitute for an 8 oz tub of whipped topping.
Looking for more no-bake desserts besides chocolate pudding pie? Try our turtle cheesecake or strawberry cake and cheesecake for another make-ahead crowd-pleaser.
No-Bake Chocolate Pudding Pie
Ingredients
Equipment
Method
- Whisk the pudding: In a large bowl, whisk both boxes of instant pudding mix with the cold milk for about 2 minutes, until it starts to thicken. Using less milk than the box instructions is what gives the pie a firm, sliceable texture instead of a soft, spoonable one.
- Fold in the whipped cream: Once the pudding has thickened, gently fold in about half of the whipped cream or whipped topping. This lightens the texture and keeps the pie from tasting too dense.
- Fill the crust: Pour the pudding mixture into your graham cracker crust and smooth the top with a spatula. Press a piece of plastic wrap directly onto the surface of the filling to stop a skin from forming while it chills.
- Chill: Refrigerate for at least 3-4 hours, or until fully set. Overnight is even better if you have the time.
- Top and serve: Remove the plastic wrap, spread the remaining whipped cream over the top, and finish with grated chocolate. Slice with a warm, clean knife for neat pieces.