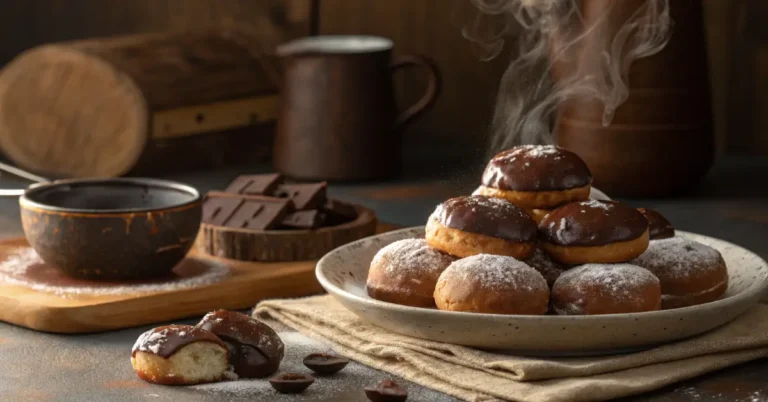
How to Make Oreo Balls (Truffles): The Ultimate No-Bake Guide
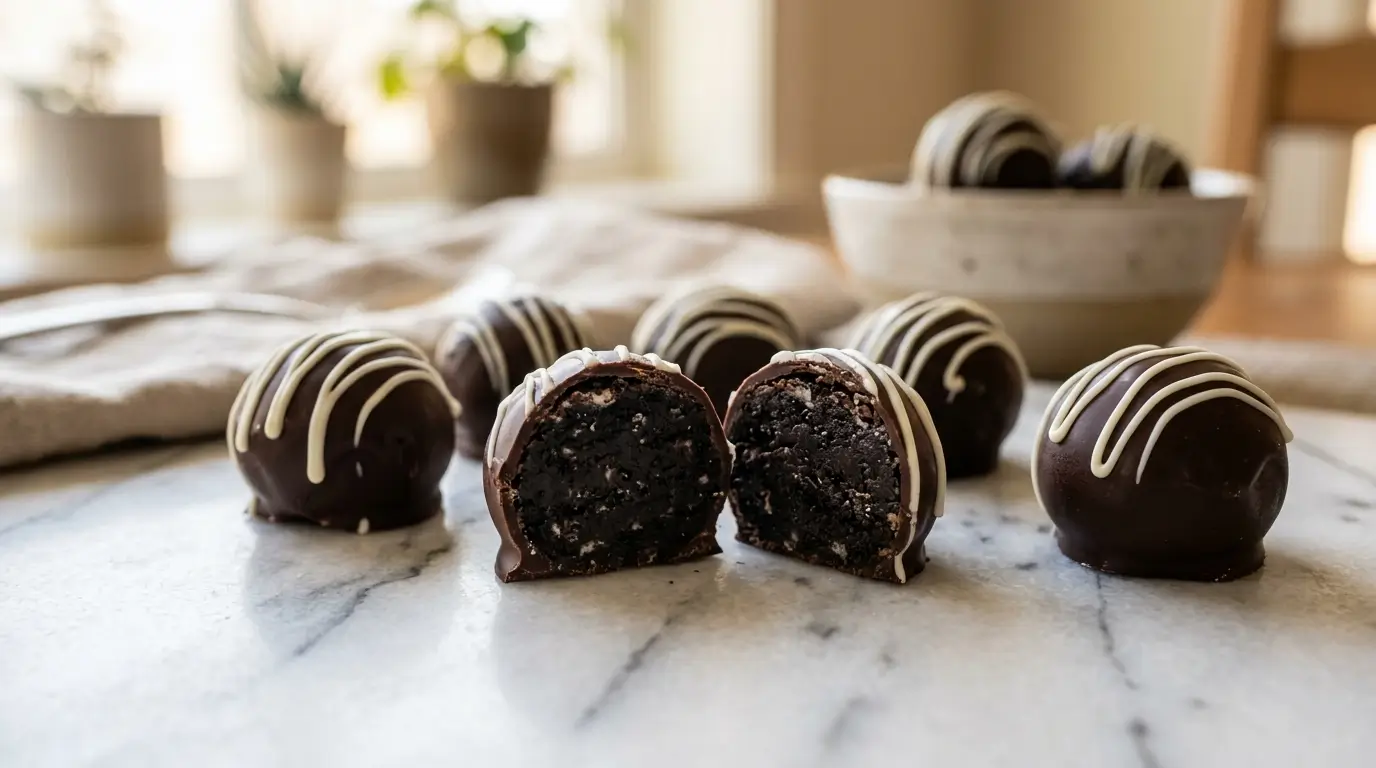
If you are looking for the king of no-bake desserts, you have found it. These oreo balls are more than just a quick snack; they are a decadent, cheesecake-like truffle cloaked in a professional chocolate shell. While many recipes give you the basics, this guide dives into the science of the “snap,” the secret to a non-greasy filling, and how to achieve a bakery-standard finish every single time.
Why These Are the Best Oreo Balls You Will Ever Make
Most people struggle with truffles that are too mushy or chocolate that flakes off the moment you take a bite. We have refined this process to ensure a stable structure and a rich flavor profile. By balancing the high sugar content of the cookies with specific cream cheese temperatures and high-quality fats, these oreo balls stand out on any dessert platter. Whether it is for a holiday party or a weekend treat, this recipe is designed for reliability.
The Essential 4-Ingredient Foundation
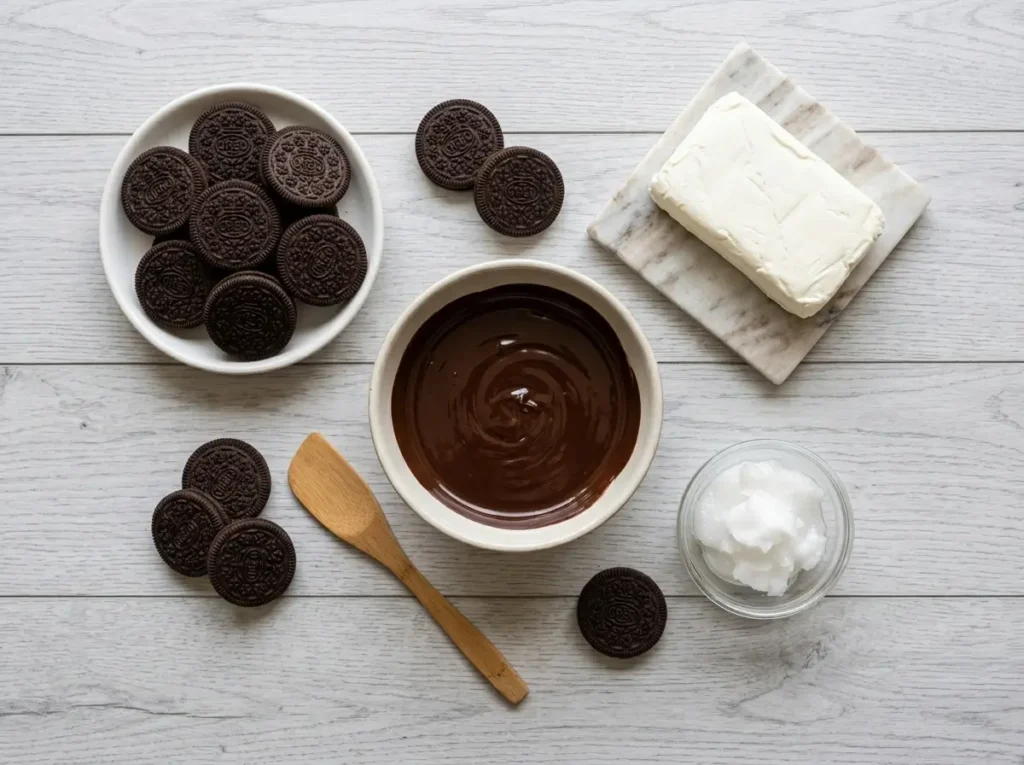
Success starts with the quality of your components. Do not settle for generic brands if you want a premium result.
- Classic Oreo Cookies: You need exactly 36 cookies. We recommend the original version rather than “Double Stuf” because the ratio of wafer to cream is critical for the binding process.
- Full-Fat Brick Cream Cheese: Avoid the spreadable tubs. The stabilizers in tub cream cheese are too soft, which leads to “slumping” truffles.
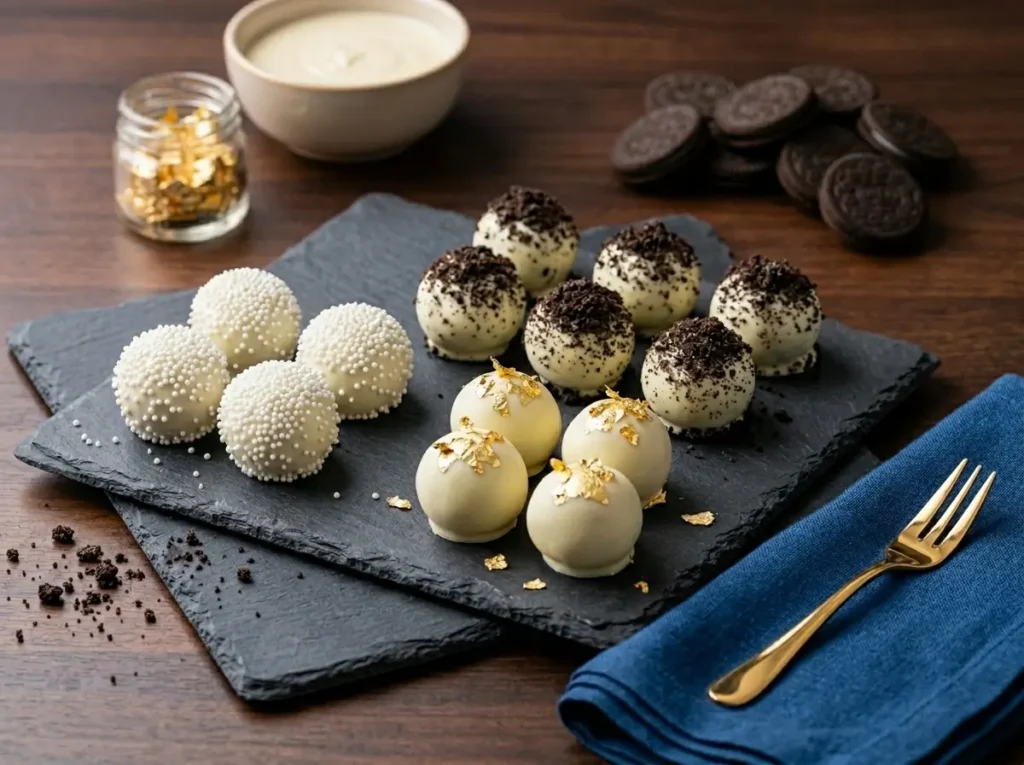
- High-Quality Baking Chocolate: Use bars with at least 60% cocoa butter for dark chocolate or real cocoa butter for white chocolate. Avoid standard chocolate chips as they contain paraffin and soy lecithin designed to hold their shape, not melt smoothly.
- Refined Coconut Oil: A half-teaspoon added to your chocolate provides that professional “sheen” and makes the dipping process significantly more fluid.
Step-By-Step: Mastering the Oreo Balls Process
1. Achieving the Perfect Crumb Texture
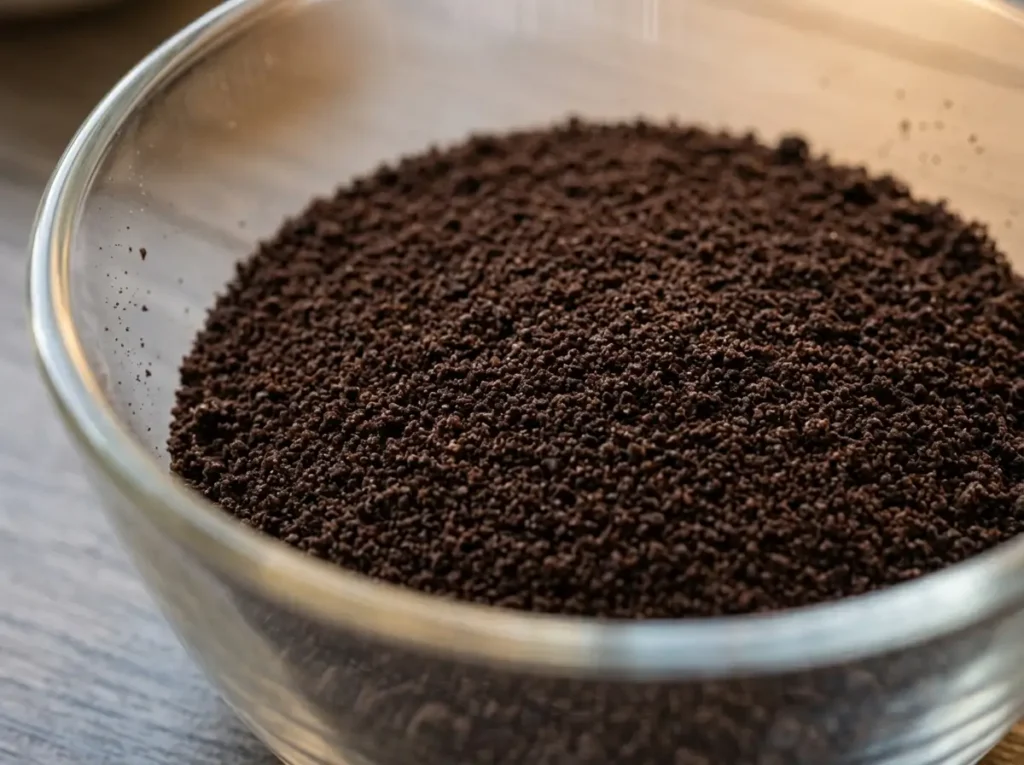
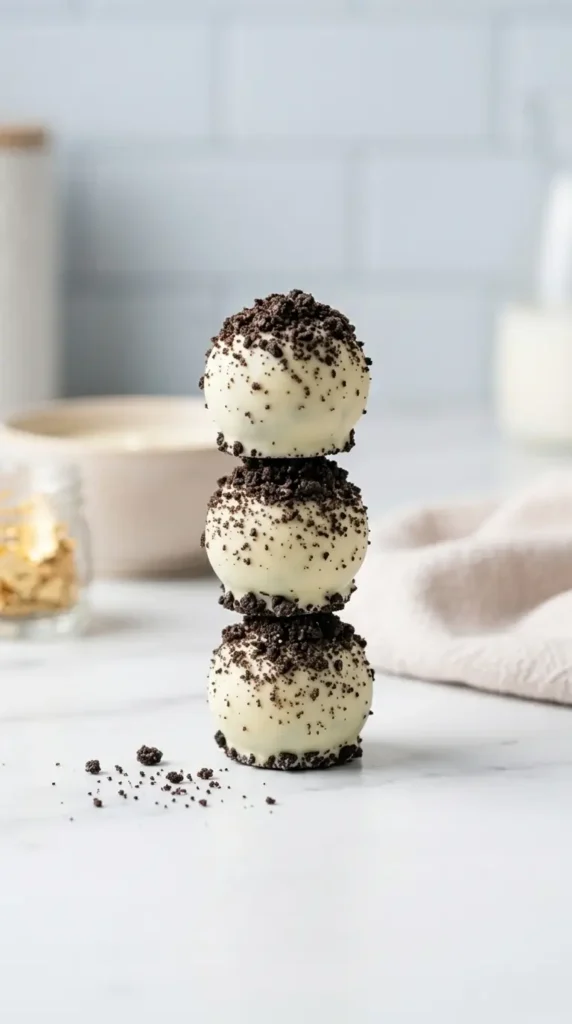
The biggest mistake beginners make is leaving large chunks of cookie in the mix. For the most luxurious mouthfeel, your Oreo crumbs should resemble fine sand. Use a high-powered food processor and pulse until the mixture is uniform. If you see white flecks of cream, keep pulsing. This ensures that the cream cheese integrates perfectly, creating a homogenous “dough” rather than a lumpy paste.
2. The Science of the Cream Cheese Integration
Your cream cheese must be at true room temperature. If it is too cold, you will get “white spots” in your dark filling. Mix the cream cheese into the crumbs until no streaks remain. The resulting mixture should be dark, glossy, and pliable.
3. Precision Rolling and Chilling
Use a small 1-tablespoon scoop to ensure every one of your oreo balls is identical in size. This isn’t just for aesthetics; uniform size means they will all chill and set at the same rate. Once rolled, they must be chilled for at least 45 minutes. A cold center is what allows the chocolate to set instantly upon contact, preventing the filling from “bleeding” into your dipping bowl.
Pro-Level Dipping Techniques for Oreo Balls
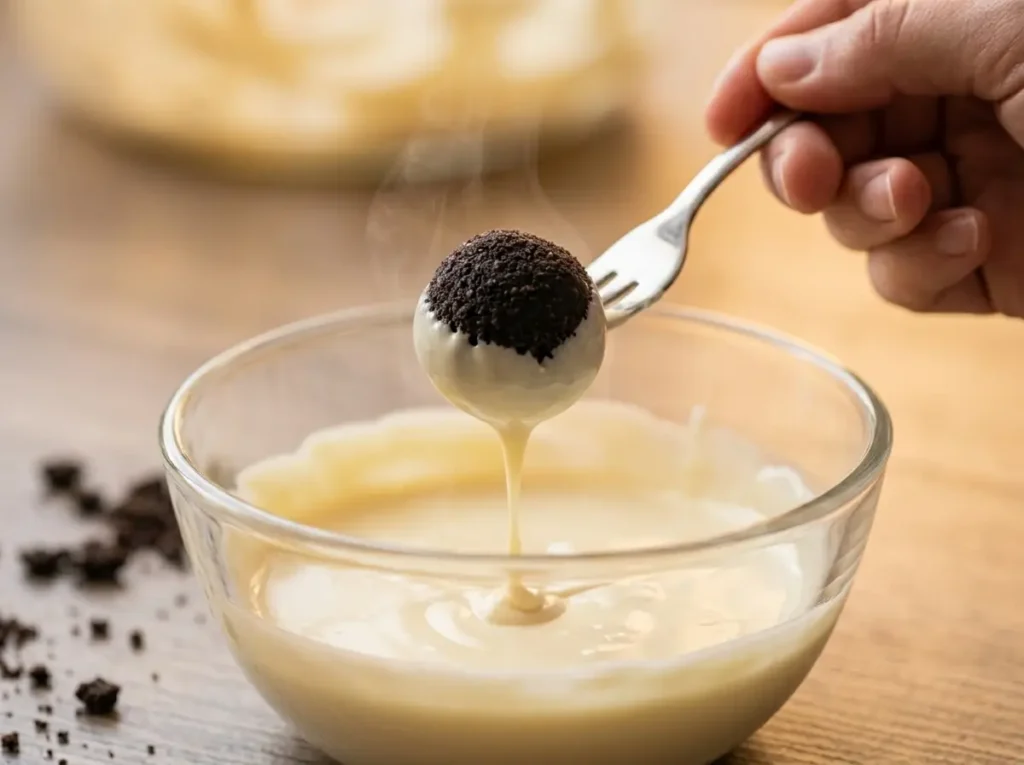
This is where most home bakers fail, but you won’t. To get that smooth, “sphere” look without the messy “foot” at the bottom, follow these professional tips.
Use a Double Boiler for Temperature Control
Chocolate is temperamental. If you overheat it in a microwave, it becomes “seized” or grainy. Using a double boiler allows you to keep the chocolate at a constant, gentle heat. This ensures that the last oreo ball you dip looks just as good as the first one.
The “Two-Tool” Method
Instead of using your hands, use a chocolate dipping fork or a standard dinner fork combined with a toothpick. Drop the cold ball into the chocolate, roll it once, and lift it out. Tap the fork against the side of the bowl to vibrate the excess chocolate off. Use the toothpick to gently slide the ball onto your parchment paper.
Managing the “Condensation” Issue
If you take your oreo balls out of the freezer and let them sit too long before dipping, they will develop moisture on the surface. This moisture will cause your chocolate coating to crack later. Work in small batches—keep half the tray in the fridge while you dip the other half.
Advanced Flavor Variations and Customizations
Once you master the classic, you can expand your SEO-driven “Total Tastes” repertoire with these variations:
- Golden Velvet: Use Golden Oreos and white chocolate coating for a vanilla-heavy, birthday cake flavor profile.
- Mint Refresh: Use Mint Oreos and add a drop of peppermint extract to the melted chocolate.
- Mocha Truffles: Add 1 teaspoon of espresso powder to the cookie crumbs during the processing stage.
- Salted Caramel: Drizzle with sea salt and a caramel reduction immediately after dipping while the chocolate is still “wet.”
Troubleshooting Common Oreo Balls Mistakes
Why is my chocolate coating cracking? This usually happens because the filling was too cold (frozen) and the chocolate was too hot. As the filling expands slightly while warming up, it snaps the rigid chocolate shell. Aim for “refrigerator cold,” not “freezer frozen.”
Why are my balls leaking oil? This is a sign that you used “Double Stuf” cookies or didn’t pulse the crumbs fine enough. The excess fat in the cream filling needs to be fully emulsified into the cookie wafer crumbs.
How do I get rid of the chocolate “pool” at the bottom? After dipping, make sure you spend those extra 5 seconds tapping the fork. If you still get a pool, you can “trim” the excess chocolate with a warm paring knife once the truffles have fully set in the fridge.
Storage and Shelf Life
Because of the dairy content in the cream cheese, oreo balls must be stored in the refrigerator. They will stay fresh in an airtight container for up to 2 weeks. If you want to make them ahead of time, they freeze beautifully for up to 3 months. Just ensure you thaw them in the fridge rather than on the counter to prevent “sweating” on the chocolate surface.
Conclusion: Why You Should Make Oreo Balls Today
In the world of easy desserts, nothing beats the ROI of oreo balls. With minimal ingredients and zero oven time, you produce a treat that rivals high-end chocolatiers. By focusing on the temperature of your ingredients and the quality of your coating, you elevate a simple 4-ingredient hack into a professional-grade confection.

How to Make Oreo Balls (Truffles)
Ingredients
Method
- Crush Cookies: Place the whole Oreo cookies (filling and all) into a food processor. Pulse until you achieve a fine, sand-like crumb texture with no large chunks.
- Combine: In a large bowl, mix the Oreo crumbs with the softened cream cheese using a hand mixer or stand mixer until a uniform dark dough forms.
- Roll: Scoop approximately 1 tablespoon of the mixture (about 18-22g) and roll it between your palms to form a smooth ball. Place on a baking sheet lined with parchment paper.
- Chill: Refrigerate the balls for at least 60 minutes (or freeze for 30 minutes). This step is critical to ensure they don't fall apart during dipping.
- Melt Chocolate: Melt the chopped baking chocolate and coconut oil in a double boiler or the microwave (in 20-second bursts), stirring until glossy and smooth. Let it cool for 5 minutes.
- Dip: Using a fork, dip each chilled ball into the chocolate, tap off the excess, and slide back onto the parchment paper using a toothpick.
- Set: Add any sprinkles or extra drizzles while the chocolate is still wet. Refrigerate until the chocolate shell is fully set and firm.