How to Make a Sourdough Starter: Easy 7-Day Step-by-Step
Making a sourdough starter from scratch is like bringing a “living ingredient” into your kitchen. Unlike store-bought yeast, a sourdough starter relies on wild yeast and beneficial bacteria, giving your bread that signature tangy flavor and airy texture.
In this guide, we’ll show you the simplest, most effective way to build a healthy, bubbly starter in just 7 days.
What is a Sourdough Starter?
A sourdough starter is a fermented mixture of flour and water. It acts as a natural leavening agent. Through a process called fermentation, the wild yeast in the air and flour multiplies, creating the carbon dioxide needed to make your bread rise.
Why Choose Sourdough?
- Better Digestion: The fermentation breaks down phytic acid and gluten.
- Superior Flavor: You get a depth of taste that commercial yeast can’t match.
- Lifelong Ingredient: With proper care, a starter can last for decades.
Essential Ingredients & Tools
You don’t need fancy equipment to start your sourdough journey.
- Flour: Unbleached all-purpose, whole wheat, or rye flour.
- Water: Filtered water is best (chlorine can slow down the yeast).
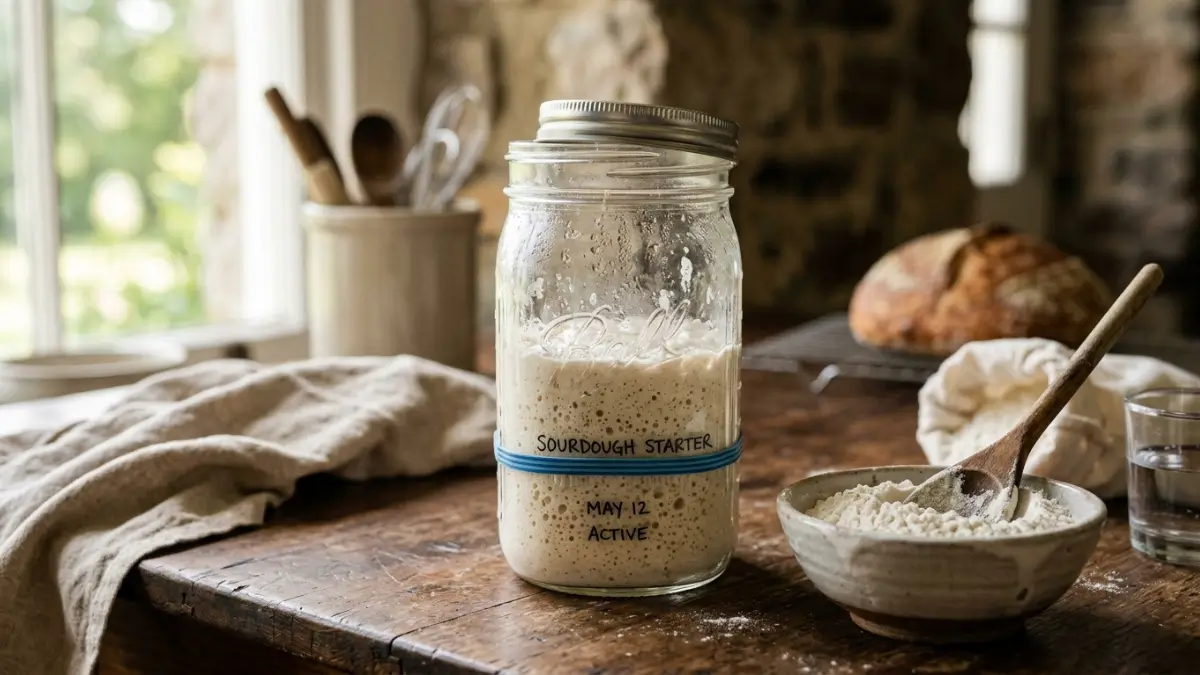
- Container: A clean glass jar (Mason jar) is ideal.
- Stirrer: A wooden spoon or silicone spatula.
- Breathable Cover: A paper towel, tea towel, or a loose lid.
Step-by-Step: 7-Day Sourdough Starter Recipe
The secret to a successful sourdough starter is consistency. Follow this daily schedule:
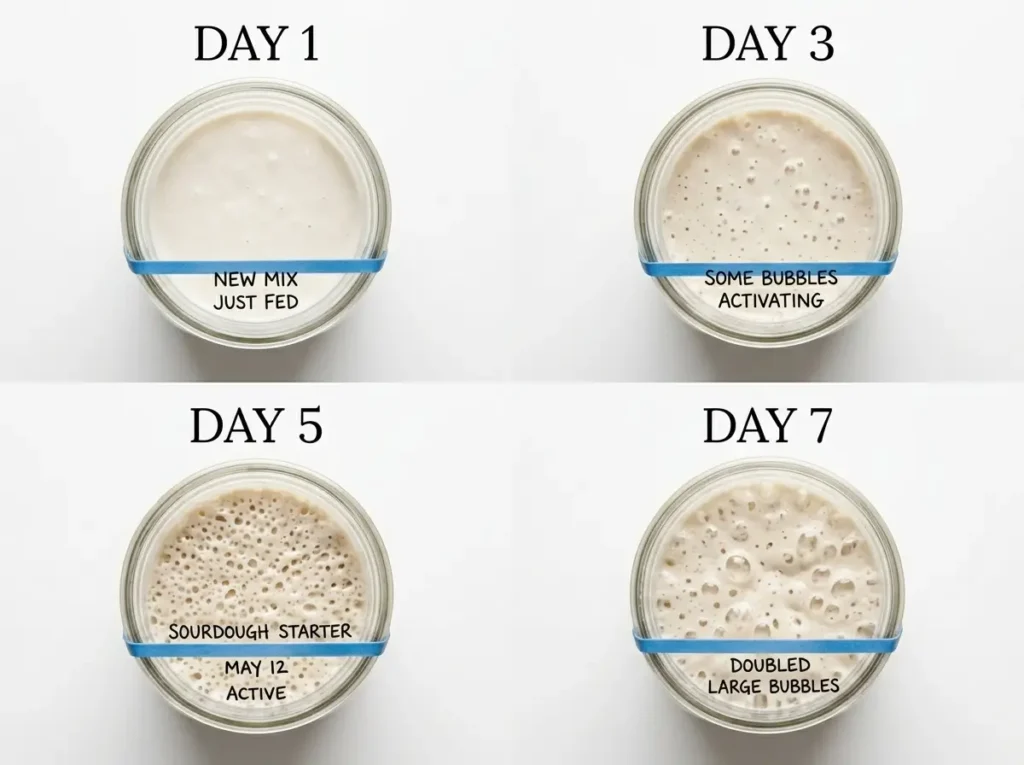
Day 1: The Beginning
Mix 1/2 cup (60g) flour and 1/4 cup (60g) water in your jar. Stir until no dry flour remains. Cover loosely and let it sit at room temperature (21°C–24°C) for 24 hours.
Day 2: First Signs of Life
You might see a few bubbles.
- Discard half of the starter.
- Add 1/2 cup flour and 1/4 cup water.
- Mix well, cover, and rest for 24 hours.
Days 3 to 5: Establishing the Colony
Repeat the feeding process (Discard half + Feed). You should start smelling a sour, fruity aroma. The mixture will begin to look more porous and bubbly.
Days 6 to 7: Peak Activity
Increase feedings to every 12 hours. By Day 7, your starter should double in size within 4–6 hours of feeding.
How to Tell When Your Starter is Ready
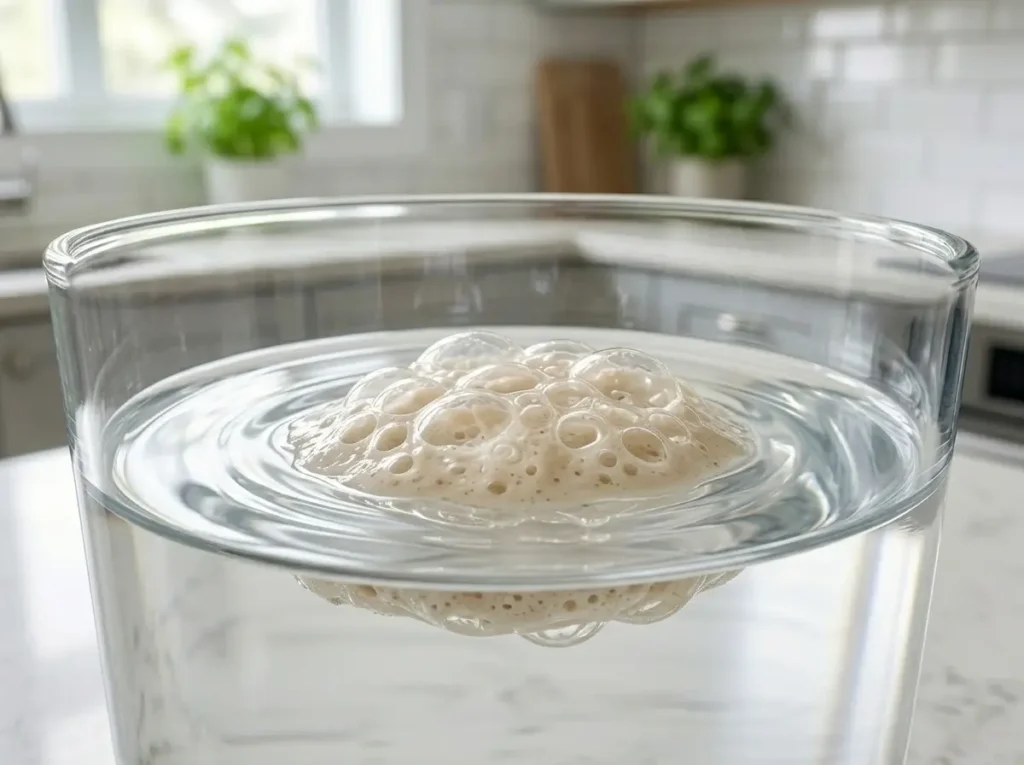
Before you bake your first loaf, perform these two checks:
- The Visual Test: Does it double in size and look “spongy” with lots of bubbles?
- The Float Test: Drop a small teaspoon of active starter into a glass of water. If it floats, it’s ready! If it sinks, it needs more time or another feeding.
Common Sourdough Starter Troubleshooting
- Liquid on top (Hooch): If you see a dark liquid, your starter is hungry! Drain it off and feed your starter more frequently.
- No Bubbles: Ensure your water isn’t too hot (which kills yeast) or too cold (which slows it down).
- Mold: If you see fuzzy orange or pink spots, discard it and start over. (This is rare if you use clean jars!)
Pro Maintenance Tips
- Daily Baking: Keep it on the counter and feed daily.
- Weekly Baking: Keep it in the fridge. Feed it once a week to keep it dormant but healthy.
- The “Discard” Rule: Don’t throw away your discard! Use it for pancakes, waffles, or crackers.
How to Make a Sourdough Starter (Step-by-Step Guide)
Ingredients
Equipment
Method
- Day 1 Mix 60g flour and 60g water in the jar. Cover and rest for 24h.
- Day 2 Discard half the mix. Add 60g flour + 60g water. Stir well.
- Day 3-5 Repeat the Day 2 process (Discard + Feed) every 24 hours.
- Day 6-7 Feed every 12 hours until it doubles in size and gets bubbly.
- Final Test Perform the Float Test in water to check readiness.
Notes
- The “Hooch” (Dark Liquid): If you see a dark, watery liquid on top, don’t worry! This is called “hooch.” It just means your starter is hungry. Pour it off or stir it in, and feed your starter immediately.
- Water Quality: Always use filtered or bottled water. Chlorine in tap water can kill the natural yeast you’re trying to grow.
- Temperature Matters: A warm spot (21°C–24°C) is perfect. If your kitchen is cold, the process might take 10–14 days instead of 7.
- Don’t Toss the Discard: You can use the “discard” (the part you remove before feeding) to make delicious pancakes, waffles, or crackers once it starts smelling sour but isn’t yet strong enough for bread.
- Metal vs. Glass: While stainless steel is usually fine, glass jars are best because you can see the bubbles and track the growth easily.
Gluten Free Banana Bread – Moist, Easy & One Bowl
Stop Buying Pretzel Sticks — Make Them Better At Home